Install the canopy hatch – Great Planes Edge 540 1.60-43cc Performance Series ARF - GPMA1414 User Manual
Page 41
41
the cowl with the covering on the fuse and gently tighten the
nut. Measure 5" [127mm] along the lines on the tape and
mark the locations of the center of each mounting block onto
the cowl. Also, use the templates to mark the locations of
the exhaust outlets, needle valve and glow plug access, etc.
onto the cowl.
o
8. Drill 3/32" [2.4mm] holes through the cowl and into the
cowl mounting blocks at the marks you made. Remove the
cowl from the fuse and the alignment jig from the front of the
cowl and enlarge the holes in the cowl using a 7/64" [2.8mm]
bit. This will prevent the cowl from splitting when the cowl
mounting screws are installed. Thread a #4 x 5/8" [16mm]
screw into each mounting block and remove it. Apply a couple
drops of thin CA to each hole to harden the wood. Make the
necessary cutouts in the cowl (cooling hole and exhaust exit,
glow plug access, needle valve access, etc.) using a rotary
tool. Bolt the muffler to the engine and install the cowl onto
the fuse using six #4 x 5/8" [16mm] self-tapping screws and
six #4 flat washers (use the four #4 x 5/8" [16mm] screws
and washers from the cowl alignment jig).
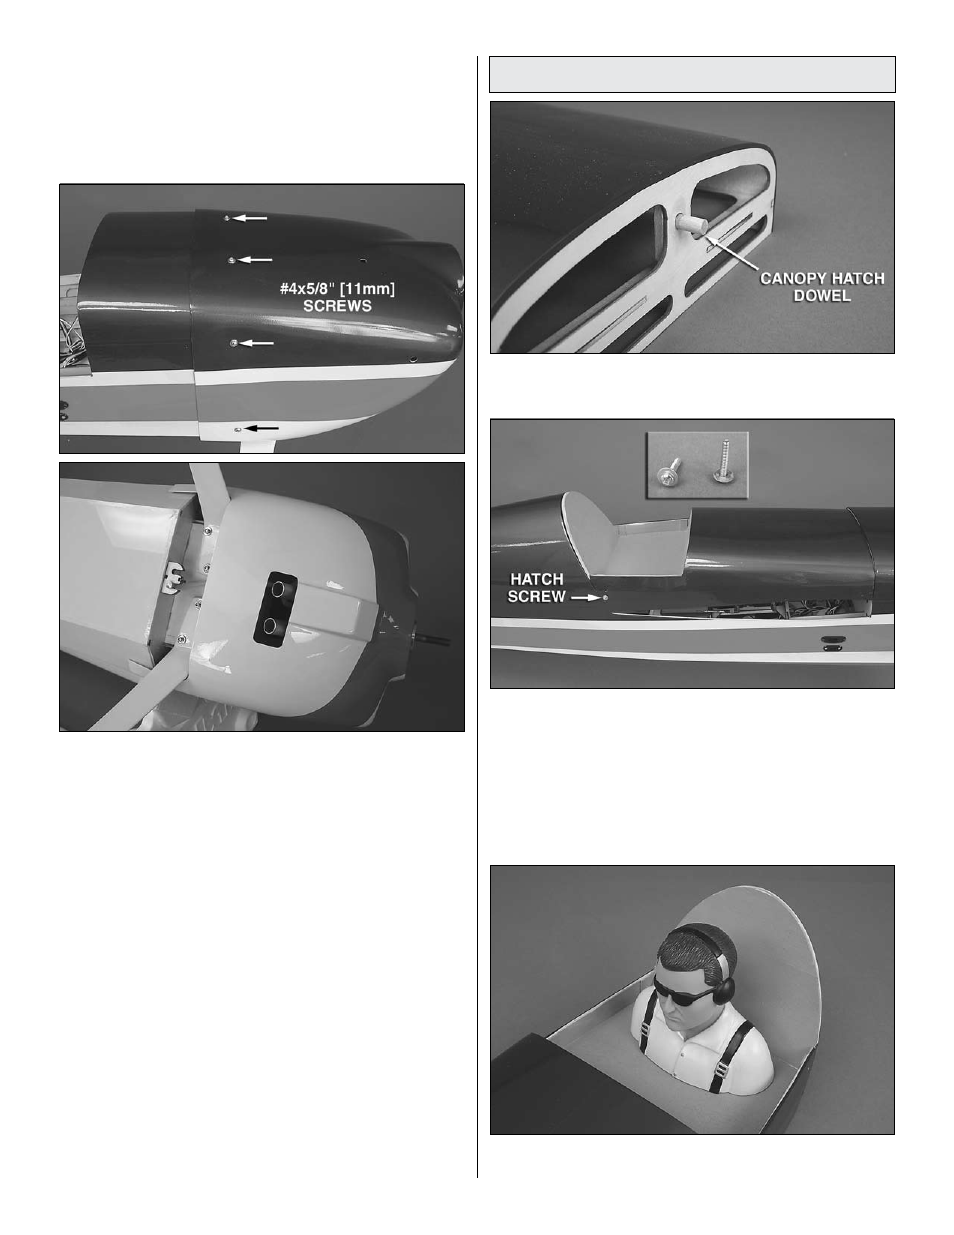
Install the Canopy hatch
o
1. Glue the
canopy hatch dowel into the front of the canopy
hatch so half of it protrudes beyond the front of the hatch.
o
2. Glue a #4 flat washer to each of the two 4-40 x 3/4"
[19mm] machine screws used to mount the canopy hatch to
the fuselage. Gluing the washers in place will help prevent
them from becoming lost at the flying field. Put the canopy
hatch in place and use the screws to test fit it to the fuse.
When the wing is also installed, it will hold the front of the
canopy hatch flush with the top fuse sheeting. This can be
checked now or at the end of the build.
o
3. If you plan to install a pilot and the instrument panel
decal, do so before gluing the canopy in place. The picture