Great Planes Edge 540 1.60-43cc Performance Series ARF - GPMA1414 User Manual
Page 13
13
o
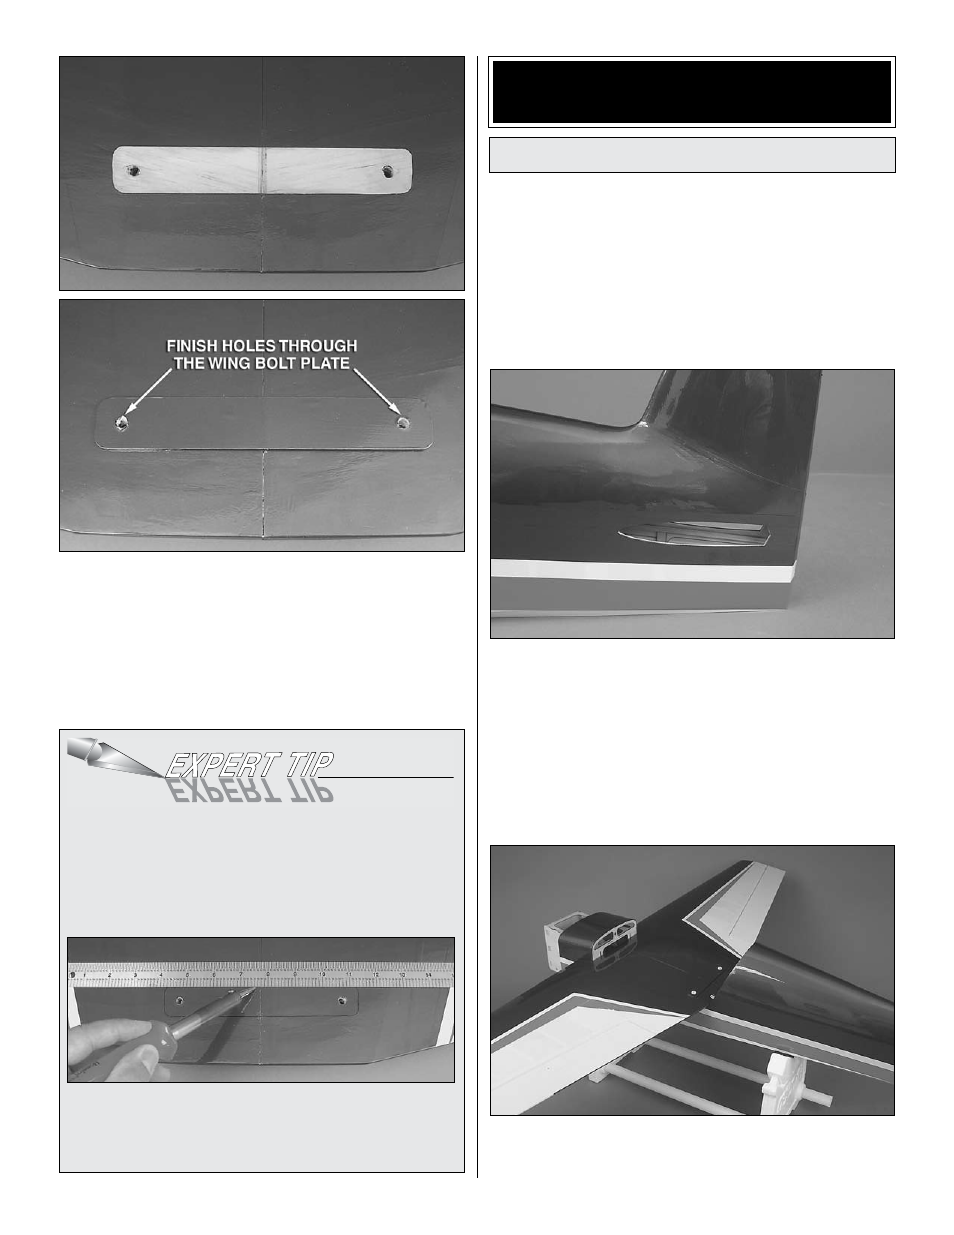
6. Use a sharp #11 hobby knife or use the following Expert
Tip to cut the covering 1/16" [1.6mm] inside of the lines you
marked. Use care to cut only in the covering and not into
the wood. Use alcohol to wipe away the lines. Glue the wing
bolt plate in position. Continue the wing bolt holes through
the plate using a 1/4" [6mm] drill bit. Clamp a piece of scrap
wood against the wing bolt plate to reduce tear out when
drilling the holes.
hOw TO CUT COVERINg FROM BALSA
Use a soldering iron to cut the covering from the area
beneath the wing bolt plate. The tip of the soldering iron
doesn’t have to be sharp, but a fine tip does work best.
Allow the iron to heat fully.
Use a straightedge to guide the soldering iron at a rate
that will just melt the covering and not burn into the wood.
The hotter the soldering iron, the faster it must travel to
melt a fine cut. Peel off the covering.
ASSEMBLE ThE TAIL SECTION
AND LANDINg gEAR
Install Stabilizer, Elevators, and Rudder
o
1. Just as you did with the ailerons, prepare the hinge
point holes in the
stabilizer and elevators by test fitting the
hinges and enlarging the holes as necessary. Do not glue
the hinges until instructed to do so.
o
2. Locate the stabilizer slots near the aft end of the
fuselage and trim away the covering.
o
3. Temporarily install the wing onto the fuselage using two
1/4-20 nylon wing bolts. The wing dowels will fit into receiving
holes in the former behind the leading edge of the wing.