Brushless motor installation mount the motor – Great Planes Edge 540 1.60-43cc Performance Series ARF - GPMA1414 User Manual
Page 29
29
BRUShLESS MOTOR INSTALLATION
Mount the Motor
The installation of a brand of out-runner brushless motor
other than the Great Planes RimFire 63-62-250kV should
be similar to the procedure listed below for the Great Planes
model. Be sure to maintain the correct prop adapter distance
from the firewall regardless of which motor you choose to
install. A mounting template is provided on page 53 of this
manual for installing the Great Planes Extra Large Brushless
Motor mount.
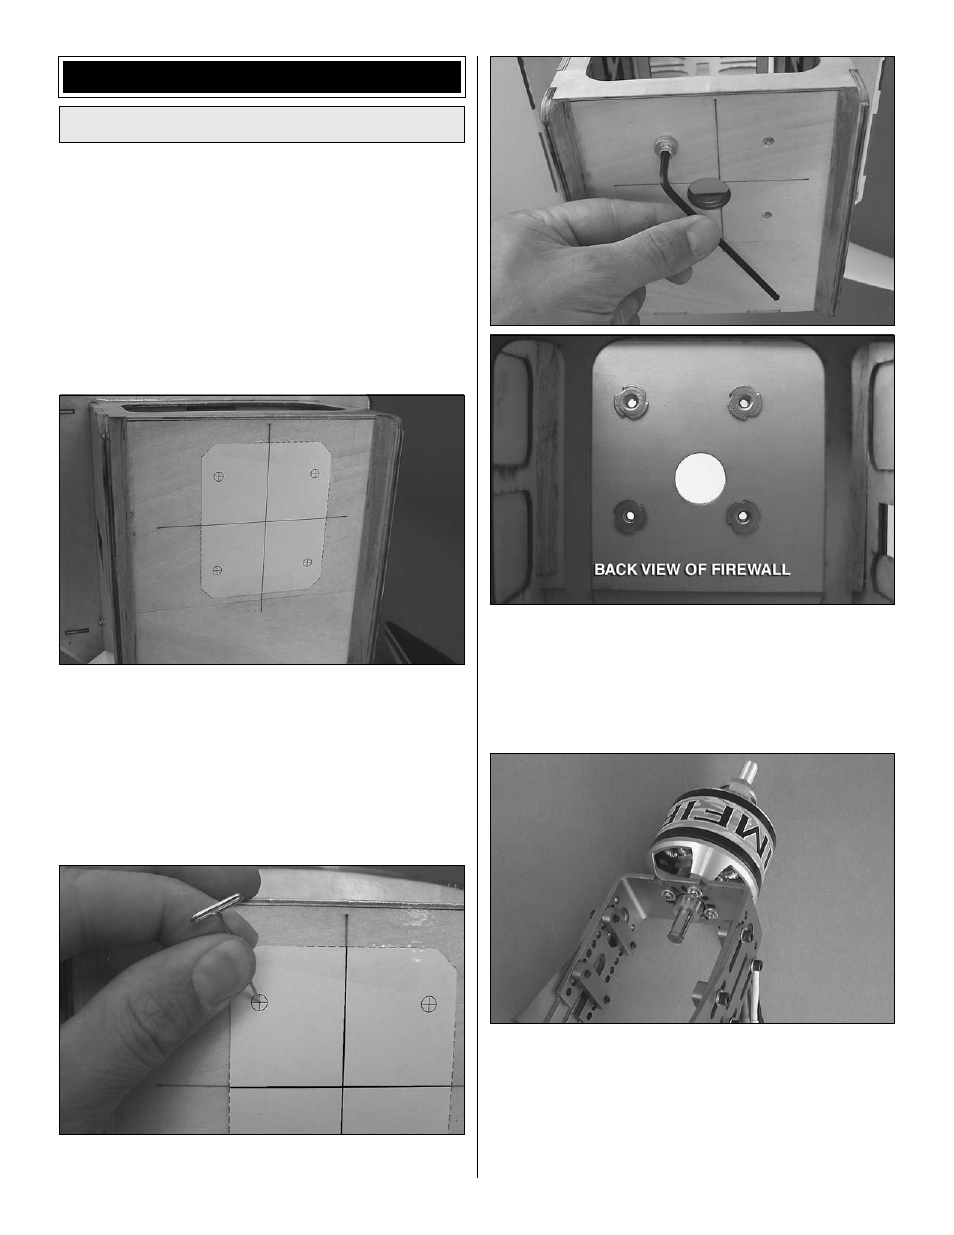
o
1. Cut the template out on page 53 for mounting the
Great Planes Extra Large Brushless Mount. Use tape or
spray adhesive to hold the template to the firewall. Align the
vertical and horizontal lines on the template with the lines on
the firewall.
o
2. Use a large T-pin or a wire sharpened on the end to
transfer each bolt hole mark on the template into the firewall.
o
3. Use a 7/32" [5.6mm] bit to drill holes at the four marks
you made on the firewall. To reduce tear-out, make pilot holes
with a smaller bit first, then finish the holes with the 7/32"
[5.6mm] bit. Insert a 8-32 blind nut into the back of each hole.
Use a 8-32 x 1" [25mm] SHCS and a few #8 flat washers to
draw the blind nuts tight against the back of the firewall.
o
4. Attach the motor to the brushless motor mount using
the included four 3 x 8mm machine screws, four 3mm flat
washers, and
threadlocking compound. You may need to
remove the brass collar to fit the motor to the mount. Be
sure to replace the collar after the motor is installed. If you
haven’t done so already, install the prop adapter to the front
of the motor using the hardware included with the motor and
threadlocking compound.