Great Planes Edge 540 1.60-43cc Performance Series ARF - GPMA1414 User Manual
Page 14
14
o
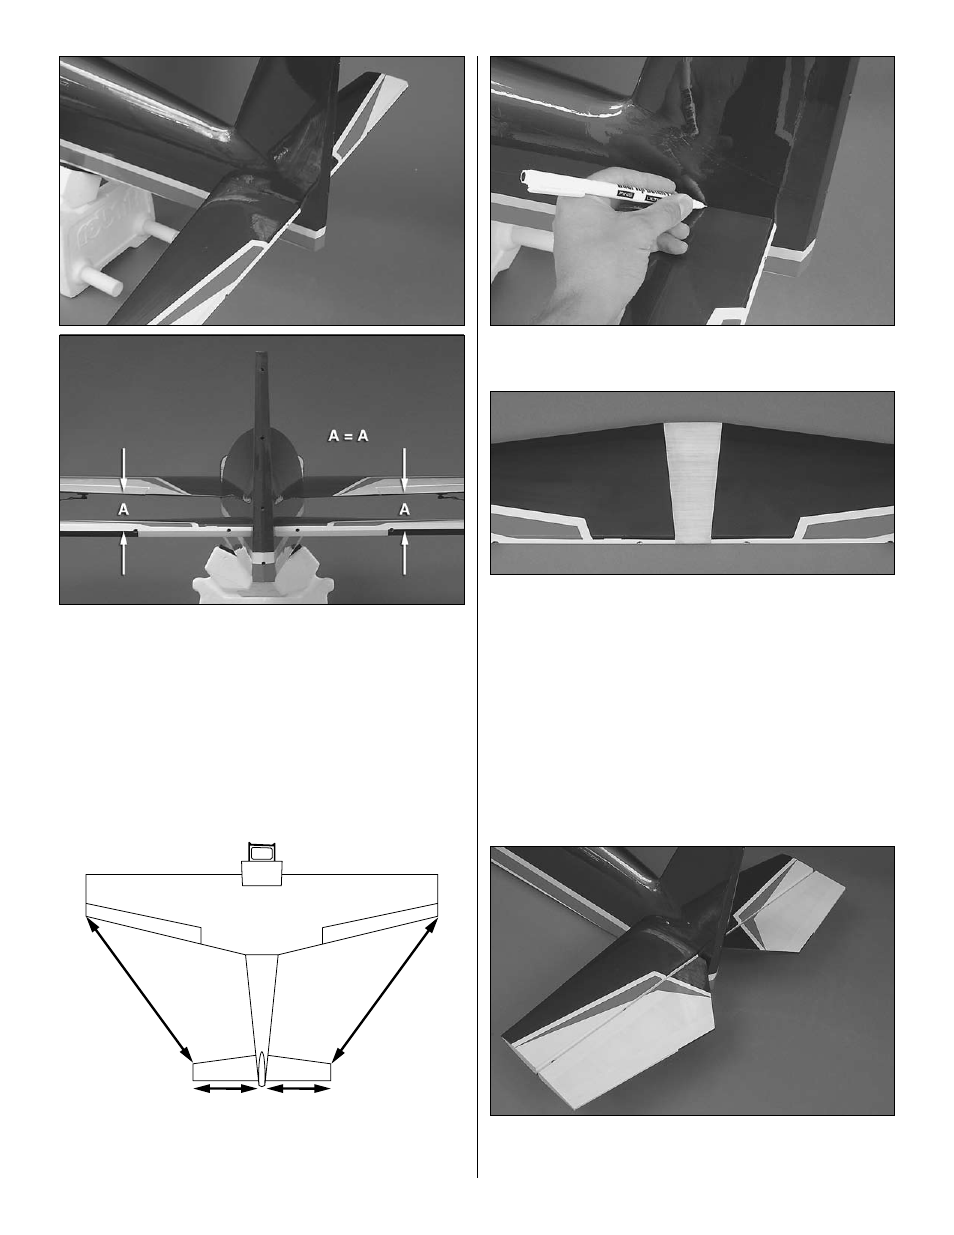
4. Test fit the stabilizer in the fuselage. Center the stab left
and right in the fuselage. Stand back 15-20ft [5-6m] and check
to be sure the stab is parallel to the wing. If necessary, adjust
the stab saddle as needed until the stab and wing are parallel.
A
A
B
B
A = A
B = B
o
5. Measure the distance from the tip of each wing to the
tip of the stab. Adjust the stab until the distance from the tip
of the stab to the tip of the wing is equal on both sides.
o
6. Use a felt tip marker to mark the outline of the fuselage
onto the top and bottom of the stab.
o
7. Remove the stab from the fuse and cut the covering just
inside the lines you drew. If using a hobby knife to remove
the covering, use care to
cut only in the covering and not
into the wood.
o
8. Use 30-minute epoxy to glue the stab into the fuselage.
For the most strength, apply epoxy to both sides of the stab
and inside the fuse where the stab fits. Slide the stab into
position. Confirm that the stab is centered and parallel with
the wing as was done in steps 4 and 5. Wipe away any excess
epoxy with a paper towel and denatured alcohol. Do not
disturb the model until the epoxy has fully hardened. With the
stab secure, you can now remove the wing from the plane.
o
9. As you did with the ailerons, use a toothpick or wood
scrap to apply 30-minute epoxy to the inside of each elevator
and stab hinge point hole. Apply a light coat of epoxy to one