Install the fuel tank (gas) – Great Planes Edge 540 1.60-43cc Performance Series ARF - GPMA1414 User Manual
Page 23
23
o
4. Attach the included ball stud to the throttle arm on
the carburetor with a 2-56 nylon lock nut. Mount the engine
inverted using four 10-32 x 1-1/4" [32mm] SHCS (not included),
four #10 flat washers (not included), four #10 lock washers
(not included), and threadlocking compound. The distance
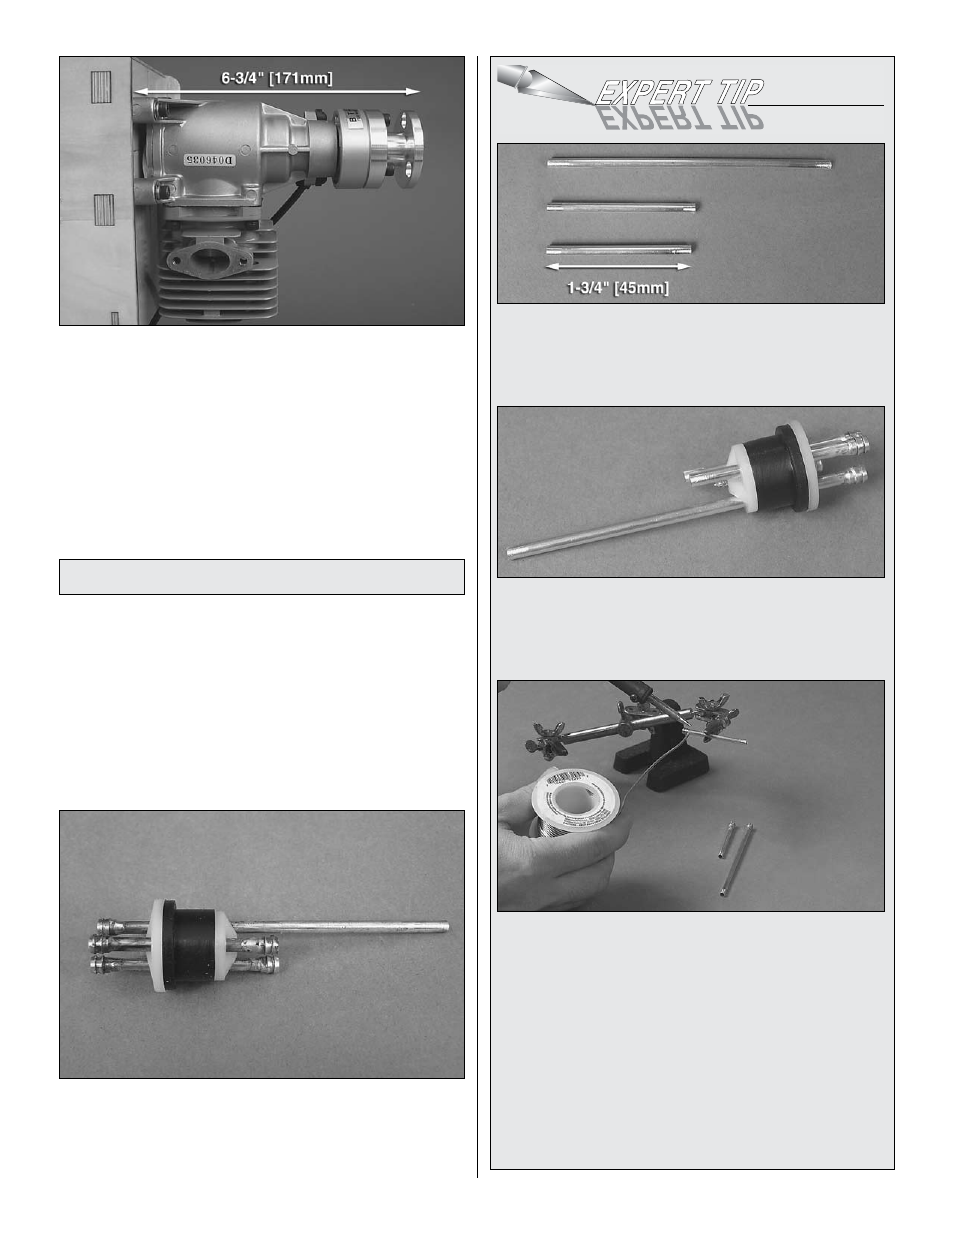
from the firewall to the front of the drive washer is 6-3/4"
[171mm] when installing the Fuji-Imvac BT-43 EI-2 engine.
This distance may vary slightly with other engine models. If
installing another model engine, effort should be made to
maintain a similar drive washer distance to the firewall.
Install the Fuel Tank (gas)
The fuel line and stopper included with the Edge 540 1.60
ARF is
NOT gasoline safe. Gasoline will degrade the rubber
stopper and silicone fuel tubing supplied. You will need to
purchase a gasoline safe stopper and gasoline safe tubing
to use for the fuel system on this model. The
Sullivan #484
gasoline/Diesel fuel tank conversion kit (SULq2684)
works well for this.
o
1. Remove the stopper from the included fuel tank and
replace it with a gas safe stopper as mentioned above.
o
2. Assemble the stopper using Du-Bro #813 1/8" [3.2mm]
I.D. fuel line barbs and 1/8" [3.2mm] brass tubing as shown.
Solder the barbs to the brass tubing but be careful not to
overheat the assembly as it could cause damage to the
rubber stopper.
o
A. Cut one of the two brass tubes included with the
Sullivan conversion kit in half (approximately 1-3/4" [45mm]
pieces). Prepare the tubes for solder by scuffing up the
ends with sandpaper and cleaning them with alcohol.
o
B. Assemble the stopper by inserting the tubes through
the large stopper plate, stopper, and then the small
stopper plate. Join the plates and stopper together using
the screw that came with the conversion kit.
o
C. Solder a Du-Bro fuel line barb onto one end of each
of the three tubes (be sure that the barbs are positioned in
the correct direction on the tubes so that they will secure
the fuel tubing when fitted in place). Slide the barbs in
place and apply a small amount of solder to the joints
between the barbs and the tubes. Solder will wick into the
joints securing them in place. Be careful not to use too
much solder as it could obstruct fuel flow inside the tubes.
Note: The item used in the picture above to hold the tubes
is the X-Acto Extra Hands Double Clip (XACR4214).
o
D. Solder a barb onto the other end of each short
brass tube.