Great Planes Edge 540 1.60-43cc Performance Series ARF - GPMA1414 User Manual
Page 28
28
o
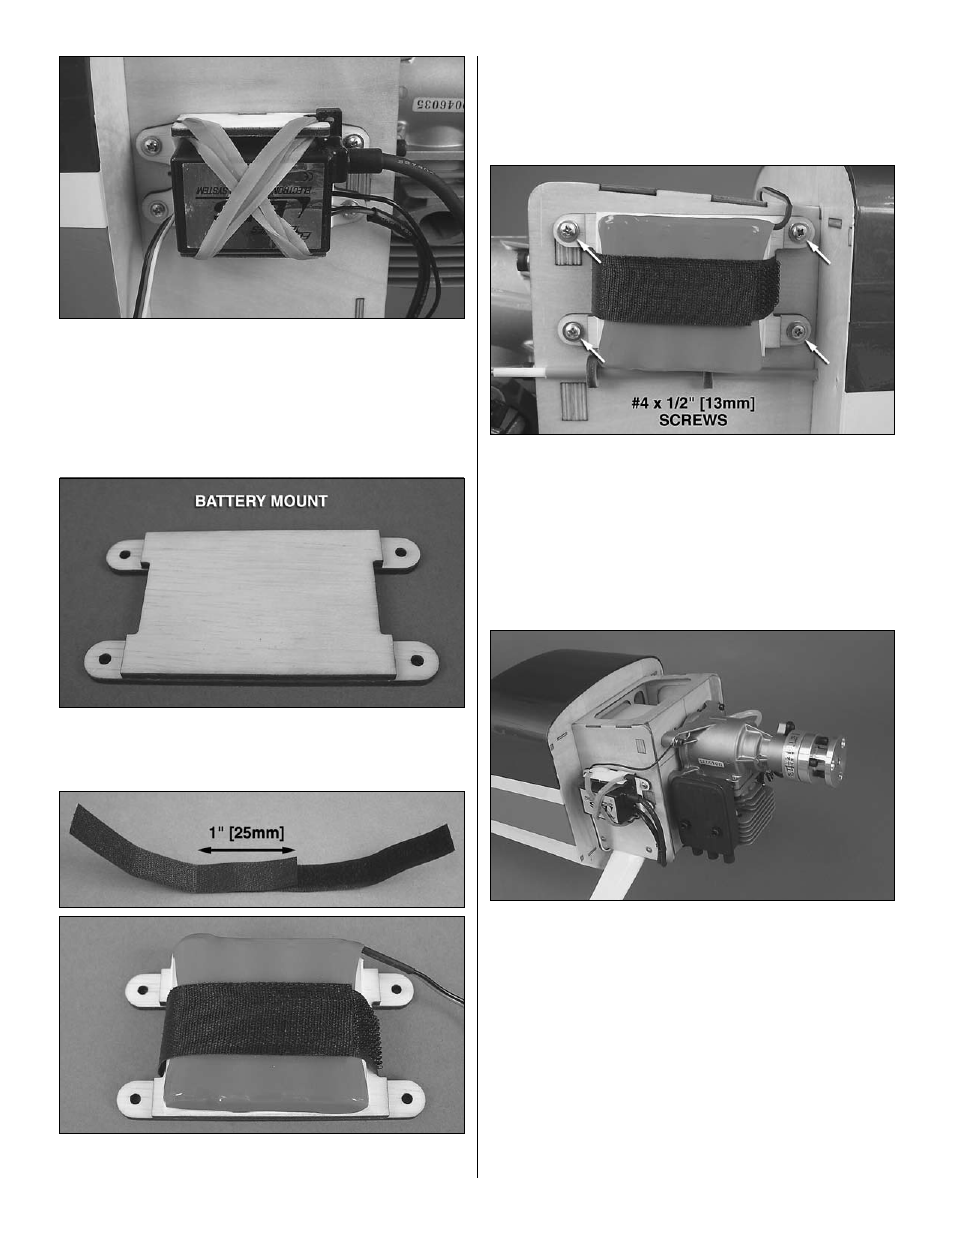
2. Cut a piece of 1/4" [6mm] foam rubber (not included)
to line the bottom of the ignition module mount. Position the
ignition module onto the mount and use rubber bands to
secure it to the mount.
Note: Different models of engines
may require an alternative method of mounting the ignition
equipment depending on the size of the components, length
of wires, and engine manufacturer recommendations.
o
3. Locate the three
ignition battery mount pieces. Glue
the two long pieces flush with the long sides of the large
piece and centered left and right. Fuel proof the assembly.
o
4. Cut a piece of foam rubber to fit your ignition battery
pack. Make a hook and loop strap to fit your ignition pack by
overlapping the mating ends of the included hook and loop
material by approximately 1" [25mm]. The total length of the
strap you make will be determined by the size of your pack.
Place the foam rubber onto the ignition battery mount and use
the hook and loop strap to secure the battery to the mount.
o
5. Place the mount onto the motor mounting box side and
mark the locations for the four mounting holes. Drill 3/32"
[2.4mm] holes at your marks. Thread a #4 x 1/2" [13mm]
screw into each hole and back it out. Apply a couple drops of
thin CA to each hole to harden the wood. Screw the mount
to the firewall using four #4 x 1/2" [13mm] screws and four #4
flat washers. Be sure that the battery pack is properly secured
to the battery mount. The mount can also be installed so the
hook and loop strap is oriented vertically.
o
6. Install the muffler onto the engine if you have not done
so yet. Connect the spark plug wire to the engine, ground
wire to the engine crankcase (see engine manual) and the
ignition module wire lead to the pick up sensor. Mount your
ignition battery switch (or engine kill switch) and charge jack
near the front of the fuselage (test fit the cowl over the engine
to make sure the position of the switch and jack will not
interfere with it). If you plan to install hardware (not included)
for operating the engine choke, do so now. Access to the
choke will need to be made when installing the cowl.