Great Planes CAP 232 40 Kit - GPMA0232 User Manual
Page 9
A. 1/4" x 1/2" LE pin in place
B. 1/4" x 1/2" Root rib pin and glue
C. 1/4" x 1/2" elevator tip rib fit and glue
D. 1/4" x 1/2" TE fit and glue
E. 1/4" x 1/4" ribs fit and glue
F. 1/8" x 1/4" diagonal ribs fit and glue
G.1/4" x 1/2" diagonal rib fit and glue
H. Remove the elevator from the plan and inspect all the
glue joints. Add CA where necessary.
I. Sand flat and smooth with bar sander and 220-grit
sandpaper. Note: Do not glue the laminated balance
tab in position until
after you bevel the leading edge
of the elevator as instructed on page 11. This will
make it easier to sand the bevel.
J. Build the other elevator the same as the first.
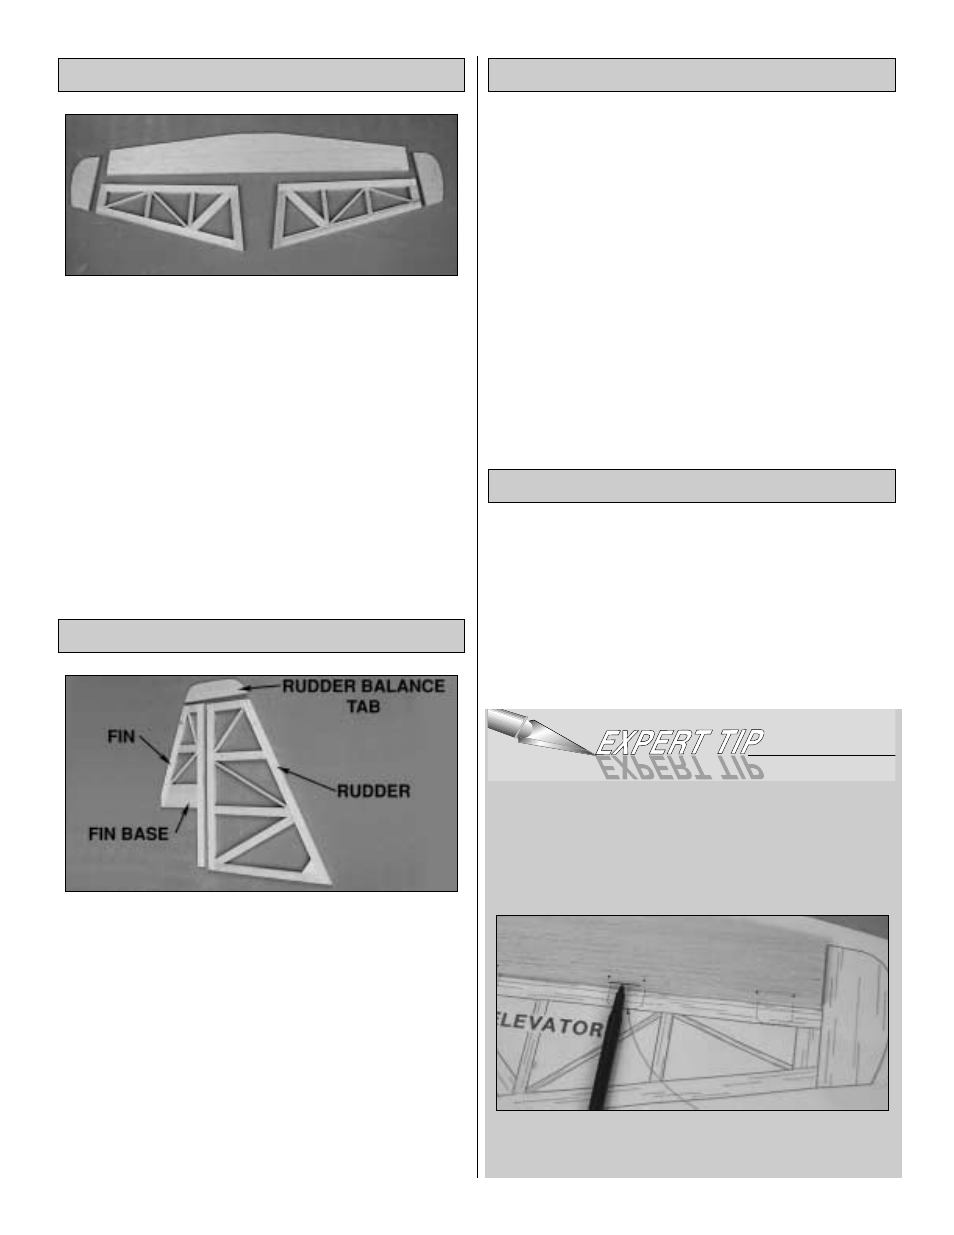
A. Laminate the two die-cut 1/8" balsa Fin Bases
together and pin them in place.
B. 1/4" x 1/2" TE
C. 1/4" x 1/2" Fin tip
D. 1/4" x 1/2" LE (cut taper so it fits against F-9 as
shown on the plan)
E. 1/4" x 1/2" center rib
F. 1/4" x 1/8" diagonal ribs
G. Remove the fin from your building board and inspect all
the glue joints. Add CA where necessary. Use your bar
sander to sand the top of the leading and trailing edges
even with the tip of the fin. Sand the bottom of the leading
edge even with the base. Sand the entire fin flat and
smooth with your bar sander and 220-grit sandpaper.
A. 1/4" x 1/2" LE
B. 1/4" x 1/2" Rudder bottom
C. 1/4" x 1/2" TE
D. Two 1/4" x 1/2" ribs
E. One 1/4" x 1/2" diagonal rib
F. Two 1/8" x 1/4" diagonal ribs
G.
Remove the rudder from your building board and
sand the top, the LE and TE so they are flush.
Note: Do not glue the laminated balance tab in
position until
after you bevel the leading edge of the
rudder as instructed on page 11. This will make it
easier to sand the bevel.
H. Inspect all the glue joints. Add CA where necessary.
❏
1. Place the stab over its location on the plan and
lightly
mark the hinge locations on the trailing edge with a ball
point pen. Mark the hinge locations on the elevators in the
same manner.
HOW TO MARK THE HINGE SLOTS
It's important that the hinge slots are centered and parallel to
the part you are hinging. The best way to start is by accurately
marking the hinge slots. We'll start with the stabilizer.
A. Lay the stabilizer and a ballpoint pen on a flat surface.
Mark a “test line” on the trailing edge of the stab, away from
the hinge locations you marked earlier.
Hinge the Tail Surfaces
Rudder Building Sequence
Fin Building Sequence
Elevator Building Sequence
9