Join the wing panels – Great Planes CAP 232 40 Kit - GPMA0232 User Manual
Page 15
Note: The designer wishes to assure you that the specified
dihedral is correct. Although somewhat out of scale, this
dihedral angle is required to eliminate roll coupling, thus
providng you with a more neutral airplane. A side benefit of
the dihedral is better low speed stability.
❏
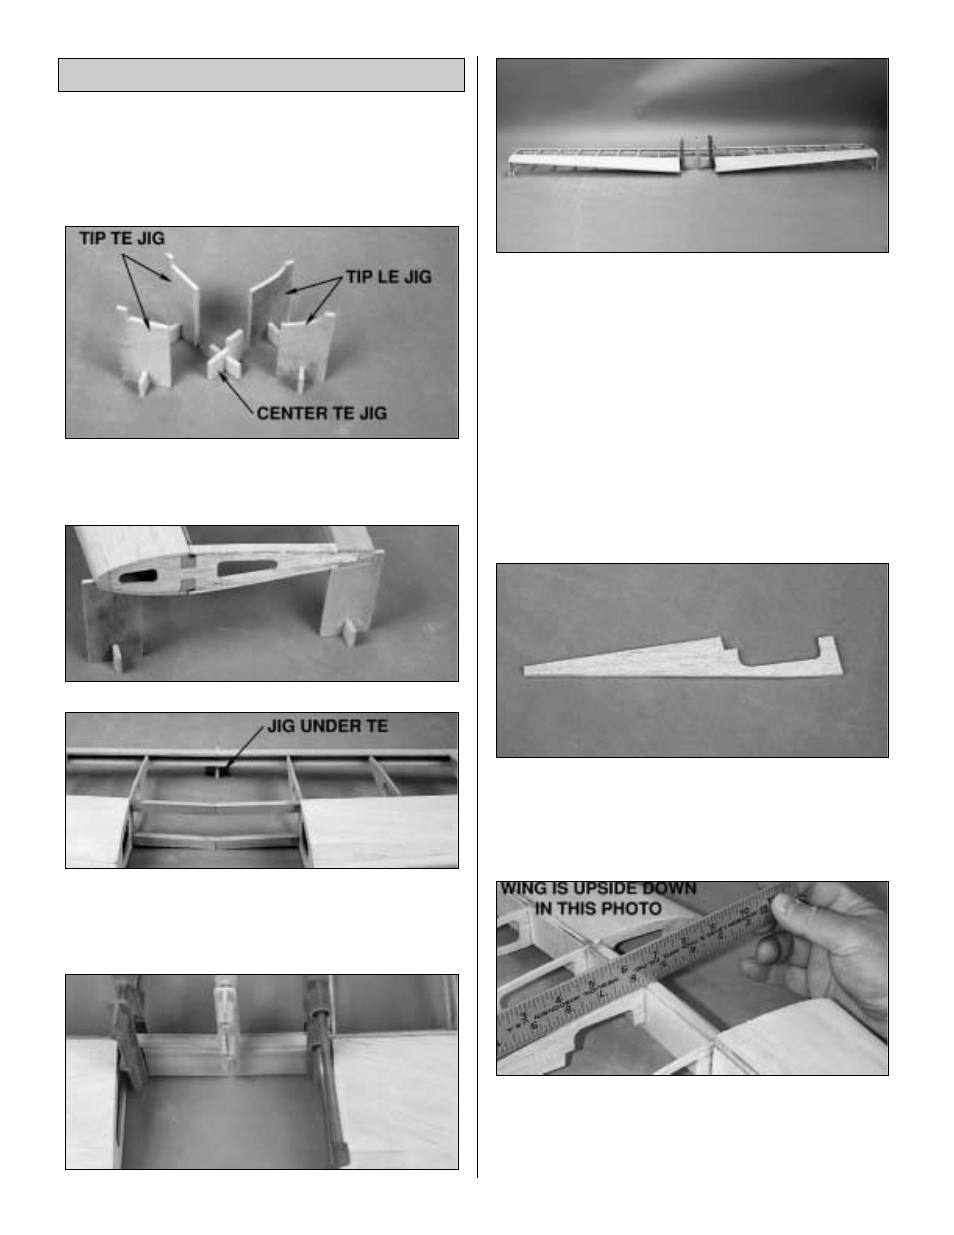
1. From the 1/8" die-cut ply pieces make the five wing
jigs as shown in the photo above.
❏
2. Without using any glue, test join the wing panels on
the jigs as shown. Make sure the ends of the spars and
TE’s join without any gaps.
❏
3. Place wax paper under the center of the wing to catch
excess epoxy. When satisfied with the fit, glue the dihedral
braces to the spars with 30-minute epoxy by spreading a
film of epoxy on
both the spars and the dihedral braces,
followed by C-clamps to hold them in place. Once the
C-clamps are tightened, wipe away excess epoxy before it
cures. Place weights on top of your wing to hold it in place
on the jigs.
❏
4. Glue the TE’s together with thin CA. Do not disturb the
wing until the epoxy cures.
❏
5. Trim the tabs off of both R-1 wing ribs. Laminate the
two R-1's together with medium CA.
❏
6. Glue the laminated R-1 in place aligning the bottom of
the rib with the bottom of the spars.
Join the Wing Panels
15