Great Planes CAP 232 40 Kit - GPMA0232 User Manual
Page 13
❏ ❏
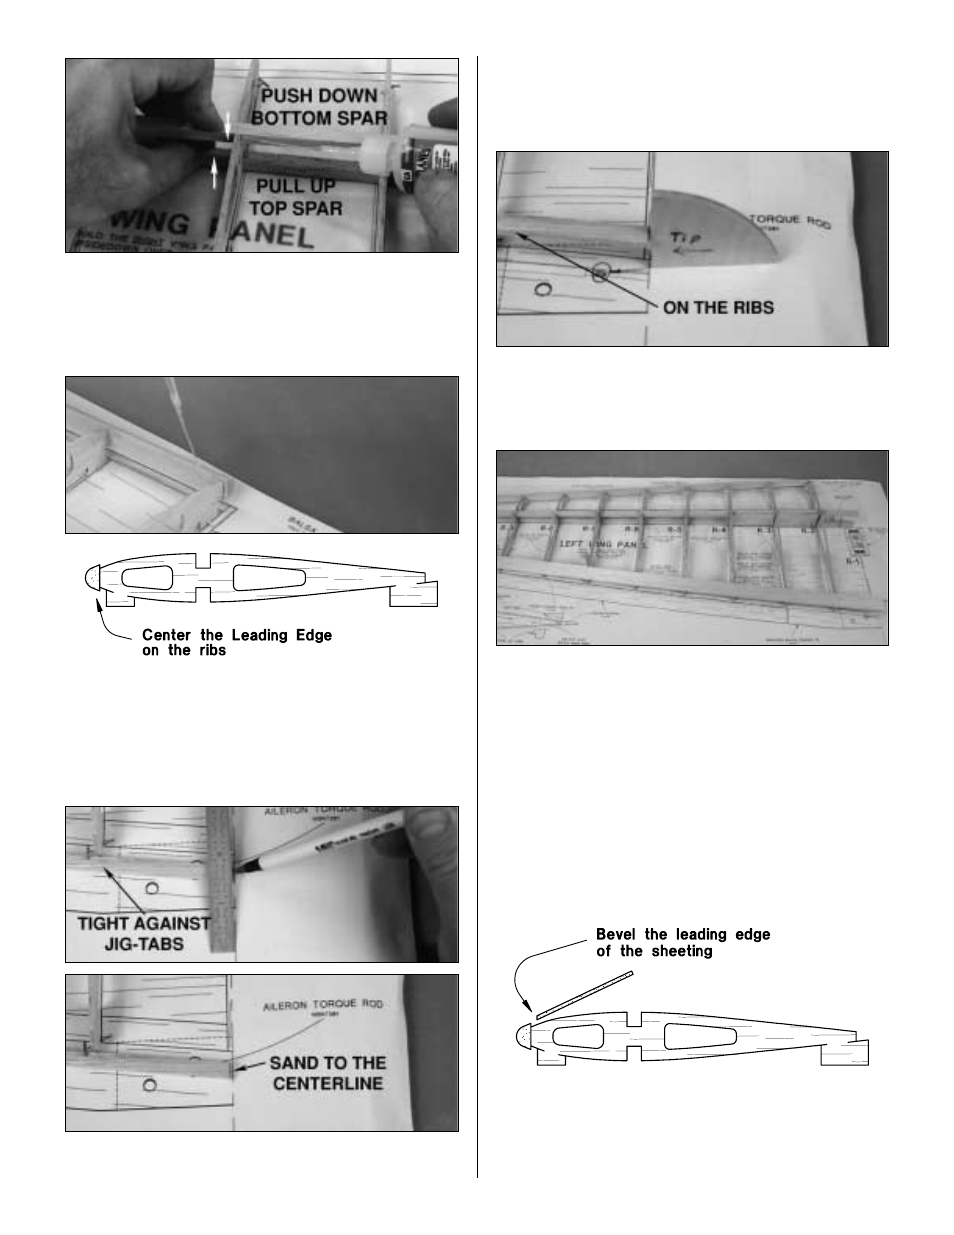
5. Glue the main spars to the ribs with thin CA. As
you glue each rib to the spars, simultaneously
pull the top
spar up into the rib and
push the bottom spar down into the
rib to make sure the spars are fully seated in the notches.
Make sure all the jig tabs are contacting the work surface.
❏ ❏
6. Lightly run a sanding bar across the front of the ribs
to check alignment. Position the shaped leading edge (LE)
on the front of the ribs. The LE should be centered on all the
ribs and the root end should extend past rib R-2 by about
1/16". Make sure all the jig tabs are contacting the work
surface. Use thin CA to glue the LE to the front of the ribs.
❏ ❏
7. Place the 30" balsa shaped trailing edge (TE)
against the rear of the rib tabs and flat on the work bench.
Mark the root end so that it lines up with the centerline of
the wing. Take the TE off your work bench and sand the TE
to the mark you made.
❏ ❏
8. Using the dihedral gauge to correctly position the
TE, use thin CA to glue the trailing edge (TE) to the ends of
the ribs.
❏ ❏
9. Starting at ribs R-8 & R-7, test fit the die-cut 3/32"
cross grain balsa shear webs to the front of the spars.
Note that the shear webs increase in height as they get
closer to the root. Glue them in place with medium CA.
There are two additional shear webs for the rib bays
between ribs 2 & 3 and 3 & 4. Glue these to the back of the
spars between these ribs with medium CA.
❏ ❏
10. Use medium CA to glue the 3/32" x 7/8" x 30"
trailing edge sheeting to the TE and ribs so the end
extends past the wing centerline by approximately 1/8".
❏ ❏
11. Without gluing, fit one of the leading edge sheets
to the bottom of the wing panel by sanding a bevel on the
front edge of the sheet so it matches the leading edge of
the wing.
13