Preflight – Great Planes CAP 232 40 Kit - GPMA0232 User Manual
Page 41
41
or a felt tip pen to make the marks. The balance point (CG)
is located 3-3/4" back from the leading edge as shown in
the sketch and on the fuselage plan.
Hint: Reference the full size fuse plan to help you locate
the proper balance point. This is the balance point at which
your model should balance for your first flights. After initial
trim flights and when you become more acquainted with
your CAP 232, you may wish to experiment by shifting the
balance up to 1/4" forward or back to change the flying
characteristics. Moving the balance forward may improve
the smoothness and stability, but the model may then
require more speed for takeoff and it may be more difficult
to slow for landing. Moving the balance aft makes the
model more agile with a lighter, snappier "feel" and often
improves knife-edge capabilities. In any case, please start
at the location we recommend and do not at any time
balance your model outside the recommended range.
Hint: The Great Planes CG Machine
™
makes this process
much easier and more accurate.
❏
2. With the wing attached to the fuselage, all parts of the
model installed (ready to fly) and an empty fuel tank, hold
the model upside-down with the stabilizer level.
❏
3. Lift the model at the balance point. If the tail drops
when you lift, the model is "tail heavy" and you must add
weight* to the nose to balance the model. If the nose
drops, it is "nose heavy" and you must add weight* to the
tail to balance the model.
NOTE: Nose weight may be easily installed by using a
"spinner weight" or gluing lead weights to the firewall. Tail
weight may be added by using Great Planes (GPMQ4485)
"stick-on" lead weights. Later, if the balance is OKAY, you
can open the fuse bottom and glue the weights
in permanently.
*
If possible, first attempt to balance the model by changing
the position of the receiver battery and receiver. If you are
unable to obtain good balance by doing so, then it will be
necessary to add weight to the nose or tail to achieve the
proper balance point.
Follow the battery charging procedures in your radio instruction
manual. You should always charge your transmitter and
receiver batteries the night before you go flying, and at other
times as recommended by the radio manufacturer.
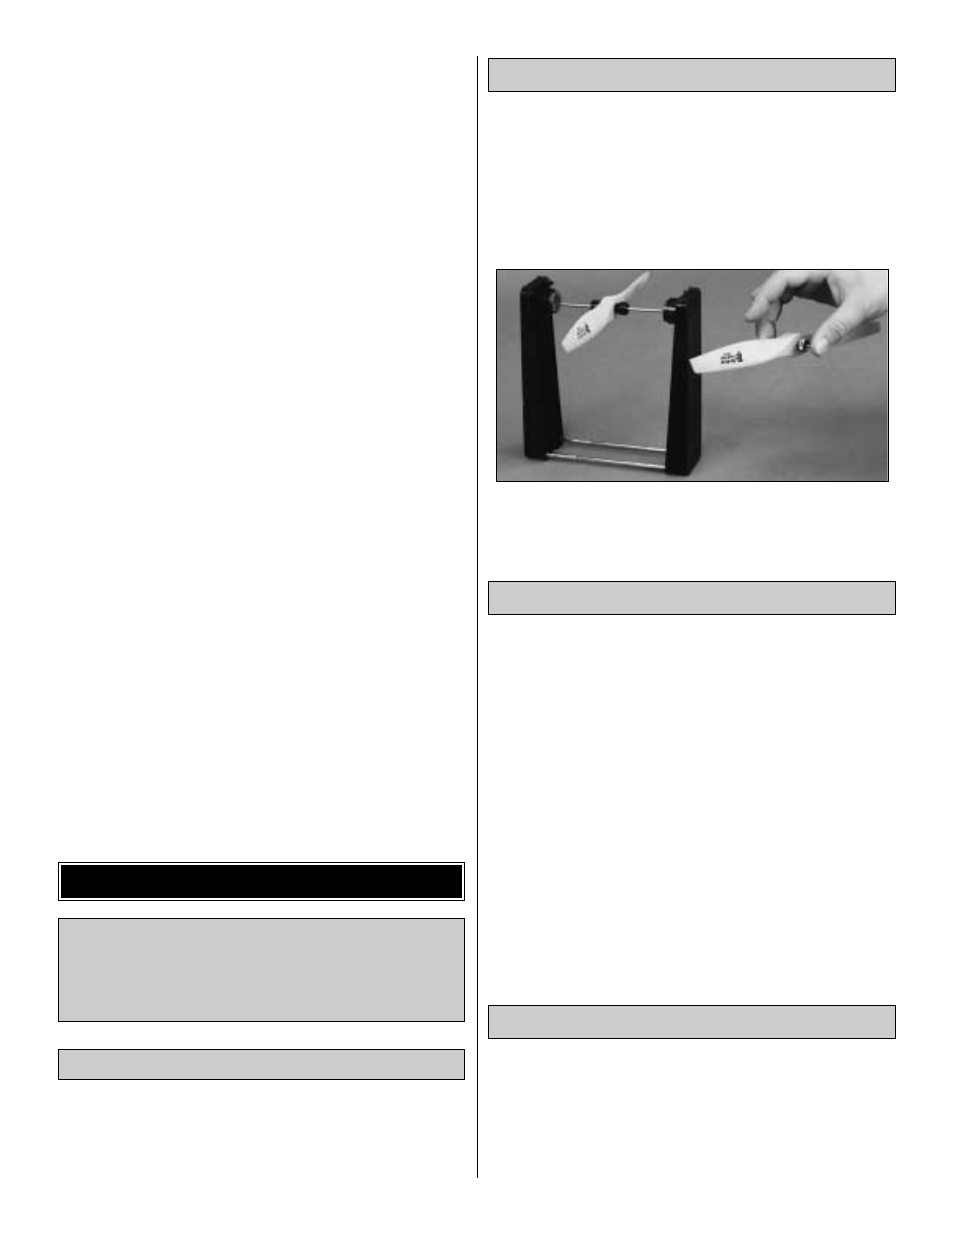
Balance your propellers carefully before flying. An
unbalanced prop is the single most significant cause of
vibration. Not only may engine mounting screws vibrate
out, possibly with disastrous effect, but vibration may also
damage your radio receiver and battery. Vibration may
cause your fuel to foam, which will, in turn, cause your
engine to run lean or quit.
We use a Top Flite Precision Magnetic Prop Balancer
™
(TOPQ5700) in the workshop and keep a Great Planes
Fingertip Balancer (GPMQ5000) in our flight box.
Since you have chosen the CAP 232 we assume that you
are an experienced modeler. Therefore, you should already
know about AMA chartered flying fields and other safe
places to fly. If, for some reason you are a relatively
inexperienced modeler, and have not been informed, we
strongly suggest that the best place to fly is an AMA
chartered club field. Ask the AMA or your local hobby
dealer if there is a club in your area and join. Club fields are
set up for R/C flying and that makes your outing safer and
more enjoyable. The AMA address and telephone number
are in the front of this manual.
If a club and flying site are not available, find a large, grassy
area at least 6 miles away from houses, buildings and
streets and any other R/C radio operation like R/C boats and
R/C cars. A schoolyard may look inviting but is too close to
people, power lines and possible radio interference.
If you are not thoroughly familiar with the operation of R/C
models, ask an experienced modeler to inspect your radio
installation and confirm that all the control surfaces
respond correctly to transmitter inputs. The engine
operation must also be checked by confirming that the
engine idles reliably and transitions smoothly and rapidly to
Ground Check the Model
Find a Safe Place to Fly
Balance the Propeller
Charge the Batteries
At this time, check all connections including servo arm
screws, Faslinks, clevises and servo wires. Make sure
you have installed the nylon retainer on the screw-lock
pushrod connector on the throttle pushrod at the servo
arm, and the silicone retainers on all the clevises.
PREFLIGHT