Build the front fuselage deck – Great Planes CAP 232 40 Kit - GPMA0232 User Manual
Page 25
❏
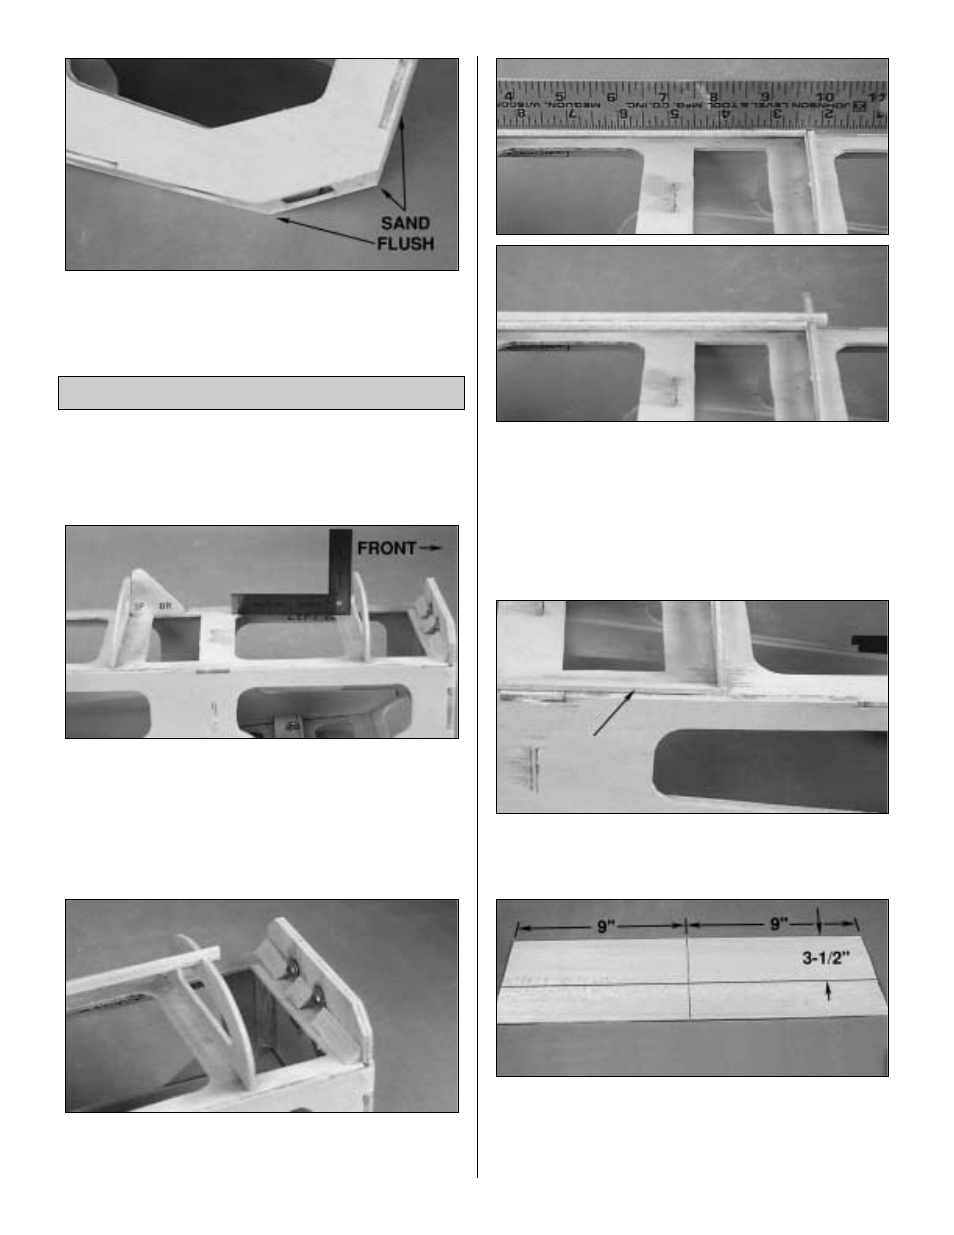
30. Sand the fuselage sides flush with the firewall. Sand
the bottom of the firewall flush with F1C. Sand the bottom of
F1C flush with the landing gear base.
Note: The front and the rear of the front deck use the same
pieces (F-2), but the front F-2 is 90 degrees to the fuse
and the rear F-2 must to be set at an angle using the IP
(instrument panel) gauge.
❏
1. Using a 90 degree triangle for alignment, glue the
front die-cut 1/8" plywood F2 in place.
❏
2. Use the IP gauge while gluing the rear die-cut 1/8"
plywood F2 in place.
❏
3. From the 1/8" x 1/4" x 30" balsa stick, cut an 8" piece
for the front deck main stringer. Glue this stringer into the
notches in both F2's.
❏
4. From the 1/8" x 1/8" x 30" balsa stick, cut two 7-1/8" long
gluing stringers. Use a straightedge held on top of both F-
2's to position the right gluing stringer. With medium CA,
attach the gluing stringer to the right side of the main stringer.
❏
5. Glue the left gluing stringer in place on the left side of
the main stringer.
❏
6. From the same 1/8" square balsa, cut two more
pieces 7-5/8" long. Glue these in place at the bottom
corners of both F-2's on both sides.
❏
7. Edge glue two 3/32" x 3" x 18" balsa sheets together.
Use your draftsman’s square to mark a centerline, then cut
the two sheets in half, making two 6" x 9" sheets. Cut each
piece so that it measures 9" x 3-1/2" as shown in the photo,
making the front deck sheeting.
Build the Front Fuselage Deck
25