Assemble the fuselage – Great Planes CAP 232 40 Kit - GPMA0232 User Manual
Page 20
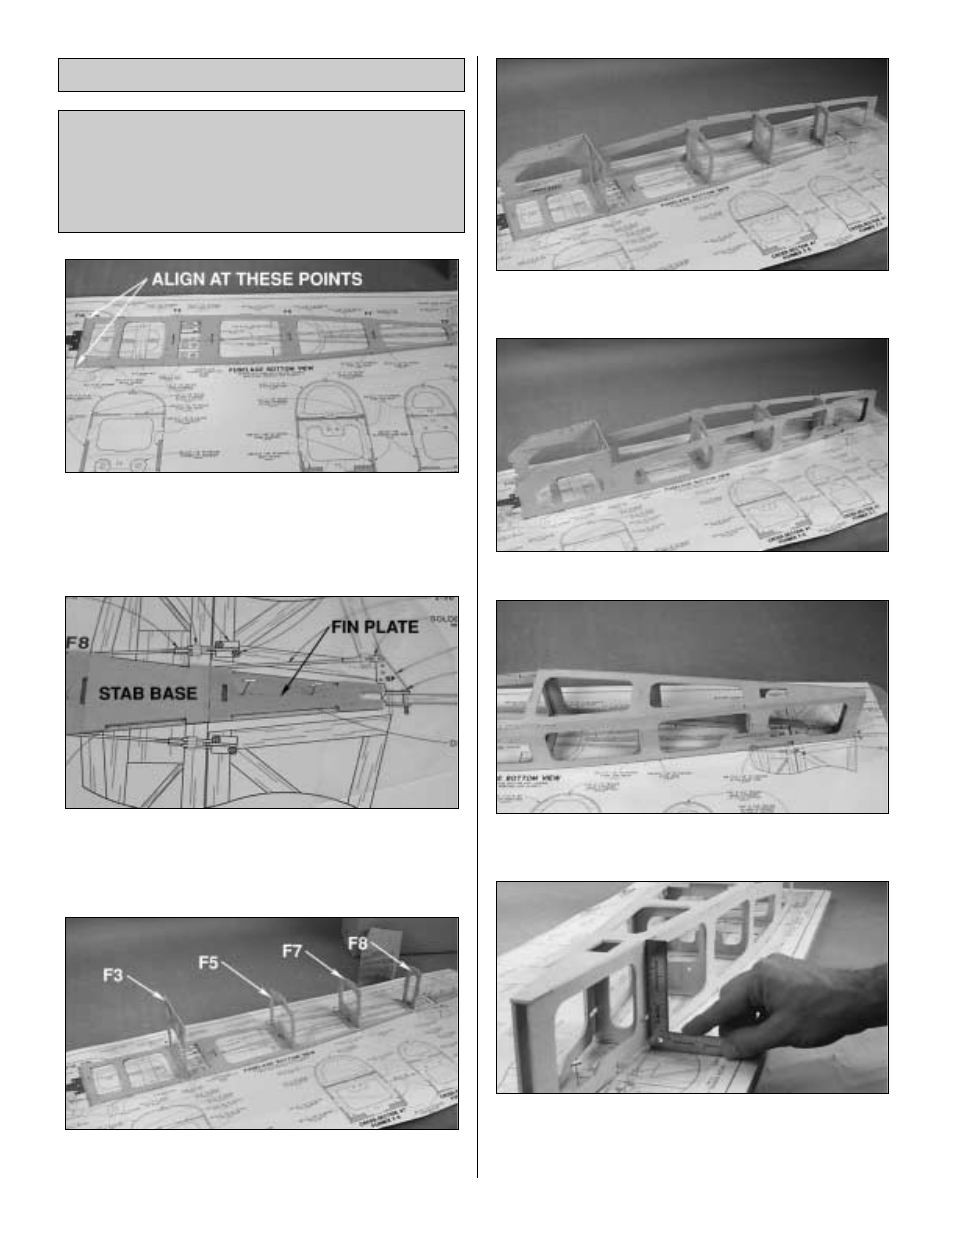
❏
1. Pin the die-cut fuse top in position over the fuselage
bottom view on the plan. Make sure the front of the fuse top
lines up with the firewall on the plan, as this sets the
right thrust.
❏
2. Pin the die-cut fin plate in place, using the die-cut
stab base to correctly locate it. After you have the fin plate
pinned in position, remove the stab base.
❏
3. Place formers F3, F5, F7 and F8 in position on the fuse
top. The doublers on F3 face forward, toward the nose.
❏
4. Fit the left fuse side to the formers and fuse top. Do
not glue.
❏
5. Fit the right fuse side to the formers and fuse top.
❏
6. Fit the fuse bottom in place. Note: the landing gear
base does not get installed until after the wing is mounted.
❏
7. Using a square, check that the fuse sides are
perpendicular to the work bench. Using thin CA, glue each
former to the fuse top, bottom and sides. Double check
every former to make sure it is square.
Note: The interlocking construction this Great Planes kit
allows you to quickly assemble the fuselage upside down
on the plan while maintaining alignment. You will be fitting
most of the die-cut fuselage par ts together before
applying glue. Do not use any glue until instructed to
do so.
Assemble the Fuselage
20