Mount the engine – Great Planes CAP 232 40 Kit - GPMA0232 User Manual
Page 29
❏
12. Glue one side of the fin fillet to the fuse top and
former F-9. DO NOT GLUE it to the dummy fin. Allow the
glue to dry thoroughly before gluing the other fin fillet
in place.
Note: The dummy fin is only used as a temporary spacer,
so don't glue it in place.
❏
13. Carve and sand the fin fillets and dummy fin to blend
smoothly with the fuse sides and the turtle deck.
Note: Masking tape around the stab at the root will make it
less prone to nicks while sanding the fillets.
❏
14. If you have not already done so, final sand the fin.
Remove the dummy fin and put the fin in its place. Before
gluing, double check to make sure the fin aligns with the
fuse centerline. Glue the fin in place with 30-minute epoxy.
Use clamps to hold the fuse sides tight against the fin until
the epoxy has thoroughly cured.
❏
1. Cut the "spreader bar" from the supplied Great Planes
engine mount, then use a hobby knife to remove any
flashing left over from the molding process so the halves fit
together well.
❏
2. Temporarily mount the engine mount to the firewall
with four 6-32 x 1" Phillips head machine screws and #6 flat
washers. Do not tighten the screws all the way, because
you still need to adjust the mount.
❏
3. Place your engine on the mount and slide the halves
in or out until the engine fits properly. Position the mount so
the molded-in "tick marks" are equally spaced on both
sides of the horizontal centerline you drew. When the
engine mount is adjusted and positioned, tighten the
mounting screws.
❏
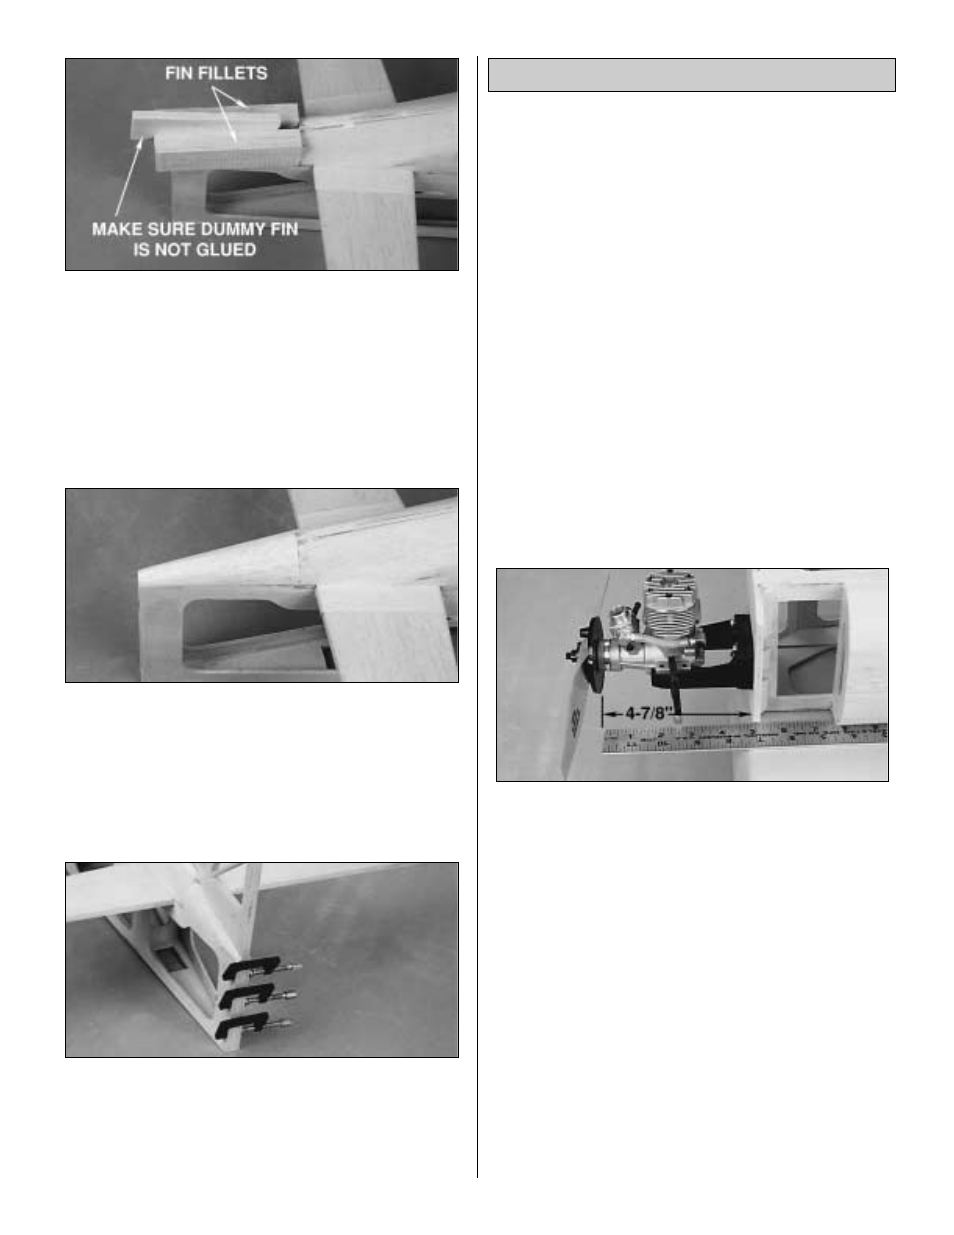
4. Position the engine on the mount so the front of the
drive washer (or the back of the spinner) is 4-7/8" away
from the firewall. Mark and drill 7/64" engine mounting
holes for the #6 x 3/4" engine mounting screws. Mount
the engine.
Mount the Engine
29