Great Planes CAP 232 40 Kit - GPMA0232 User Manual
Page 22
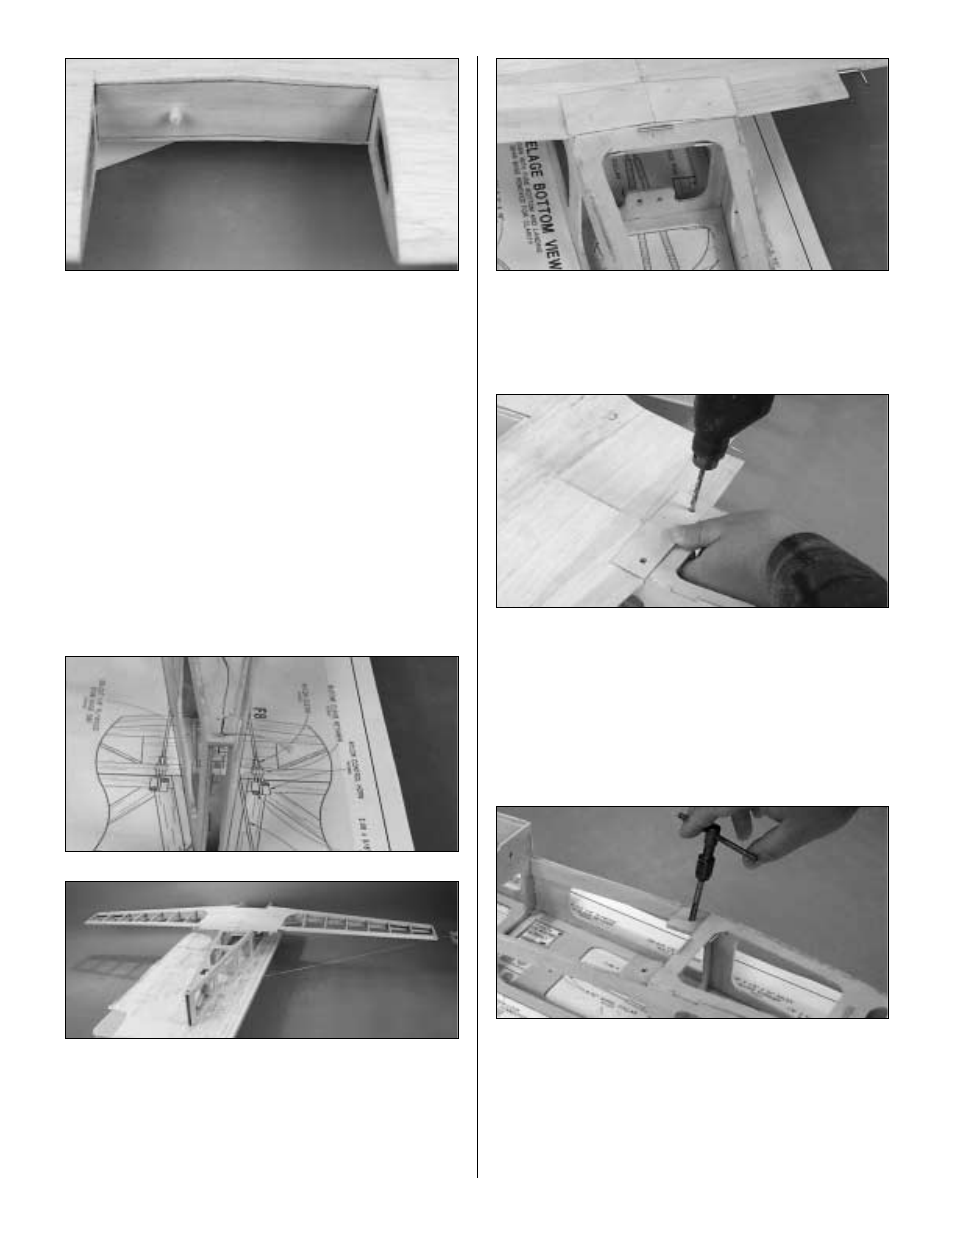
❏
5. Slightly round one end of a 1/4" x 1-1/8" wing dowel.
Using 6-minute Epoxy, glue the dowel in the wing leaving
3/8" protruding from the front of the dihedral brace.
❏
6. Allow ample time for the epoxy to cure. Then, fit the
wing back onto the fuse, drill the second dowel hole,
remove the wing, and glue the second dowel in place.
Time to use your string again.
❏
7. Stick the T-pin through the center of the aft end of the
fuselage bottom. Pull the line to the TE of the wing tip and
move your tape to that point. Swing the string over to the
other tip and see if it aligns with the same point. If
necessary shift the wing and mark the location of the tip by
adjusting the position of the tape on the string. Do this until
the arrow on the string aligns with both tips.
❏
8. Now that the wing is accurately aligned, glue the wing
bolt plate in place on the wing, being careful not to glue the
wing to the fuse.
Note: The punch marks in the wing bolt plate are closer to
the TE of the bolt plate.
❏
9. Holding the wing firmly in place, drill 13/64" holes
through the punch marks in the bolt plate, drilling through
the wing and the laminated bolt blocks. Try to drill straight
in, perpendicular to the bolt plate. Note: Do not allow the
wing to move while drilling.
❏
10. Remove the wing and re-drill the holes in the wing
only to 17/64".
❏
11. Use a 1/4-20 tap and a tap wrench to cut threads in
the laminated bolt blocks in the fuselage.
❏
12. Harden the threads in the bolt blocks with thin CA,
then re-tap the threads after the glue is completely dry.
We are almost ready to unpin the fuse from the building
board -- just a few more steps.
22