Wing assembly, Spar – Great Planes Spirit 2-Meter Sailplane Kit - GPMA0530 User Manual
Page 9
WING ASSEMBLY
D 4. Carefully punch out all the die-cut 1/16" Balsa W2
and W2S Wing Ribs. Sand the edges slightly to remove any
die-cutting irregularities.
BUILD THE INNER WING PANELS
You'll need the following parts:
SPRTW01 1/8" Die-Cut Balsa Wing Ribs
SPRTW02 1/16" Die-Cut Balsa Wing Ribs, W2, W2S
SPRTW03 1/16" Die-Cut Balsa Wing Ribs, W2, W4-W10
SPRTW04 1/8" Die-Cut Plywood Dihedral Braces
SPRTW07 1/16" Die-Cut Balsa Shear Webs
SPRTW08 1/8" Die-Cut Plywood Clamps and Gauges
SPRTW10 Shaped
Balsa
Leading
Edge
SPRTW 11 Shaped, Notched Balsa Inner Trailing Edge
SPRTW13 1/8" x 5/16" x 23-1/2" Basswood Spars
SPRTW17 1/16" x 3" x 24" Balsa Wing Sheeting
NOTE: Follow step 5 below through step 7 on page
15 to build the LEFT wing panel, then repeat these
steps to build the RIGHT wing panel.
DD 5.
Pin one of the notched balsa Inner Trailing
Edges (SPRTW 11) to the plan lining up the notches in the TE
with the notches on the the plan.
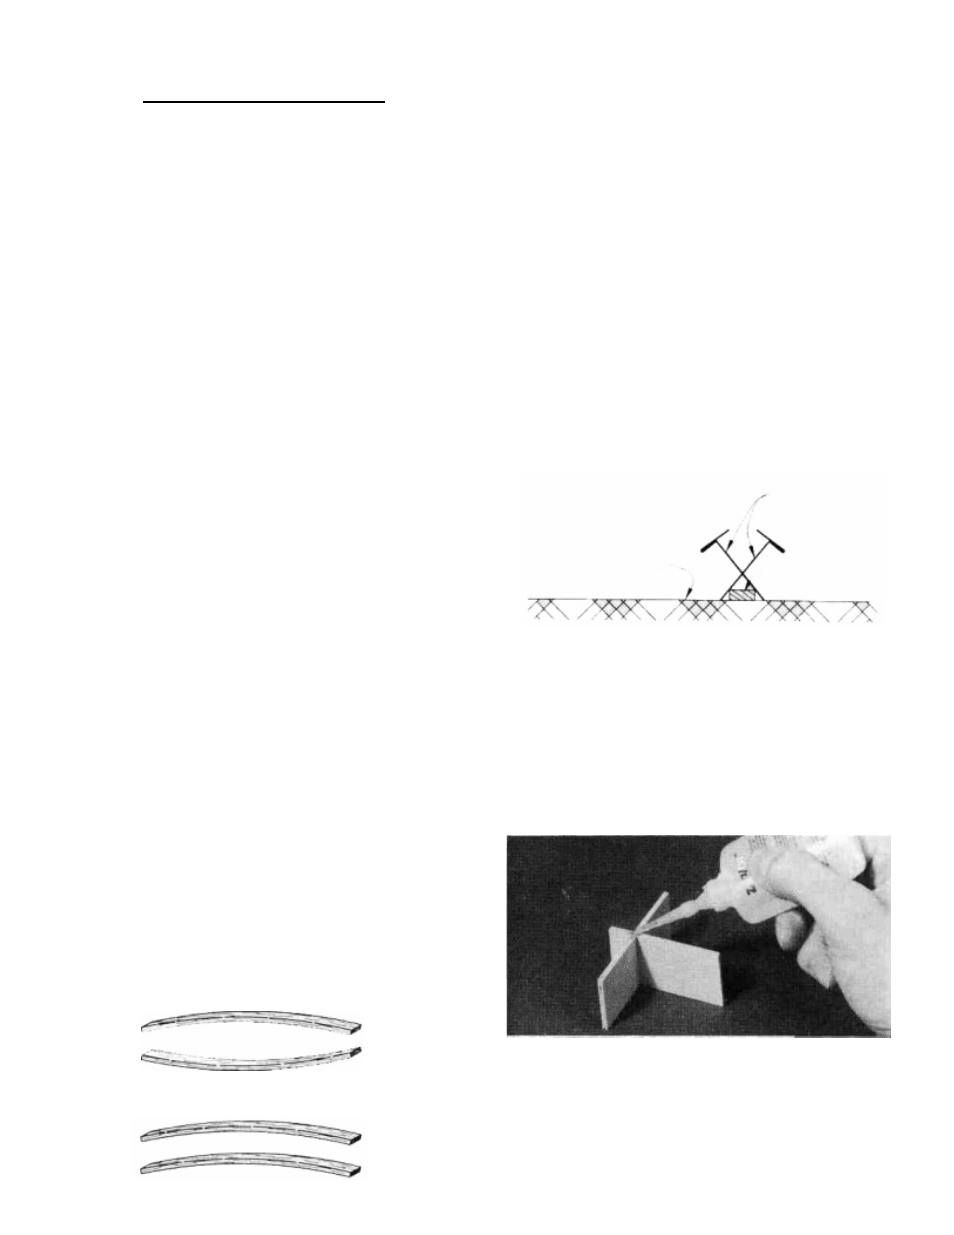
DD 6.
Place one of the 1/8" x 5/16" x 23-1/2" Basswood
Inner Spars (SPRTW13) on the wing plan and pin the spar
down with crossed T-pins as shown in the following sketch.
NOTE: The spars may be cut slightly oversize, the excess
will be cut off later.
NOTE: The wing is designed to be built as a two-
piece wing; however, we also describe how to build
a one-piece wing which can be either held on with
rubber bands or 1/4 - 20 nylon wing bolts (not
included).
D 1. Tape the plan to your flat work surface, and cover
the wing drawing with waxed paper. NOTE: If your work
space is limited, you may cut the wing drawings apart from
the rest of the plans.
D 2.
The Shaped Wing Leading Edges (SPRTW10) are
fastened together by thin strips of balsa. Separate them by
carefully cutting between the LE'S. Sand away the excess
balsa that remains along the edges after cutting them apart,
using a sanding block with 100-grit sandpaper.
D 3. Before using the 1/8" x 5/16" x 23-1/2" Basswood
Spars (SPRTW13), examine them carefully for possible
imperfections. Look for knots, soft spots, diagonal grain and
any other imperfections. If possible, position each spar so the
imperfections are on the outer half of the wing panel (toward
the tip), where they will be least affected by high stress. If the
spars are warped slightly, "balance them out" by installing
the warped spars in opposite directions (see sketch).
TWO WARPED SPARS INSTALLED
THIS W A Y WILL RESULT IN A
STRAIGHT WING
TWO WARPED S P A R S INSTALLED
THIS W A Y WILL RESULT IN A
WARPED WING
T-Pins
Work Surface
Spar
DD 7.
Place the seven W-2 ribs (from SPRTW02 and
SPRTW03) and the two W-2S ribs (from SPRTW02) on the
spar in their approximate positions, work the ribs into the
notches on the trailing edge but do not glue anything yet.
DD 8.
Punch out the two Rib Gauge Pieces from the
1/8" die-cut plywood sheet (SPRTW08) and assemble them
using CA. Notice that one end of the gauge is slanted at a 5
degree angle for positioning the end ribs. The other 3 ends are
perpendicular and can be used to keep parts 90 degrees to the
work surface.
9