Tail feathers – Great Planes Spirit 2-Meter Sailplane Kit - GPMA0530 User Manual
Page 6
"TAIL FEATHERS"
BUILD THE FIN AND RUDDER
You'll need the following parts:
SPRTS02 3/16"
x
3/8" x 30" Balsa Stick
SPRTS03 1/8"
x
3/16" x 30" Balsa Stick
SPRTS01
3/16" Die-Cut Tail Parts
SPRTF08
3/16" Balsa Triangle
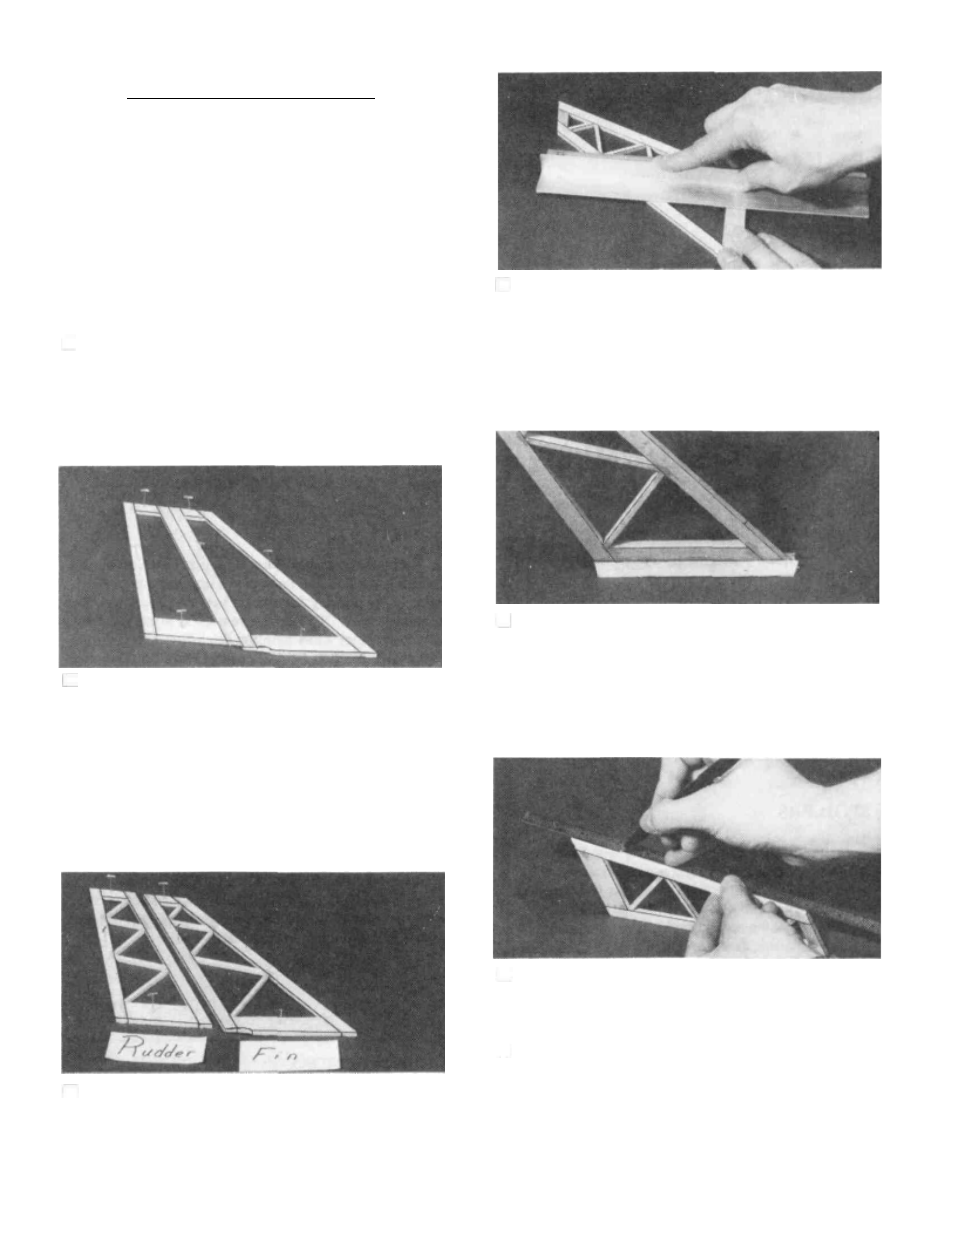
D 1.
Tape or pin the plan down to your flat work surface.
Tape a piece of waxed paper over the fin and rudder portion
of the plan (so you don't glue the parts to the plan).
D 4. Remove the fin and rudder assemblies from the plan
and examine them for any open or bad joints. Fill any gaps
with thick CA, then use your sanding block with medium grit
sandpaper to sand both sides of the framework smooth.
D 2. Using the plan as a guide, cut pieces of 3/16" x 3/8"
balsa (from the 30" sticks, SPRTS02) to make the Rudder
and Fin Framework. NOTE: Cut the Fin L.E., the Rudder
L.E. and the Rudder T.E. from a single SPRTS02 (This will
leave enough long pieces for the stab). Punch out the die-cut
Fin Tip, Rudder Tip, Fin Base and Rudder Base from
SPRTS01. Sand the edges if necessary and pin them in place
on the plan and glue the parts together using thin CA glue.
NOTE: Do not glue the fin to the rudder!
D 3.
From the 1/8" x 3/16" x 30" sticks (SPRTS03), cut
the diagonal "ribs" to fit between the rudder and fin frame-
work, and glue them in place. NOTE: It is not necessary to
get these ribs in the exact position shown on the plan.
D 5. Cut two 4-1/8" lengths of 3/16" Balsa Triangle
from SPRTF08 and glue them along the bottom of the fin.
The bottom edges of the triangle should be flush with the
bottom of the fin.
D 6. Carefully draw a centerline all around the edges of
the rudder and fin (this will help to maintain symmetry when
sanding).
D 7. Using a sanding block and coarse (50 or 80-grit)
sandpaper, sand the leading edge of the rudder to the V-shape
as shown on the plans (a small razor plane works great for
initial shaping). Sand the three remaining edges to a smooth
rounded shape. Sand the top and the leading edge of the fin
to a nice rounded shape*. NOTE: The trailing edge of the
6