Great Planes Spirit 2-Meter Sailplane Kit - GPMA0530 User Manual
Page 17
-Cut W1A Rib and Leading Edge Sheeting
away to clear Nylon Wing Bolt
D 14. Add a 5/16" x 1" x 7/8" balsa filler block (not
included) on each side of the middle W1B ribs near the
trailing edge and sand them flush with the top of the ribs.
STEPS 15 - 18 APPLY TO ALL WING
CONFIGURATIONS
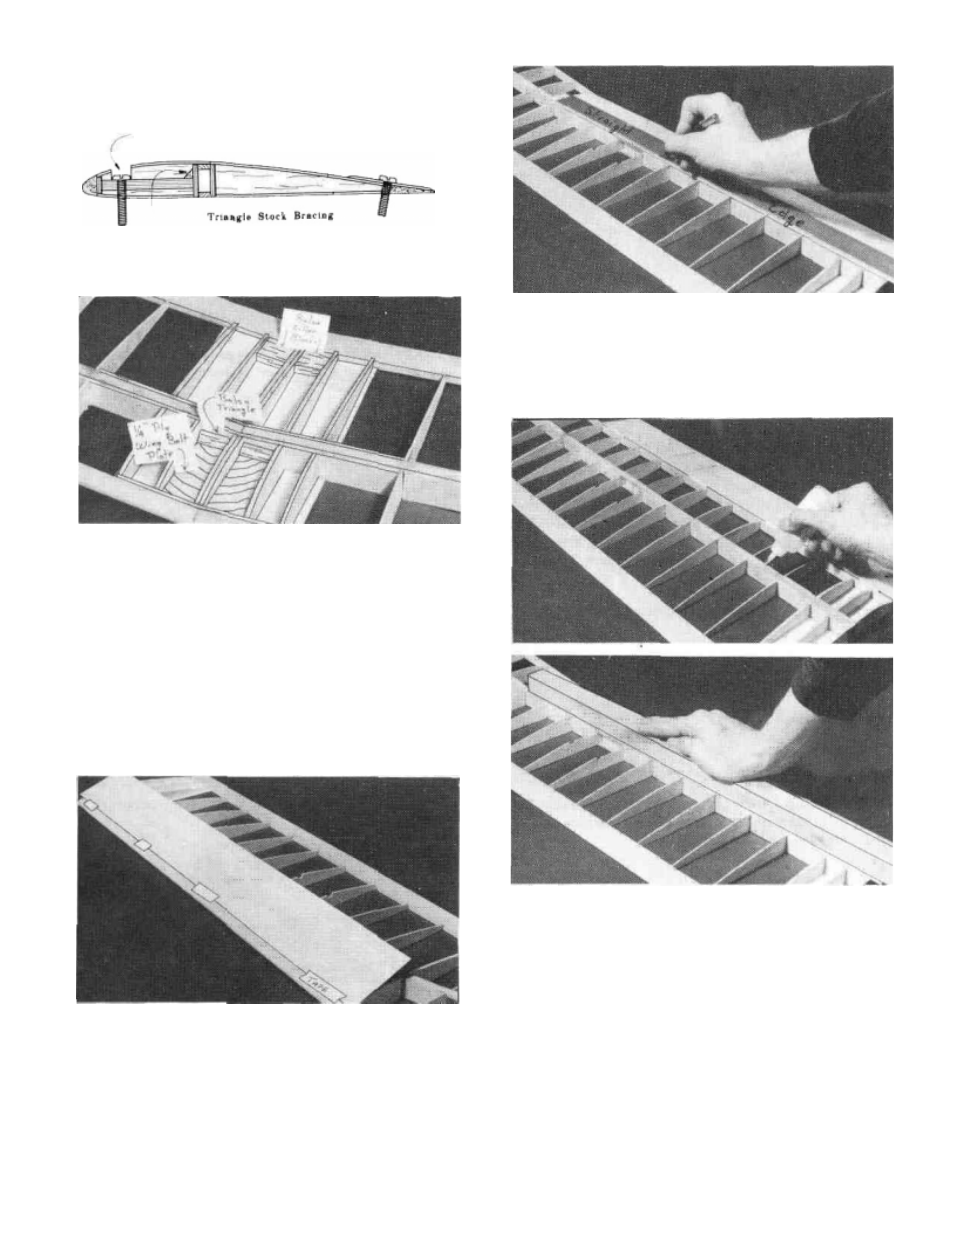
and act as a lunge for the gluing process. Press the sheeting
into place and trim it flush with the back edge of the spar using
a modeling knife and straightedge.
D 17. Lift the sheeting up and apply a bead of thick CA
along the top spar. Quickly press the sheeting down into place
and hold until the glue has cured. A straight strip of wood the
length of the panel can be a big help when trying to hold the
sheeting down evenly.
D 15. Set the 1/16" x 3" x 24" Balsa Leading Edge
Sheeting (SPRTW17)in place on the inner panel. The outer
end of the sheeting should cover rib W3A. Cut off the excess
sheeting even with rib W1A. Sand the top L.E. of the ribs if
necessary to allow the sheeting to be flush with the L.E.
D 16. With
the 1/16" sheeting in place against the leading
edge apply several strips of masking tape to hold it in place
D 18. Apply a small bead of thin CA between the pieces of
masking tape along the leading edge. When all of the glue has
cured, remove the tape, flip the wing over and securely glue
the sheeting to the ribs using thin CA as shown in the photo
at the top of the next page. Poke some pin holes in the center
sheeting where the center W1A rib is and apply a drop of thin
CA to each hole.
17