Great Planes Spirit 2-Meter Sailplane Kit - GPMA0530 User Manual
Page 27
them into place (up to the middle of the hinge) and wipe away
all excess epoxy with a tissue (for best results dampen the
tissue with rubbing alcohol).
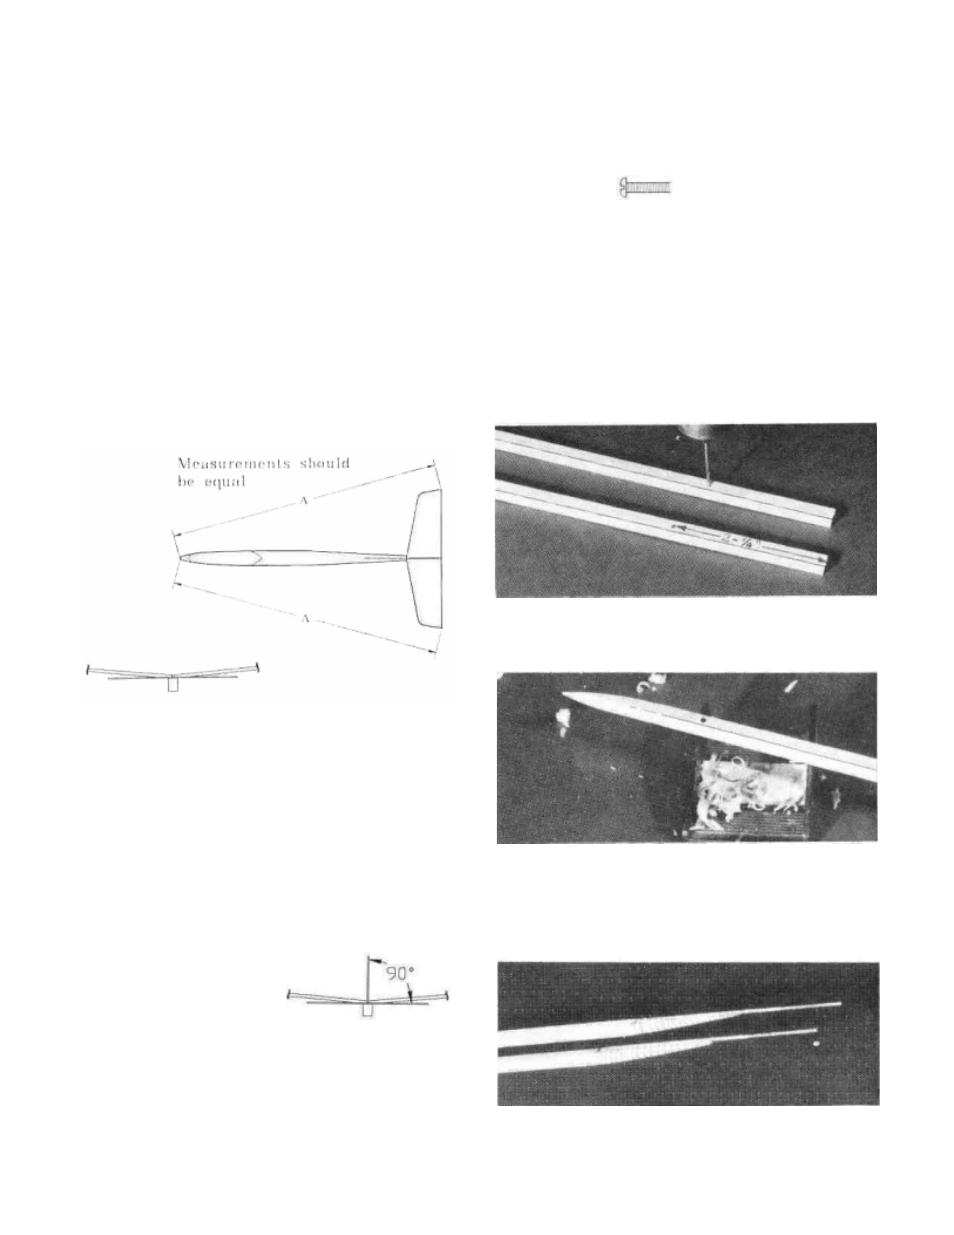
MOUNT THE TAIL SURFACES
D 1.
Use your sanding block with medium grit sandpaper
to chamfer (slightly round) the ends of the 1/4" Hardwood
Wing Dowels (DOWEL030) Insert the 1/4" wing dowels in
the holes and secure with thick CA. (Omit this step if you are
using a bolt-on wing.)
D 2.
Rubber band or bolt the wing onto the fuselage
making sure it is square and centered with respect to the
fuselage.
place on the rudder and elevator with a drop of thin CA. Use
the plans as a reference for positioning the horns (Rudder on
the left, elevator on the bottom). Drill two 3/32" holes
through the control surfaces using the control horns as guides.
Temporarily mount the horns with the 2-56 x 3/8" Screws
(SCRW001) and the Nylon Nutplates which were attached to
the
horns,
2-56 X 3/8" Screw
D 3.
Cut 4-1/4" off both threaded ends of the 36" Wire
(WIRES 17) and then cut two pieces 12" long from the
remaining piece of wire. Bend them as shown on the plans
except without the Z-bends. The Z-bends are not bent until
later. Wipe off each wire using a paper towel dampened with
rubbing alcohol to remove any oil.
D 4. Cut the pushrods from the 1/4" Square Balsa Sticks
(SPRTF09). The elevator pushrod should be 17-3/4" long and
the rudder pushrod should be 15-1/4" long.
D 3.
Position the stabilizer on the fuselage and measure
to get it centered and properly aligned. Glue the stabilizer to
the fuselage with either thick CA or epoxy. Check its
alignment with the wing while the glue is curing to make sure
they are level with each other.
D 4.
Position the fin in place on top of the stab. Glue the
fin in place on top of the stab and fuse using either thick CA
or epoxy. Check to make sure it is pointing straight at the nose
and is vertical (90 degrees) to the stab.
D 5. Drill a 5/64" hole 2-1/4" in from both ends of each
pushrod.
D 6. Use either a hobby knife, razor plane or coarse
sandpaper to taper three sides on each end of both pushrods.
The taper should start about 1-1/2" from the end. (One of the
sides with the 1/16" holes should remain flat).
ASSEMBLE PUSHRODS
D 1. Harden
the
balsa in the area of the control horns (on
both sides of the control surfaces) by poking several holes
with a pin, then apply thin CA glue and allow it to soak in and
cure.
D 2. Tack
glue the Nylon Control Horns (NYLON03) in
D 7.
Insert one threaded piece of wire into each pushrod.
Insert the 12" pieces of wire into the other end of each
27