Great Planes Spirit 2-Meter Sailplane Kit - GPMA0530 User Manual
Page 13
DD 6.
Carefully bend the leading edge to the angle
shown on the plans and position it against the ribs. The bends
should be at ribs W6 and W9. Align the leading edge with the
top and bottom edges of the ribs and glue it in place starting
at ribs W6 and W9.
DD 7.
Locate the remaining 1/16" Die-Cut Shear Webs
from sheet (SPRTW07). NOTE: These remaining shear
webs are actually tapered to match the taper of the wing.
DD 8.
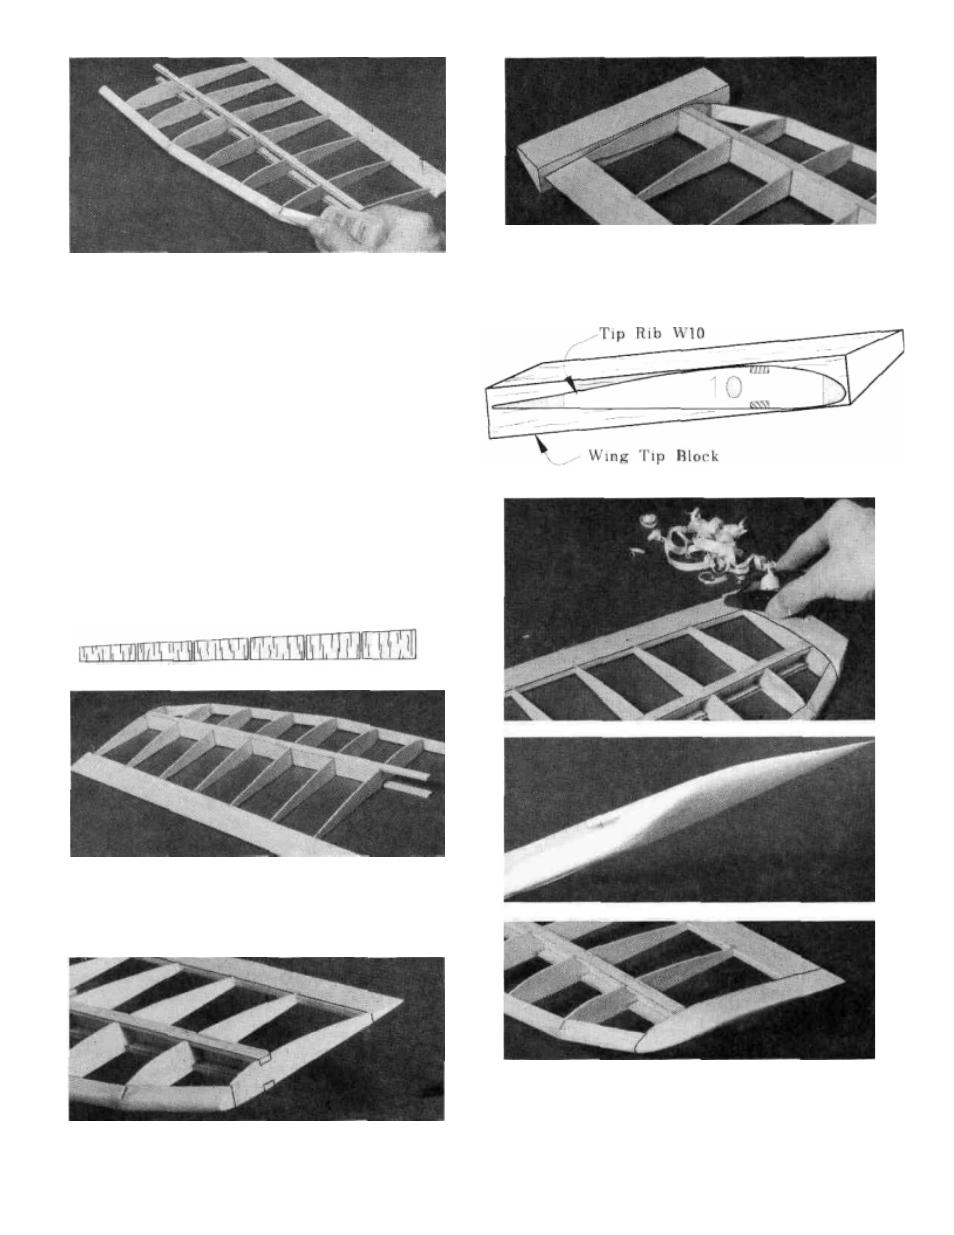
Punch out the remaining 6 shear webs and lay
them end to end so that the end of one web is the same size as
the end of the one next to it as shown in the sketch below. This
is the order and direction they will be installed in the wing.
The thinnest web goes between ribs W9 & W10 and the
thickest web goes between ribs W4 & W5.
NOTE TAPER OF WEBS
W9-WIO W8-W9 W7-W8 W6-W7 W5-W6 W4-W5
DD 9.
Glue the webs into their respective places using
thick CA. The thinnest end of each web goes towards the tip
of the panel. The C-2 clamps can be used to help hold the
webs in place while the glue cures.
DD 10. Cut and sand the trailing edge, spars and leading
edge flush with rib W 10. Also cut these to the correct length
13
at the other end using the plans as a guide.
DD 11. Glue the 7/8" x 1-1/4" x 6-1/4" Tapered Wing
Tip Blocks (SPRTW15) to W10 with thick CA. The sketch
below and the cross sections on the plan shows how the block
should be attached to get the correct tip shape.
DD 12. Carve and sand the wing tip to blend in with rib
W10. Be careful not to change the shape of W10 while
sanding the tip. There are three section views on the left wing
plan to show you the desired shape.