Final assembly – Great Planes Spirit 2-Meter Sailplane Kit - GPMA0530 User Manual
Page 25
merit and wedge the other one between the sides in the weight
compartment. These pieces arc called the Canopy Aligners.
Lift the aligners so that they are slightly above the sides.
Apply a small drop of thick CA to the middle of each aligner
and carefully slide the canopy into place. Push down on the
canopy to force the aligners against the canopy base (with the
canopy aligned with the fuselage sides) and hold it until the
glue has cured (a couple of minutes). Carefully remove the
canopy and securely glue the aligners to the canopy base with
more CA.
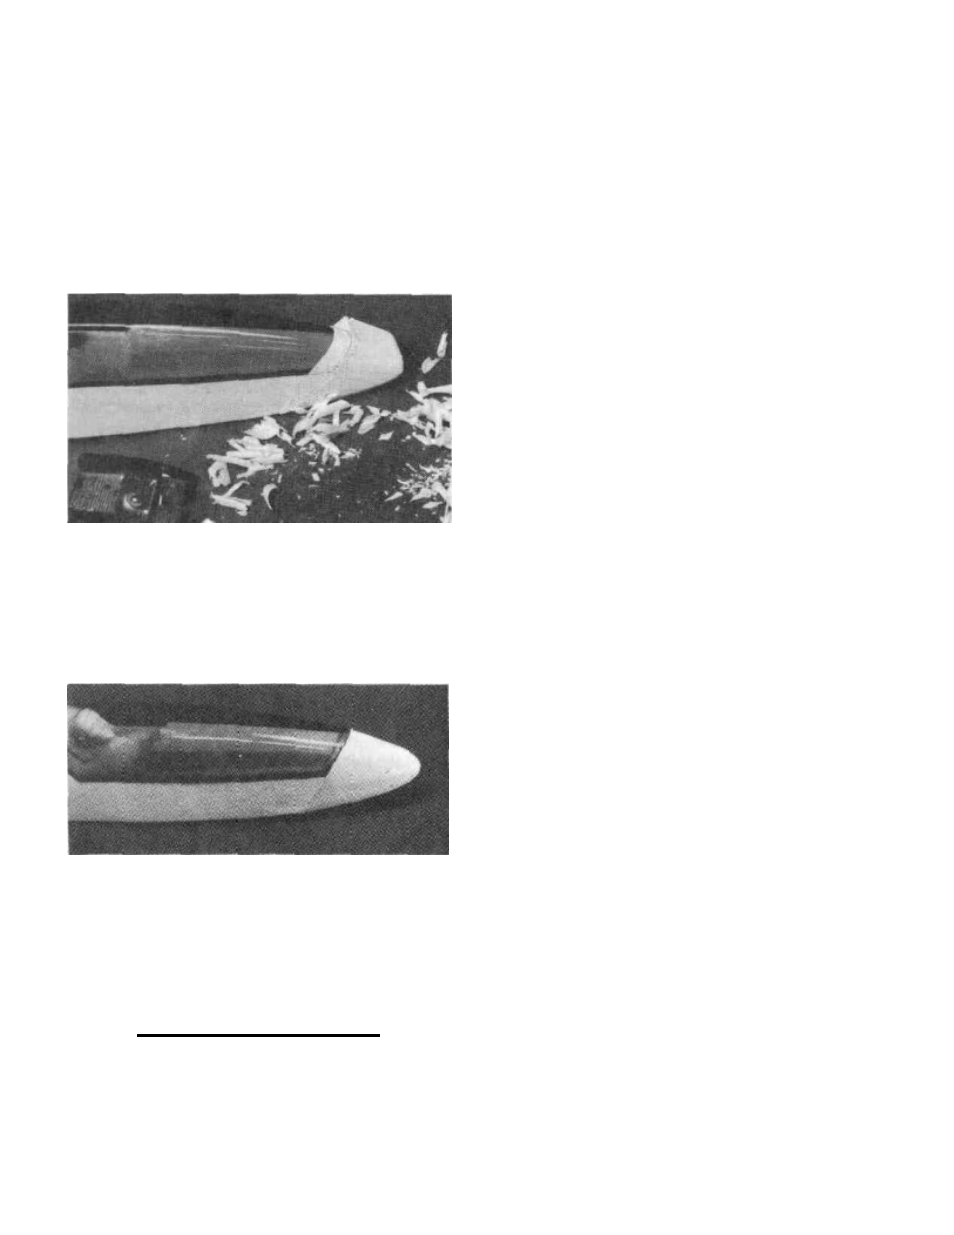
D 13. Apply a couple strips of masking tape around the
front of the canopy to protect the plastic and install the canopy
on the fuselage. Use a razor plane, hobby knife or sanding
block with coarse grit sandpaper to rough carve the nose
block to shape.
D 14. Use your sanding block with medium and then fine
grit sandpaper to smooth out the nose block and fair it in with
the canopy and the fuselage.
FINAL ASSEMBLY
BALANCE THE AIRPLANE LATERALLY
SPECIAL NOTE: Do not confuse this procedure
with "checking the C.G." or "balancing the air-
plane fore and aft". That very important step
will be covered later in the manual.
Now that you have the basic airframe nearly completed,
this is a good time to balance the airplane laterally (side-to-
side). Since the wing is the major factor on a sailplane, we
will only be concerned with it. Here is how to do it:
1.
Set the wing on a flat surface and hold it so that both
wing tips are level. Let go of the wing and notice which wing
tip drops. Do this several times and if the same wing tip keeps
dropping push a thumb tack or small nail through rib W 10 into
the wing tip that keeps rising.
2. Perform
this
test
several
times until the wing bal-
ances or the same wing tip does not drop every time and then
glue the tacks or nails in place with a drop of thin CA.
FINAL SANDING
Check over the entire structure carefully, inspecting for
any poorly glued joints, gaps and "dings". Apply additional
glue and/or balsa filler as necessary, then sand the entire
structure smooth using progressively finer grades of sandpa-
per. Sand the fuselage corners to a rounded shape as shown
on the cross sections of the plans.
COVERING
There are many different types of covering materials
available these days but the iron-on type coverings are by far
the easiest to use and in most cases the best suited for the job.
There are also several different brands of iron-on coverings
available. We recommend you use Top Flite Super
Monokote for covering your SPIRIT due to this covering's
higher strength. Sailplanes,
which usually have higher
"aspect ratio" wings (long and thin), gain a great deal of
strength from the covering. This is evident by gently twisting
the wing before and after it is covered, it is hard to believe the
difference. Because of this, the higher strength coverings are
best suited for sailplanes.
The following are some covering tips we have learned
over the years but you should follow the instructions in-
cluded with your covering material.
• Sand the surfaces as smooth as possible before starting to
cover the plane. The finished covering job will only be as
smooth as the surface you started with.
• Use a fresh single-edge razor blade or hobby knife blade
and replace the blade as soon as it starts showing signs of
dulling.
• Set the iron to the proper temperature by first applying a
25 "test strip" on a scrap of balsa.