Radio set-up – Great Planes Spirit 2-Meter Sailplane Kit - GPMA0530 User Manual
Page 30
let it gain excessive speed. If it does tuck under and you have
plenty of altitude, give the plane a little down elevator and
allow it to go on under. When it starts to climb up the back
of the "outside loop" its airspeed will drop and you can pull
out with some up elevator or roll out with full rudder. If you
don't have plenty of altitude, gently pull out with up elevator
but be careful and don't "jerk" it up or you may over stress
the wing.
D 2. With the wing attached to the fuselage, and all parts
of the model installed (ready to fly), lift the model by picking
it up with a finger on each bottom inner spar If the tail drops
when you lift, the model is "tail heavy" and you must add
weight to the nose to balance. If the nose drops, it is "nose
heavy" and you must add weight to the tail to balance. The
model should hang with a slight nose down attitude Add
BB's or lead to the weight compartment between formers F1
and F2 to correct a tail heavy model. In the unusual circum-
stance that you would have a nose heavy model, you can
switch the receiver and battery or even move the receiver
behind the servos. Getting the weight farther back helps
correct the "nose heaviness".
FINAL HOOKUPS AND CHECKS
D 1. Attach the 4-40 Threaded Towhook (WBNT148)
to the bottom of the fuselage by threading a 4-40 Nut
(NUTS002) and a #4 Washer (WSHR005) all the way onto
the towhook and screwing the towhook into the front hole for
the first flights With
the
towhook threaded almost all the
way into the blind nut, make sure the towhook is facing
straight back and tighten the 4-40 nut to secure it. After the
first flights the towhook can be moved back to the center hole
for most flying conditions. For contest flying you may want
to try the rear hole as it can help achieve a higher launch but
be careful as the sailplane will be more apt to "Pop Off the
line.
D 2.
A piece of self adhesive foam rubber weather strip-
ping can be applied to the front of the fuselage bottom to help
protect it from getting nicked up during landings.
D 3.
The canopy is held in place with a rubber band.
Loop a medium size rubber band through the cut-out in the
canopy back Thread the rubber band through itself and then
hook it on the little extension on former F4. To remove the
canopy, pick up on the back until the front is clear of the
dowel. To put the canopy back on Just do the opposite.
D 4.
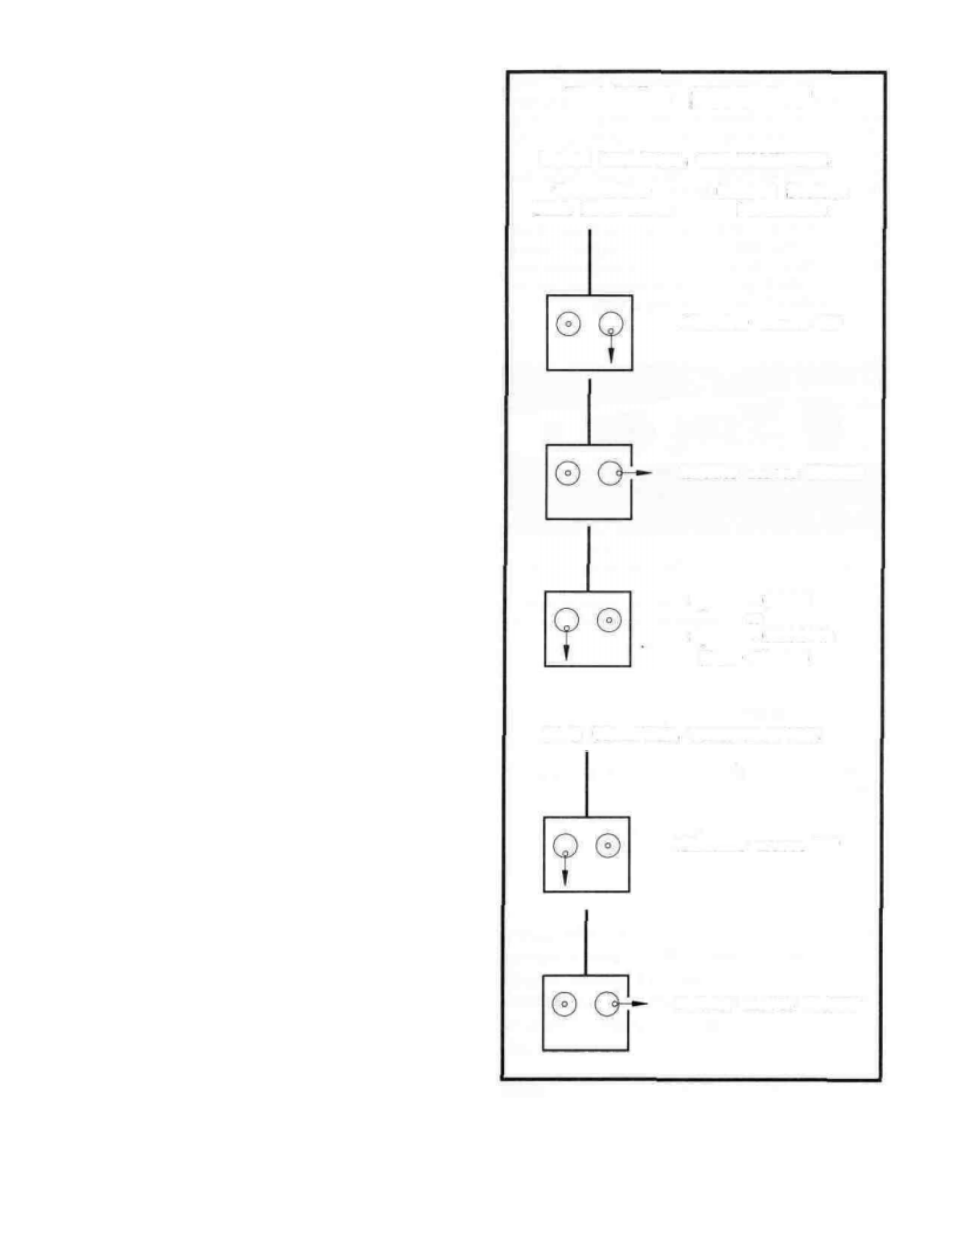
Make sure the control surfaces move in the proper
direction as illustrated in the sketch to the right.
RADIO SET-UP
FOUR CHANNEL TRANSMITTER
Transmitter
Control Surface
Stick Movements
Movements
Elevator moves UP
Rudder moves RIGHT
Spoilers OPEN
or
Spoilers CLOSED
(Your Choice)
TWO CHANNEL TRANSMITTER
Elevator moves UP
Rudder moves RIGHT
30