Great Planes Spirit 2-Meter Sailplane Kit - GPMA0530 User Manual
Page 15
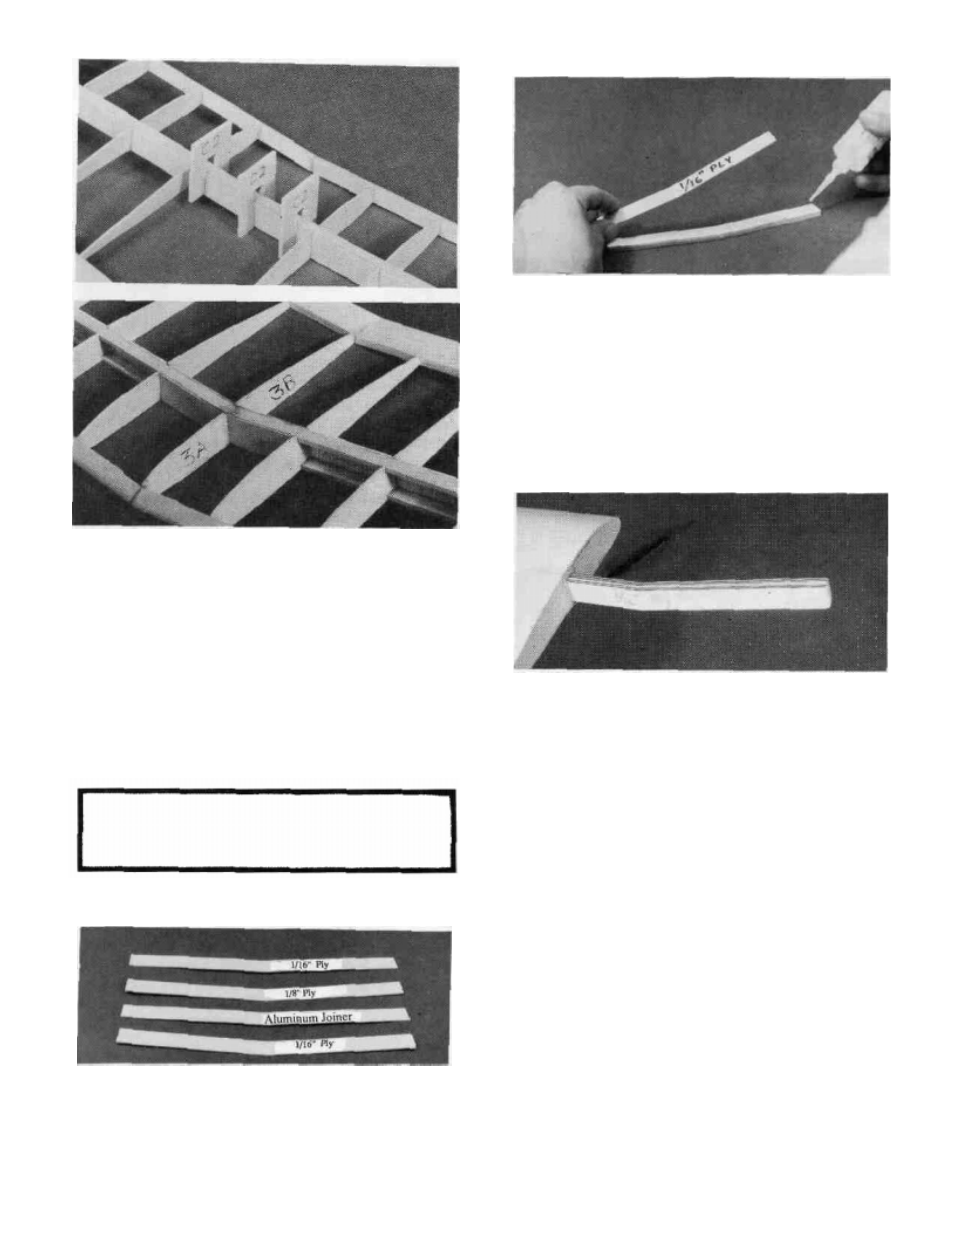
DD 7.
Glue the 1/32" Plywood Polyhedral LE Brace
(from SPRTW06) in place against the leading edges. Install
ribs W3A and W3B between the inner and outer panels using
thick CA as shown in the photo. A little sanding may be nec-
essary to achieve a good fit. Use the rib gauge to tilt the ribs
to the proper angle.
D 8. Now go back to step 5 on page 9 and assemble the
other half of the wing.
FINAL WING ASSEMBLY
D 2. Use either epoxy or thick CA to glue one of the 1/16"
laminations to the 1/8" laminations. Apply as much pressure
(clamps, clothespins, weights, etc.) as possible while the glue
is curing and be sure to accurately line up the two pieces.
Next, glue this lamination assemby and the other 1/16" lami-
nation, one on each side, to the aluminum joiner using epoxy
(The alumium joiner and the 1/8" Lamination should be in the
middle). Clamp together until the glue cures.
D 3. Sand the edges of the finished "wing joiner" to
remove any glue globs and test fit it in the wing joiner box.
Some sanding may be required to get a nice smooth but not
loose fit.
IF YOU ARE BUILDING A ONE-PIECE
WING SKIP AHEAD TO STEP 4
IF YOU ARE BUILDING THE TWO.
PIECE WING SKIP AHEAD TO STEP 15
D 1.
Punch out three of the 1/16" and one of the 1/8" Ply-
wood Wing Joiner Laminations (SPRTW05 / SPRTW04)
and find the aluminum joiner. Lightly sand the edges of each
to remove any high spots.
D 4.
Prop up one wing half 2" (as measured from the work
surface to the bottom of rib W3) and sand the root (Inner) end
of the trailing edge, spars and leading edges to achieve
vertical surfaces as you did earlier for the outer panels. Do the
same for the other wing panel.
D 5. Test fit the two inner panels together by laying one
panel flat on the work surface and propping up the other
panel 4" (at the bottom of rib W3). Use the dihedral gauge
next to the last W2 rib to achieve the correct angle. Make sure
that each spar, etc. just touches the opposite spar, etc. of the
other panel. Carefully sand the longest ends until a good joint
15 is achieved between each member.