E-MU Tracker Pre USB 2.0 User Manual
Page 43
Tutorials
TRACKERpre Reference Manual
43
7. Open the Preferences via the Options menu (PC) or Live menu (OS X) and
choose the Record/Warp/Launch tab. Set the Count-in to any value other
than “None.” Live doesn’t start recording until the count-in period has elapsed
and gives you time to get ready after pressing “Record.” Close the Window.
8. Delete all the Clips in your MIDI track. (Select a clip and hit backspace to
delete it.)
• If your MIDI interface isn’t already connected, you’ll have to quit Ableton
Live Lite 6, connect the MIDI interface, then restart Ableton Live Lite 6 before
continuing.
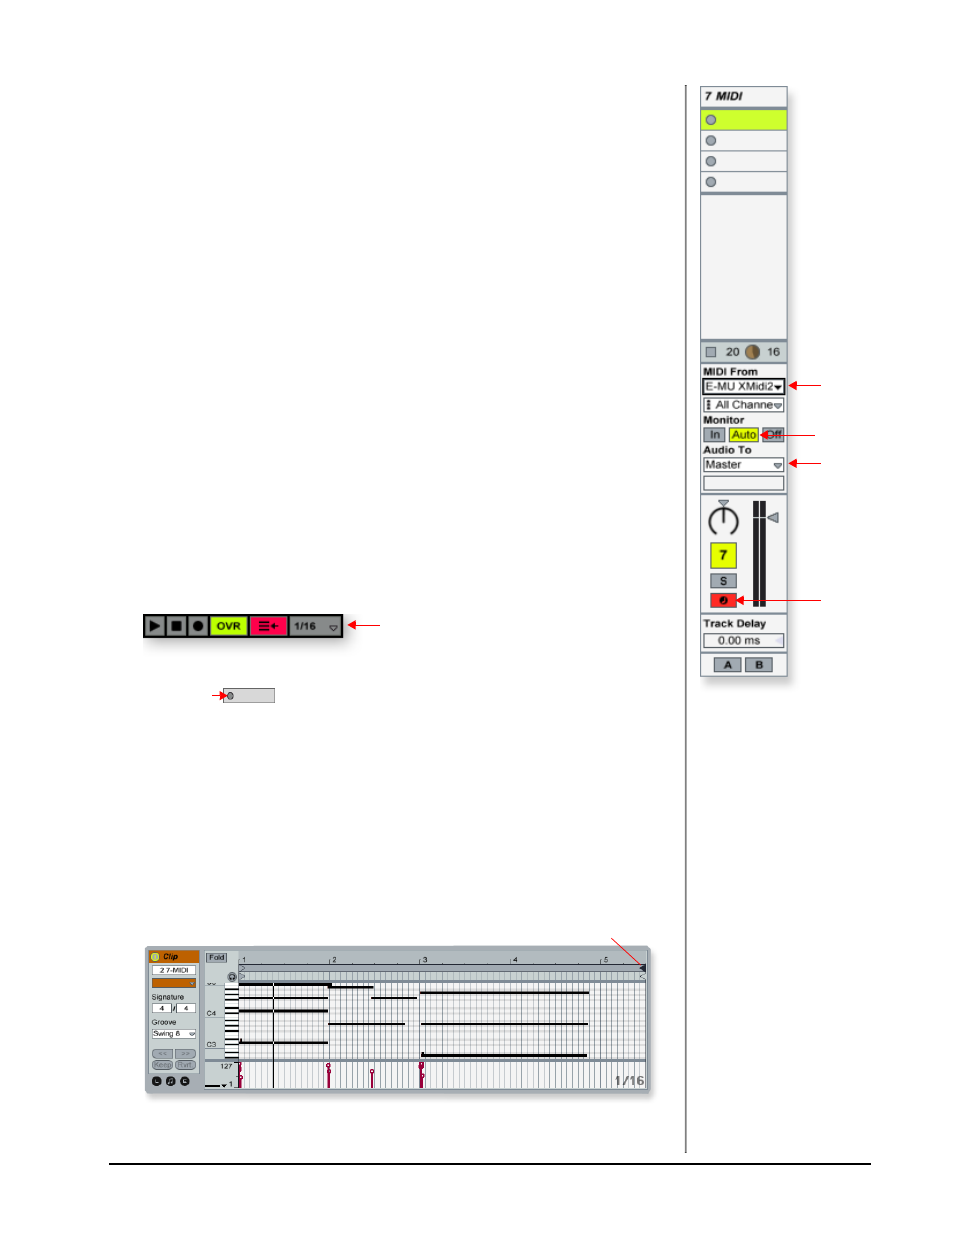
9. Set up the MIDI track as shown at left.
a. Select your MIDI Interface in the “MIDI From” field.
b. Monitor should be set to Auto.
c. Set the Audio To = Master
d. Turn Arm Session Record On (red).
10. Play the keyboard. You should hear Proteus VX playing the last sound you
selected on channel 1. Go ahead and change the sound if you wish. (Double-
click the top of the Track, then click the Wrench icon on the Device Title Bar.
Make sure you’re changing the sound on channel 1.)
Get Ready to Record
11. Start up the Verse using the Scene Launch button and practice playing along
with it.
12. Optional: You can set the Global Quantization value to correct the timing of
your playing. Set it to anything other than “None”.
13. Click one of the round MIDI Clip Record buttons to begin
recording.
Recording will begin after the Count-In period you
specified.
14. Click the Spacebar to stop recording.
Adjust the Loop Length
15. Start up the Verse using the Scene Launch button and take a listen. You’ll
notice that your part doesn’t line up with the others after the first play
through. This is because your loop length is not a multiple of four bars. Let’s
fix that.
16. Click on the clip you just recorded and your clip will appear at the bottom of
the window. It might look something like the one below.
a
b
c
d
Quantize
Loop End Control