1 - setting up cubase le 4, Getting started with steinberg cubase le 4 – E-MU Tracker Pre USB 2.0 User Manual
Page 19
Tutorials
TRACKERpre Reference Manual
19
Getting Started with Steinberg Cubase LE 4
(Windows, OS X)
Steinberg Cubase LE 4 is a 24-bit, multi-track audio/MIDI sequencer with high-
quality effects, automation, virtual instruments (VSTi), and many other profes-
sional features.
The following step-by-step tutorials are designed to get you recording as quickly as
possible.
1 - Setting up Cubase LE 4
Follow these instructions carefully to ensure that Cubase LE 4 runs smoothly the first
time. Cubase LE 4 will remember these settings, so you’ll only have to do this once.
1. Open Cubase LE 4 from the Start
menu. An ASIO multimedia driver
test dialog box will pop up to ask if
you want to run the ASIO test.
Choose No, because you won’t be
using the driver anyway.
2. Select New Project from the File
menu.
3. Select Empty and click OK.
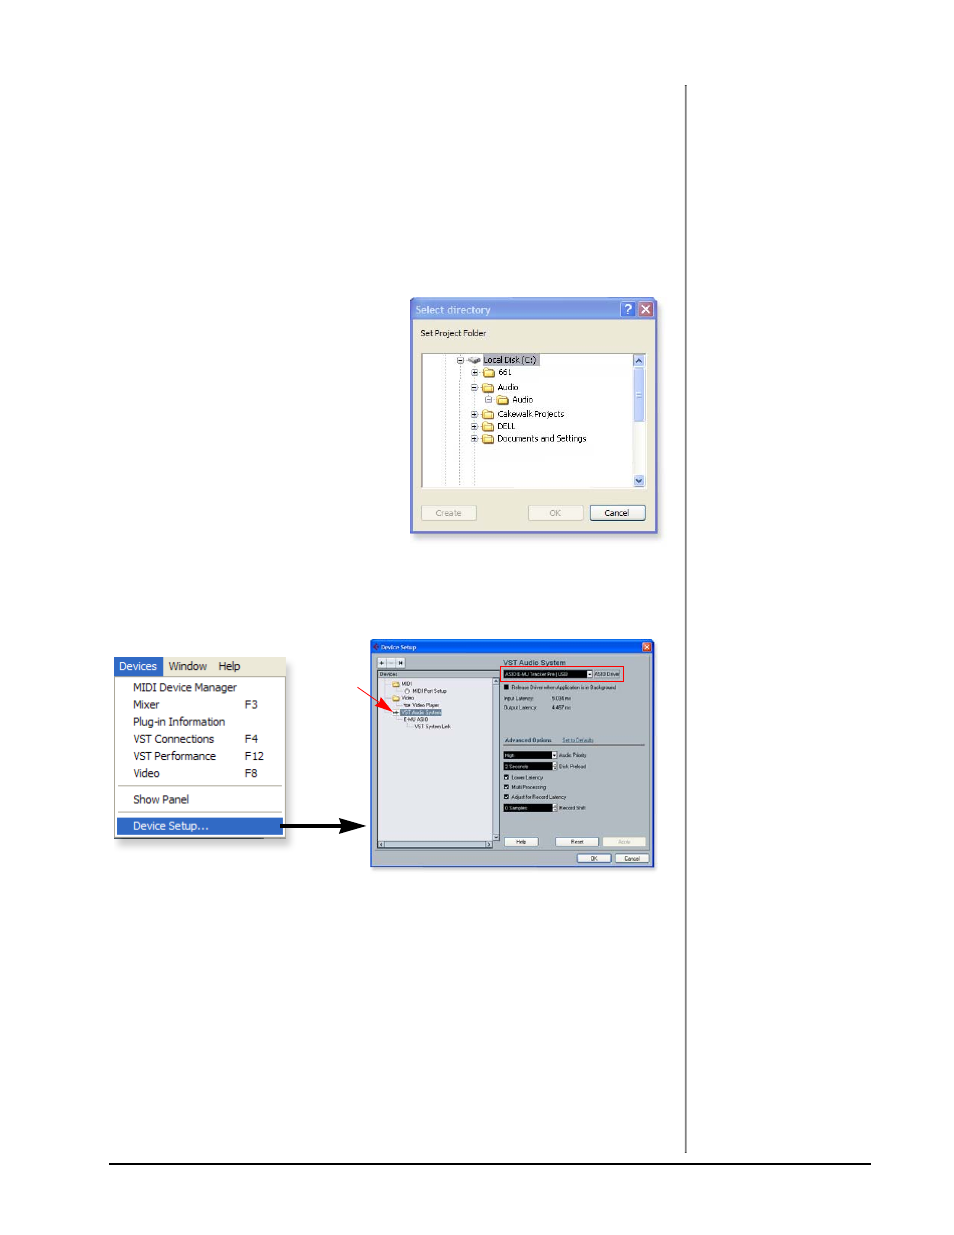
4. A Select Directory pop-up dialog
box will appear. Choose a location
on your hard disk where you want to
store your audio files, then click OK.
5. The Cubase LE 4 Project window appears.
6. Select Device Setup… from the Devices menu.
7. Select VST Audio System from the left pane.
8. Choose ASIO E-MU TRACKER Pre|USB as the ASIO Driver. A pop up dialog
box asks you if you want to keep or switch the ASIO driver. Select Switch.
Buffer Latency Setting
9. Click on ASIO E-MU Tracker Pre|USB (located immediately below VST
Audio System in the Devices pane).
TIP . . .
If you have two or more
hard disks, it’s better to
store audio files on a disk
that isn’t running your
OS.
Step 9:
VST
Audio