Before you begin, 1 - setting up the preferences, Before you begin: 1 - setting up the preferences – E-MU Tracker Pre USB 2.0 User Manual
Page 36: Getting started with ableton live lite 6
Tutorials
36
E-MU Systems
Getting Started with Ableton Live Lite 6
(Windows/OS X)
This guide contains a basic walk-through of Ableton Live Lite 6 (E-MU Edition) to
get you recording and playing back audio. A Proteus VX tutorial is also included for
Windows users. We encourage you to perform the steps on your computer as you
read so that you can “learn by doing.”
Ableton Live Lite 6 is an innovative composition and performance tool. Live
combines digital recording, virtual instruments, and digital effects with an original
interface design that many people find more intuitive than traditional designs.
The following step by step tutorials are designed to get you recording as quickly as
possible. After you’ve finished the tutorial we encourage you to follow Ableton
Live’s excellent interactive Lessons and read the Ableton Live reference manual pdf
in order to learn more about the program.
Before you Begin:
• You should have already installed the Tracker Pre software on your computer
according to the instructions in your “Getting Started” manual.
• You should have already installed the Ableton Live Lite 6 software on your
computer and unlocked it according to the instructions provided with the
Ableton User Manual.
NOTE
The first time you run Live,
you may get the message,
”Audio is disabled. Please
choose an audio output
device from the Audio
Preferences.”
Simply follow the instruc-
tions in “1-Setting up the
Preferences” to correct the
situation.
• You should hear sounds from Ableton Live 6 when you play the demos.
• PC Users - You should have already installed the Proteus VX software.
• You should have your MIDI interface and keyboard connected if you want to
record MIDI.
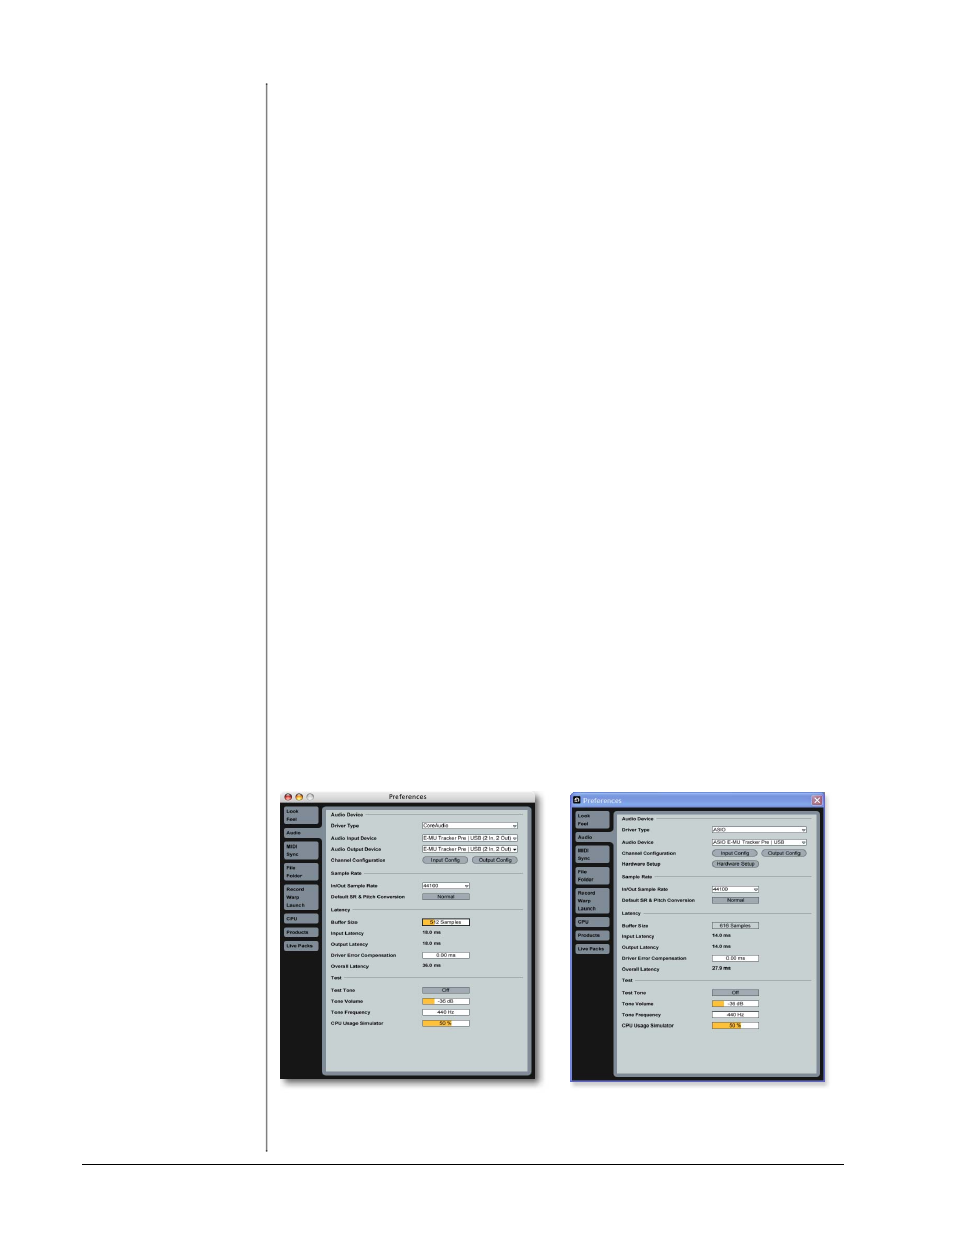
1 - Setting up the Preferences
Unlock Ableton Live Lite 6 for E-MU by following the instructions in the Prefer-
ences menu. (Windows - Options menu, Preferences; OS X - Live menu, Preferences)
Read the following instructions to configure the Audio and MIDI preferences. Live
will remember these settings, so you’ll only have to do this once.
Set up the Audio Parameters
1. Click the Audio tab of the Preferences dialog box. The Audio Setup page
appears.
2. Select ASIO as the Driver Type. Select ASIO E-MU Tracker Pre|USB as the
Audio Device.
Windows
OS X