2 - basic multitrack recording – E-MU Tracker Pre USB 2.0 User Manual
Page 21
Tutorials
TRACKERpre Reference Manual
21
2 - Basic Multitrack Recording
This tutorial assumes you’re using a single input or a pair of inputs. For more
advanced recording, refer to the Cubase LE 4 manual.
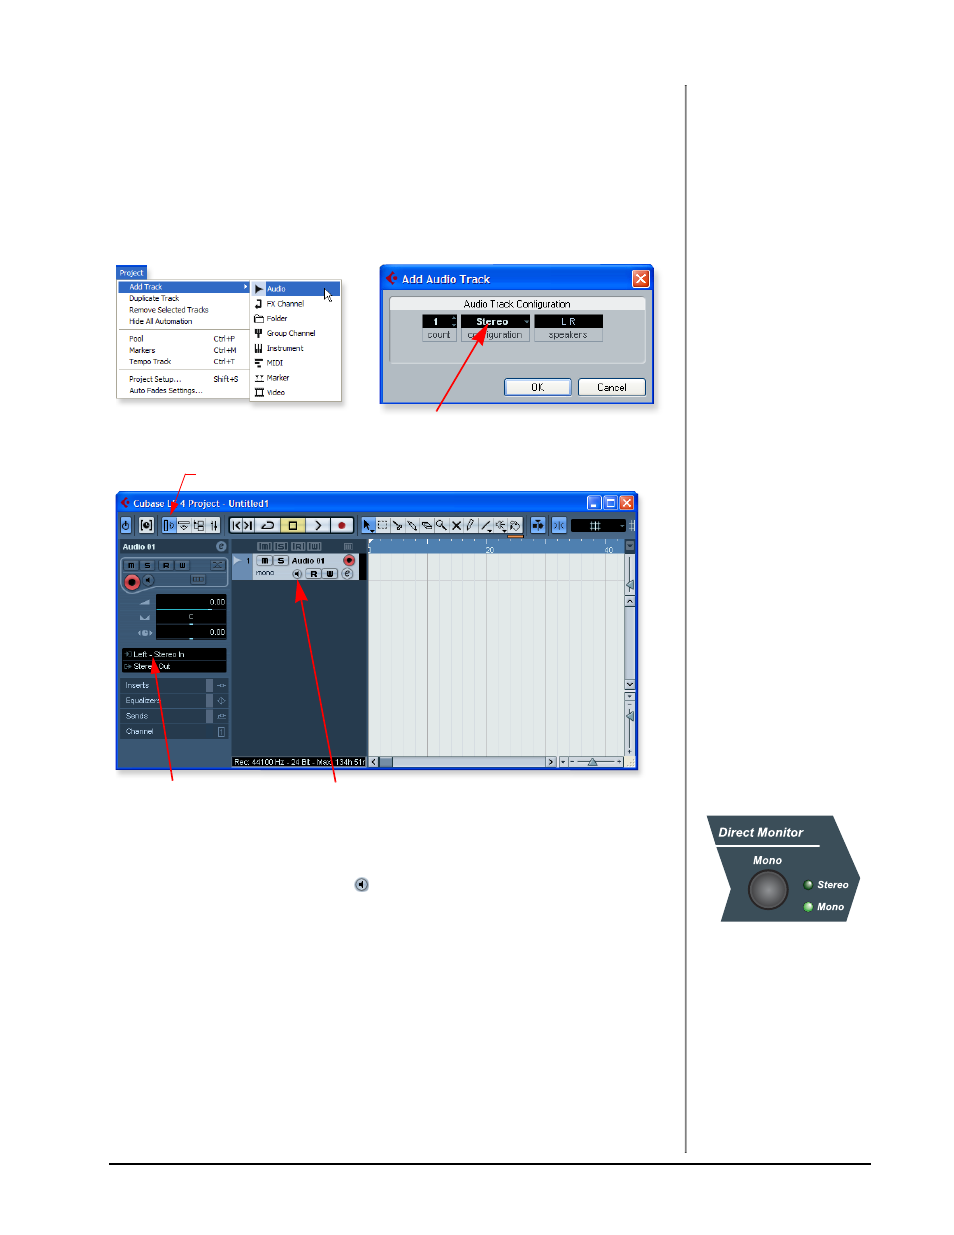
Add an Audio Track
1. From the Cubase LE 4 menu bar, select Project, Add Track, Audio. A pop-up
dialog box appears, asking you if you would like to add a mono or stereo
track. Choose a mono track for now. After making your selection, click OK. A
new audio track is added to the project window.
2. The Track Input Routing field is where you connect the Tracker Pre inputs to
the track. Left-Stereo In will appear in the Track Input field. (You can change
this to “Right-Stereo In” if you wish.)
3. Make sure the Monitor button
is OFF. You will be monitoring the input
through the Tracker Pre.
4. Press the Direct Monitor button on your Tracker Pre USB 2.0. If you are
recording a mono track, set Direct Monitor to Mono by pressing the Direct
Monitor button again.
Get Ready To Record
5. Plug in your instrument or microphone into the 1L (left) input and set the
input gain control for a good signal level. The green -12 signal LED should
come on, but the clip LED should never come on.
6. You should be hearing your instrument or microphone through your monitor
speakers or headphones. If not, go back to steps 4 and 5.
Select Mono (or Stereo)
Inspector button
Track Input Routing
Monitor Button
The Direct Monitor Button
routes the inputs directly
to the outputs.