Installation and connection, 1. installation, 1-1. precautions – Kenwood TM-3530A User Manual
Page 7: 1 -2. power supply, 1-3. mounting bracket
Attention! The text in this document has been recognized automatically. To view the original document, you can use the "Original mode".
3. INSTALLATION AND CONNECTION
3-1. INSTALLATION
3-1-1. Precautions
1. Avoid direct sunlight, and select a dry, well ventilated
location.
2. Since the heat sink is on the rear panel, avoid placing
the equipment with the bottom and rear sides close to
a wall or desk.
3. When installing the equipment in an automobile, en
sure adequate ventilation. Install the equipment in a
location where the rear does not make direct contact
with the seat, and is not directly exposed to vibration.
4. Avoid installing the equipment in front of the car
heater air outlet.
3-1 -2. Power supply
The standard operating voltage of transceiver is 13.8 V.
Do not use a power supply (both fixed and mobile) that
provides over 16 V with the power switch of transceiver
turned off.
Operation under such a condition will void the warranty.
Also, do not use a power supply that does not supply at
least 12V in transmit or receive. Use of such a supply
may cause the performance of the equipment to suffer.
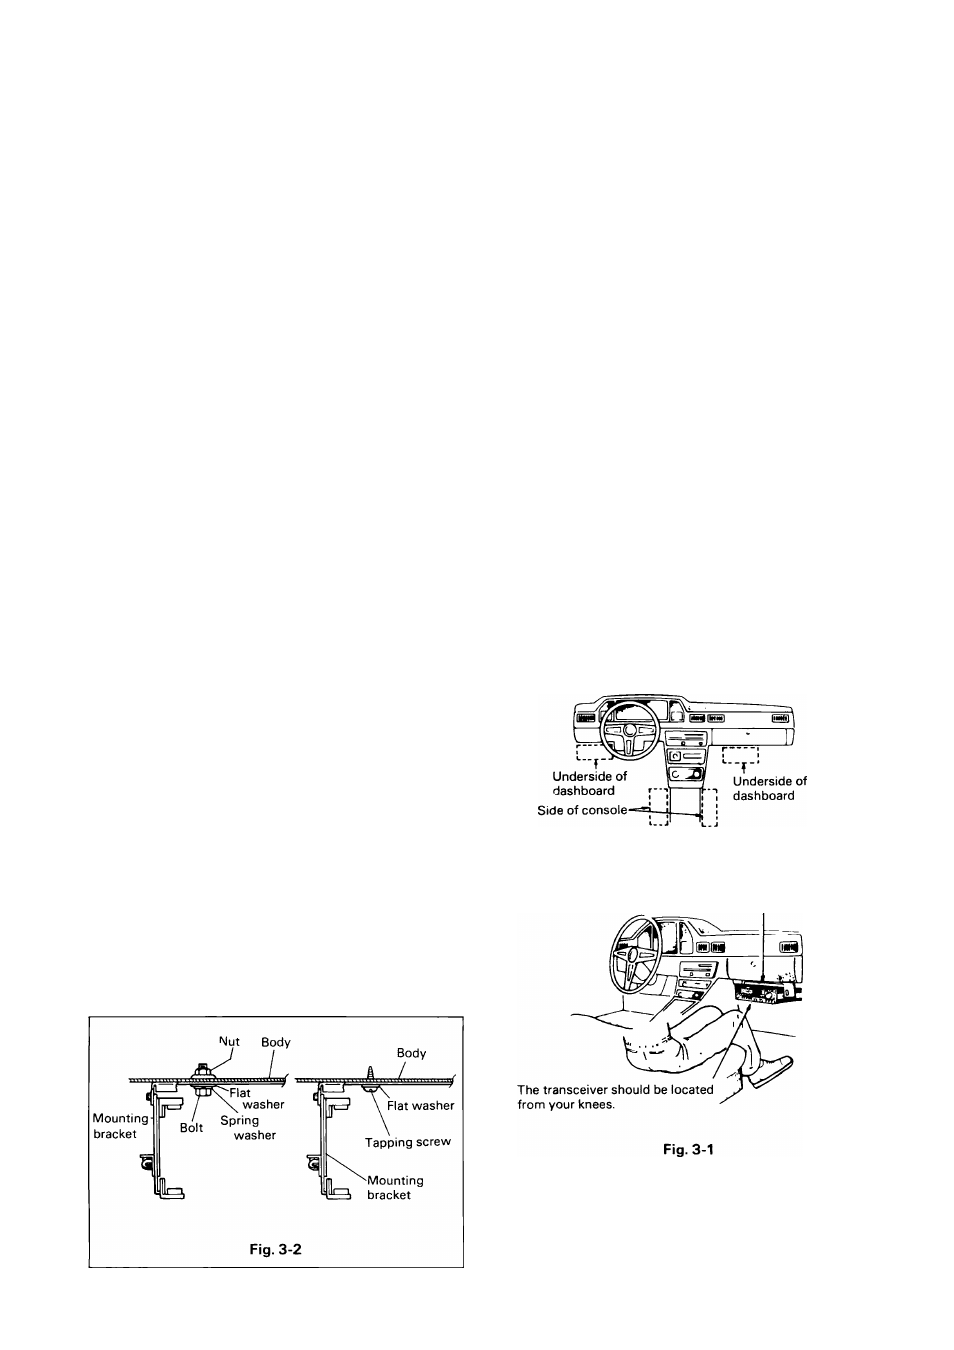
3-1-3. Mounting bracket
Using the supplied mounting bracket, install the trans
ceiver in any convenient location. (Fig. 3-1)
Caution;
Do not install the speaker directly on the transceiver, it
may cause howling. The heat sink provided at the rear of
the transceiver will get hot during long transmission. Do
not install the radio in a position where the heat sink may
come in direct contact with the dashboard. Installation
near heater air outlets should also be avoided.
If your car is equipped with an electronic fuel injection
system, the transceiver should be mounted as far from
the control equipment as possible.
Install the bracket as shown in Fig. 3-2 and Fig. 3-3.
Note:
Do not install backwards.
Drill holes in the bottom of
dashboard. Secure the mounting
bracket with nuts and bolts.