Figure 6.19, Flat style head configuration, Maintenance – AERCO KC1000 Heater w/Mod-Box Controller User Manual
Page 42
MAINTENANCE
37
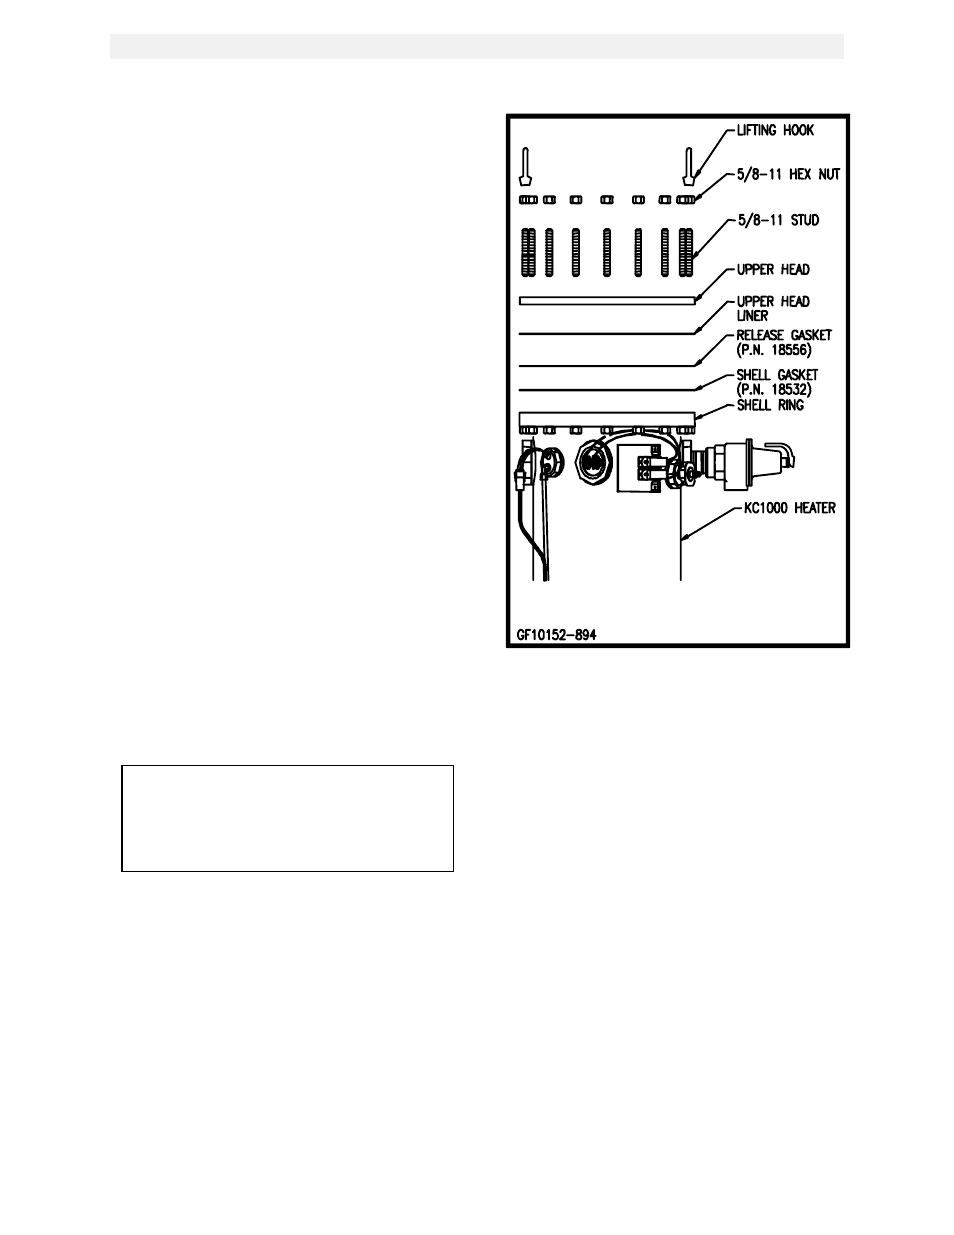
7. Place a shell head gasket on top of the shell
ring first, then place the release gasket on
top of the shell head gasket. Align the
gasket holes with those in the shell ring.
8. Place the upper head liner on top of the
gaskets.
9. Place the upper head on next aligning the
holes.
10. Reassemble the studs and nuts through the
upper head and shell ring. Cross tighten the
nuts to approximately 75 ft./lb. torque to
obtain a uniform seating, then progressively
tighten the nuts to 150 ft./lb.
11. Replace the unit Cap. Close the drain valve
and reopen the inlet, outlet, and recirculation
valves to refill the unit as per Section 2.8.1.
6.9.2 CONCAVE (OLD) STYLE HEADS
To inspect the heat exchanger watersides:
1. Disconnect the electrical power to the unit.
2. Close the inlet, outlet and recirculation
shutoff valves to the unit.
3. Open the drain valve while carefully opening
the relief valve on the right side of the unit
shell to relieve pressure in the shell.
4
Remove the wing nut from the top center of
the shell cap and remove the cap.
CAUTION:
Do not drain the unit without venting the
shell! A vacuum in the unit may displace
the liner reulting in damage not covered
by warranty.
Figure 6.19
Flat Style Head Configuration
5. Remove the nuts and studs from the shell
ring and remove the upper head ring.
Remove the upper head and head liner,
(See Fig. 6.20).
6. Inspect and clean the heat exchanger
thoroughly before reassembling the upper
head.
7. Clean all gasket surfaces thoroughly.
AERCO recommends that NEW gaskets be
used when reassembling the upper head to
the unit shell.