AERCO KC Standard to Low NOx Convertion Instructions User Manual
Page 5
5
4.
Remove the rear covers from the unit.
5.
Remove the condensate cup from under the unit and disconnect the condensate drainage
tube from the exhaust manifold.
6.
Disconnect the flame detector and igniter cable leads from the flame detector and igniter
contactor.
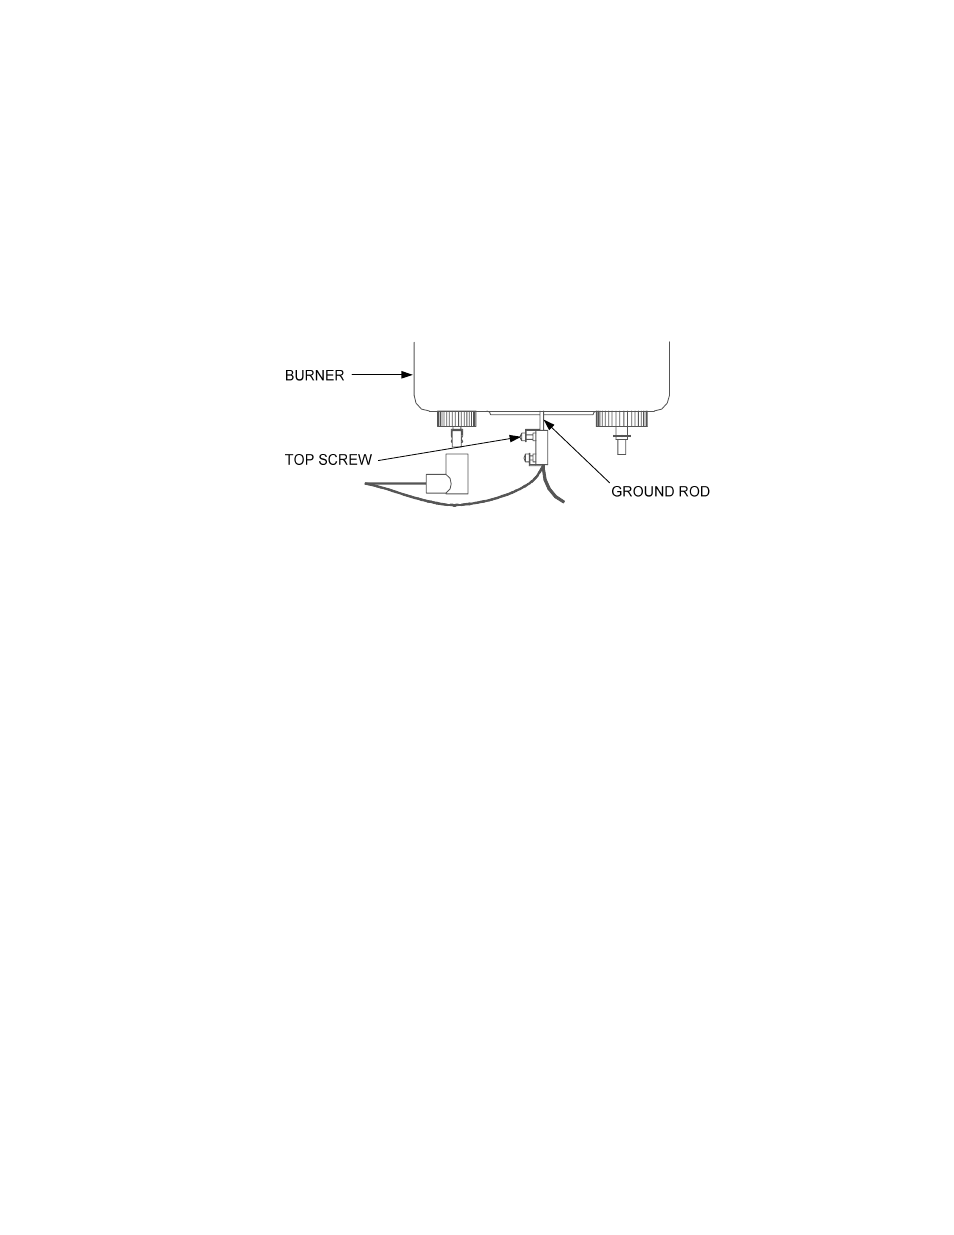
7.
Remove the ground terminal connection from the Burner by loosening the top screw shown in
Figure 2. Slide the connector off the grounding rod.
Figure 2. Ground Terminal Location
8.
Using a 7/16 inch socket or open end wrench, remove the four 1/4 – 20 hex nuts on the gas
inlet pipe flange at the Burner. See Figure 3.
9.
Using two 9/16 inch wrenches, remove the two 3/8” – 16 hex nuts and bolts on the gas inlet
pipe flange at the Air/Fuel Valve (Figure 3). Remove the gas inlet pipe and gaskets from the
unit.
10.
Loosen the hose clamp on the Air/Fuel Valve side of the valve-to-burner air hose as shown in
Figure 3.
11.
Using a 1/2 inch socket wrench, remove the six 5/16 – 18 hex nuts supporting the existing
Burner Assembly (Figure 3).
12.
Lower the Burner Assembly while sliding the valve-to-burner air hose off the Air/Fuel Valve.
Completely remove the Burner from the rear of the unit.
13.
Loosen the hose clamp on the removed Burner Assembly inlet and slide the valve-to-burner
air hose off the Burner. Retain the hose and clamp. These items will be reinstalled in Section
4. The removed Burner Assembly will be replaced with the new Low NOx Burner provided in
the Conversion Kit.