AERCO KC Standard to Low NOx Convertion Instructions User Manual
Page 38
38
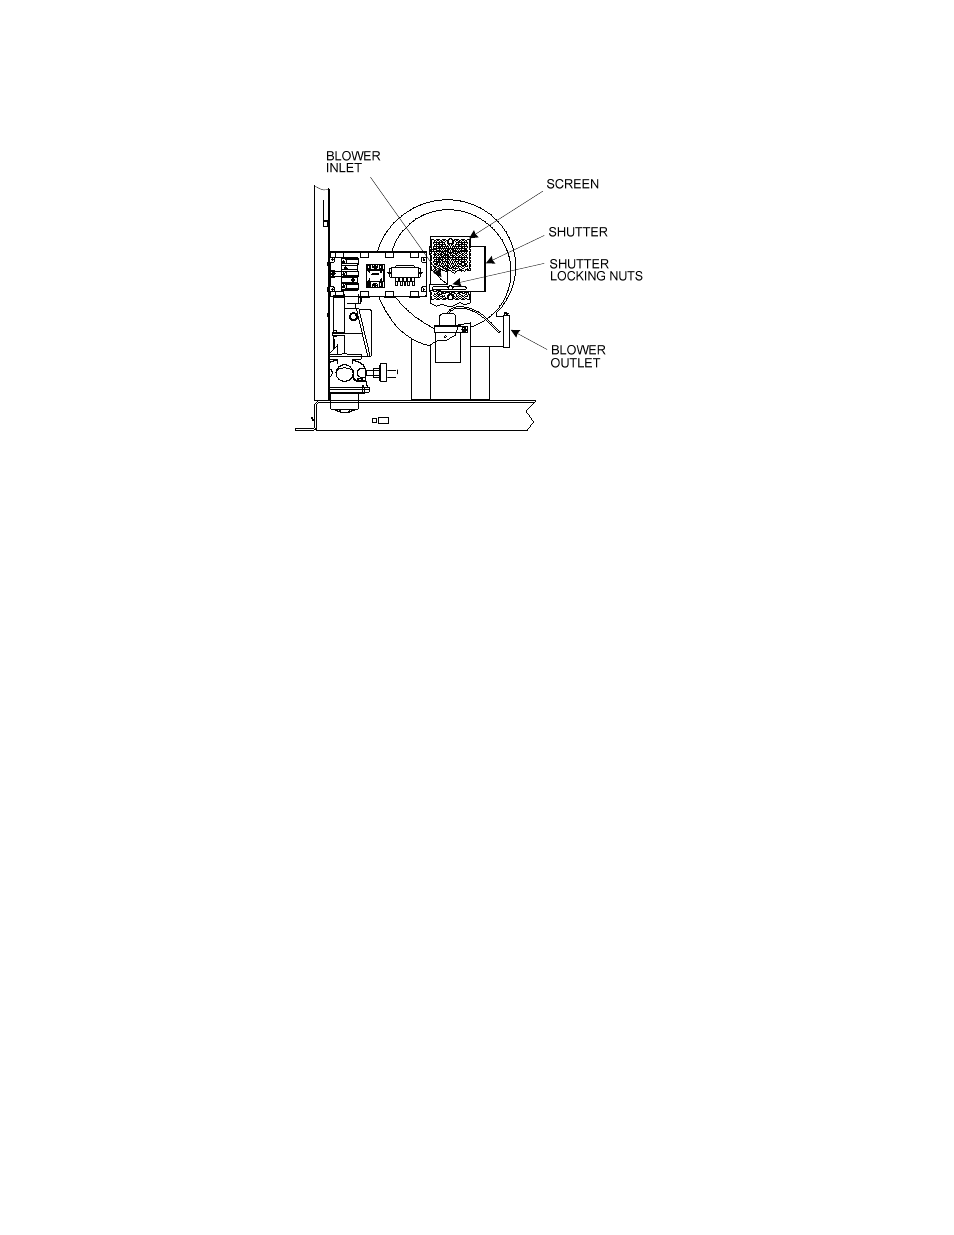
Figure 31. Air Shutter Locking Nut Location
NOTE
At 30% firing rate, adjust only the differential pressure regulator. At 100%
firing rate, adjust only the inlet air shutter.
20.
If the measured oxygen reading is above the oxygen range in Table 3, loosen the two 7/16"
locking nuts securing the inlet air shutter. Close the air shutter 1/4” to 1/2” to decrease the
oxygen level and tighten the two nuts.
21.
Allow the analyzer to settle then compare the new oxygen reading to Table 3.
22.
Repeat the adjustment until the oxygen is within the specified range. Also, ensure that the CO
and NOx readings do not exceed the values shown. Firmly tighten the inlet air shutter locking
nuts when finished.
NOTE
Adjust the inlet air shutter only at 100% firing rate. Do not adjust the
differential pressure regulator.
23.
Change the firing rate to 30%. Allow time for the combustion analyzer to settle. Check the
measured oxygen level, CO and NOx emissions to ensure that they are still within the ranges
shown in Table 1.
24.
Continue these procedures until all oxygen levels are within the ranges specified in Tables 1, 2
and 3.
25.
Record all readings on the AERCO start-up sheet provided with each unit. Proceed to
paragraph 5.5 when all natural gas combustion calibration procedures are completed.