Setting a sensitivity - basic, Fine-adjusting sensitivity, Setting a sensitivity - advanced – KEYENCE PX-10 User Manual
Page 3: Setting a sensitivity – basic, Setting a sensitivity – advanced, Positioning a target (positioning calibration), Percent (%) calibration (page 6, no. 3)
3
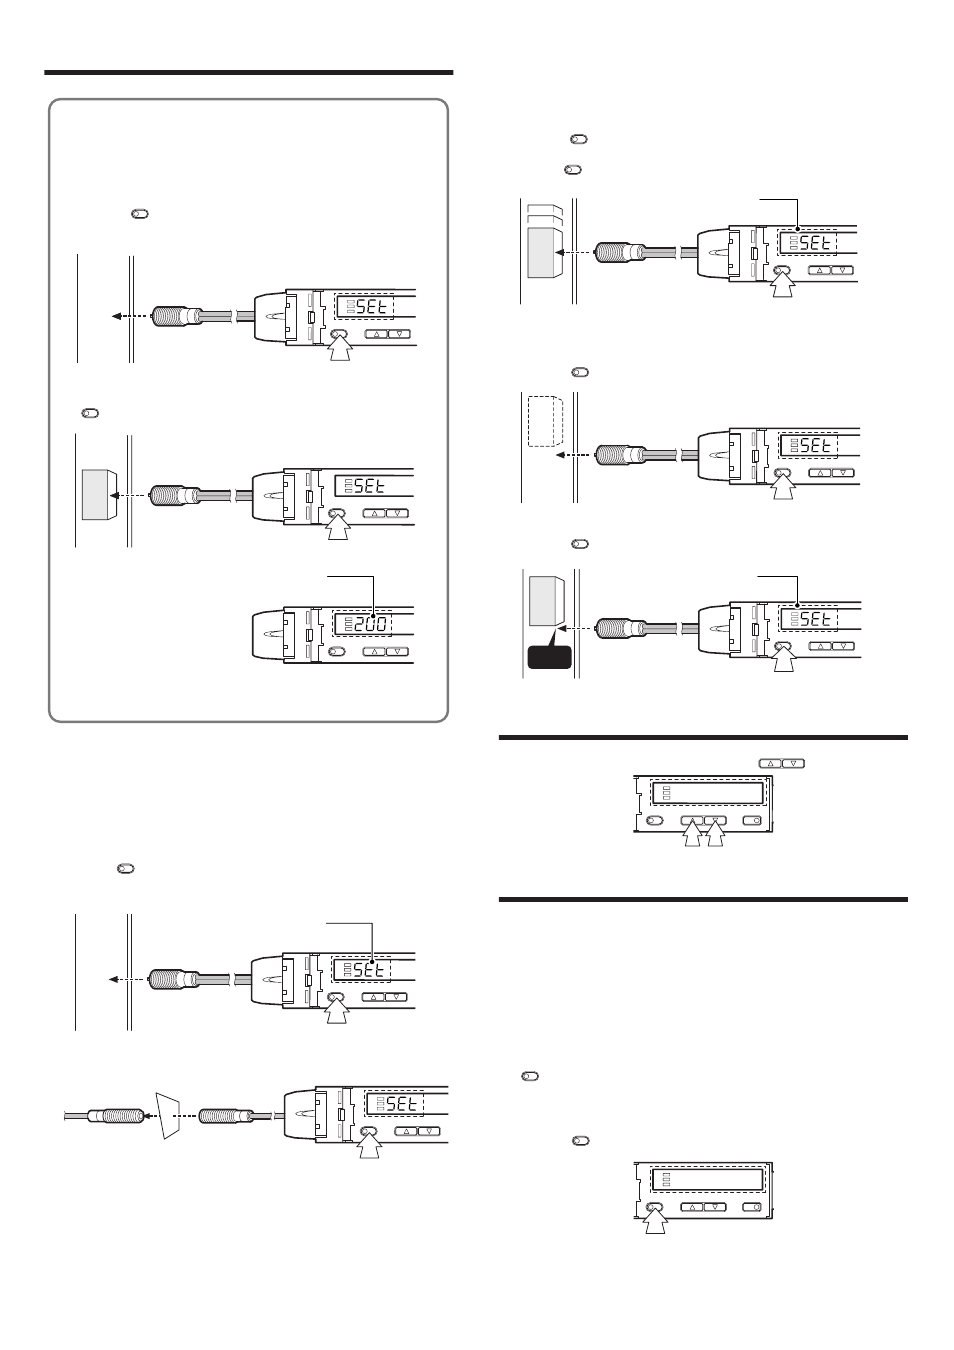
Setting a Sensitivity – Basic –
●
Improving Performance against Dust and
Stains (Maximum Sensitivity Setting)
Set the sensitivity without a workpiece for a reflective type, and with a workpiece
for a thrubeam type. Set the sensitivity slightly higher than the amount of received
light at the setting time.
1
Press the
button for at least three seconds in the state as shown in the
figure below. Release the button when "SET" flashes on the display.
Reflective
Thrubeam
●
Detecting Moving Workpieces
(Full Auto Calibration)
In this mode, the set value will be set to the mean value of the maximum and
minimum values obtained within a certain period.
1
Press the
button for at least three seconds while the target workpiece is
passing the sensing area of the sensor head.
While the
button is pressed, the sensitivity of the sensor will be set
according to the incident values.
●
Positioning a Target (Positioning Calibration)
1
Press the
button without any workpiece placed in front of the sensor
head.
2
Place a workpiece on the position where you want to perform positioning.
Press the
button for at least three seconds. When the indication flashes,
release the button.
Fine-adjusting Sensitivity
The setting value can be changed by pressing the
buttons.
Setting a Sensitivity – Advanced –
●
Setting Sensitivity with Signals from
External Devices (Page 6, No. 6)
By selecting "External calibration" in page 6, No. 6, the signal from an external
device can be used to set the sensitivity.
See "Using External Input" (page 4).
●
Percent (%) Calibration (Page 6, No. 3)
The sensitivity can be set as a percent (%) of received light intensity.
For example, when the percentage calibration target value is set to "-10P", pressing
the
button sets the value to 10% below the amount of received light.
1
When selecting the sensitivity setting method (page 6, No. 3), select percent
calibration, set the target value of calibration, and return to the normal display.
2
Press the
button at the percentage for the desired reference for light
intensity.
•
While percent calibration is selected, other calibrations (sensitivity setting) cannot
be used.
* External input (page 4) can still be used (PX-10/10P only).
●
Most Basic Sensitivity Settings
(2-point Calibration)
In this mode, the setting value used will be the mean value of two light
intensity values obtained through detection with and without a workpiece.
1
Press the
button without any workpiece placed in front of the
sensor head.
2
Place a workpiece placed in front of the sensor head, and press the
button.
If the sensitivity difference is not large enough, "----" flashes for about two
seconds after the calibration is complete. The mean value of the two
detected values is still recorded.
SET
SET
UP/DOWN
SET
SET
UP/DOWN
SET
UP/DOWN
The set value will appear
when the settings are completed.
Wo
rkpiece
SET
SET
UP/DOWN
3 seconds or longer
The set value will appear
when the settings are completed.
SET
UP/DOWN
3 seconds or longer
SET
SET
SET
UP/DOWN
Wo
rkpiece
3 seconds or longer
The set value will appear
when the settings are completed.
SET
SET
UP/DOWN
Wo
rkpiece
SET
SET
UP/DOWN
3 seconds or longer
The set value will appear
when the settings are completed.
Wo
rkpiece
Edge
UP/DOWN
SET
UP/DOWN
MODE
SET
SET
SET
UP/DOWN
MODE