Benutzen der digitalen ein-/ ausblend-funktion, Using the digital fade function – Panasonic NVRX33EG User Manual
Page 78
Attention! The text in this document has been recognized automatically. To view the original document, you can use the "Original mode".
A
3,5
6,8
a
DEUTSCH
Benutzen der digitalen Ein-/
Ausblend-Funktion
Mit der digitalen Ein-/Ausblend-Funktion können Sie Ihre
Videoaufnahmen durch interessante Szenenübergänge
bereichern.
Beim Einblenden erscheint das Bild in der Mitte des
schwarzen Bildschirms und dehnt sich langsam bis zum
Bildrand aus. Beim Ausblenden verschwindet das Bild
langsam vom Bildrand zur Bildmitte hin, bis der ganze
Bildschirm schwarz ist. Der Ton wird zusammen mit dem
Bild langsam ein^ bzw. ausgeblendet, genau wie bei der
normalen Ein-/Ausblend-Funktion. (-> 72)
1
3
4
8
Einblenden O
Die Taste [D.EFFECT^] wiederholt
drücken, bis die Anzeige [D.FADE] im
Sucher erscheint.
Im Modus Aufnahmepause den
Camerarecorder auf die Szene richten,
die Sie aufnehmen möchten.
Die Taste [FADE] drücken und gedrückt
halten.
Wenn das Bild Im Sucher vollständig
verschwunden ist, die Aufnahme-Start-/
Stop-Taste drücken, um mit dem
Aufnehmen zu beginnen.
Ca. 3 bis 4 Sekunden warten und dann
die Taste [FADE] loslassen.
Ausblenden 0
Während des Aufnehmens die Taste
[FADE] an der Stelle drücken, ab
welcher ausgeblendet werden soll, und
weiterhin gedrückt halten.
Nachdem das Bild im Sucher
vollständig verschwunden ist, die
Aufnahme>Start-/Stop-Taste drücken,
um das Aufnehmen zu beenden.
DieTaste [FADE] loslassen.
ENGLISH
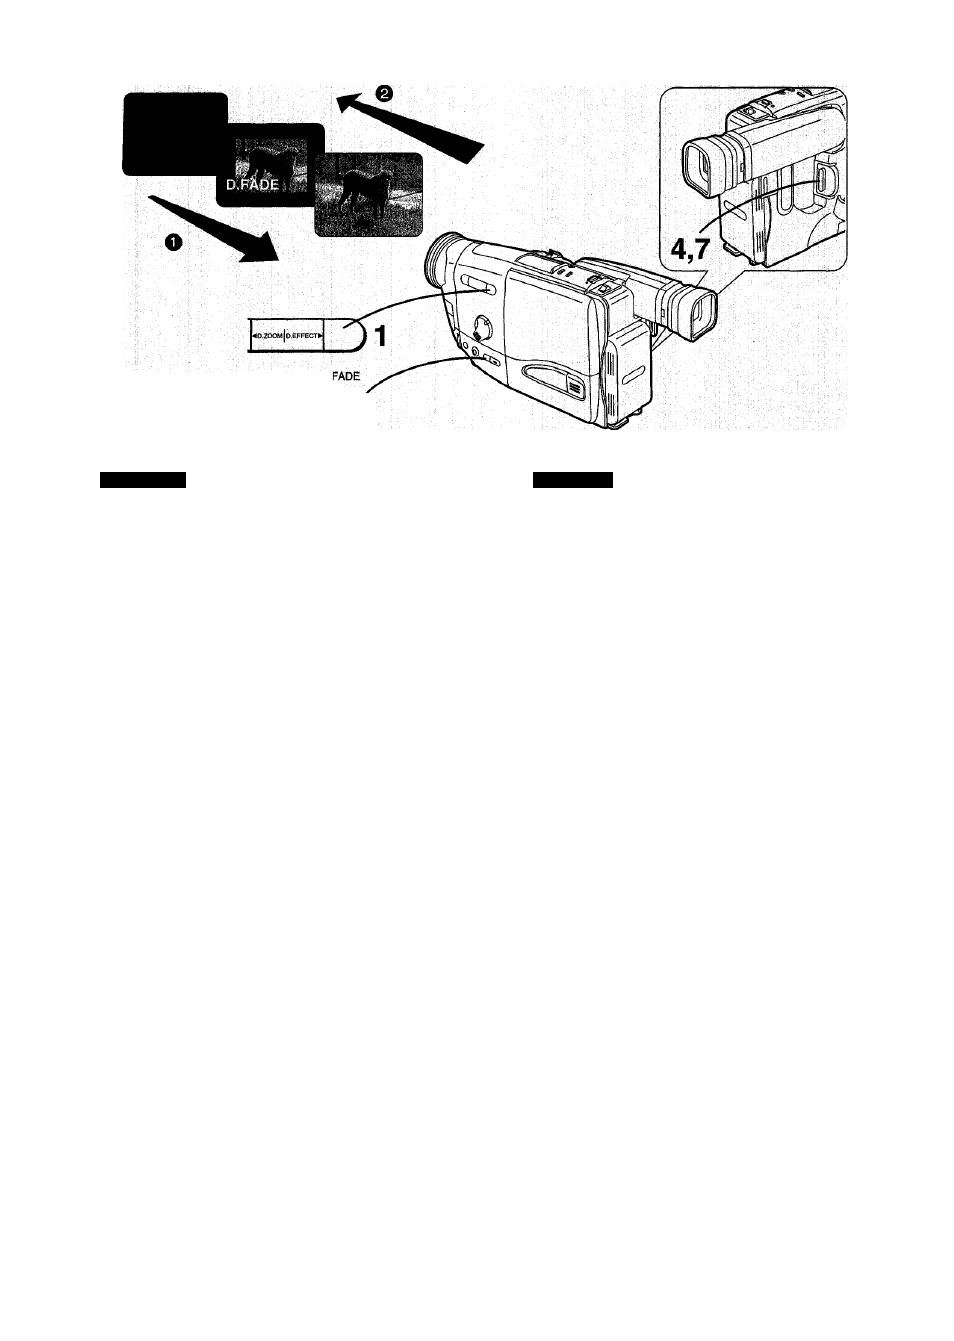
Using the Digital Fade
Function
The Digital Fade Function lets you produce interesting
scene-to-scene transitions.
Fading-in makes the picture appear from a black screen,
starting in the centre and gradually expanding outward.
Fading-out graduaiiy reduces the picture from the outer
edges toward the centre until the whole screen becomes
black. The sound also gradually fades in and out together
with the picture, as in the normal Fade Function. (-♦ 72)
■ Fading In O
1
Press the [D.EFFECTS] Button
repeatedly until the [D.FADE] Indication
appears in the Finder.
2
With the Movie Camera in the
Recording Pause Mode, aim it at the
scene that you want to start recording^
3
Press the [FADE] Button and keep it
pressed.
4
When the picture in the Finder has
completely disappeared, press the
Recording Start/Stop Button to start
recording.
5
Wait 3-4 seconds and then release the
[FADE] Button.
■ Fading Out 0
6
During recording, press the [FADE]
Button at the point where you want to
fade out, and keep it pressed.
7
After the picture in the Finder has
completely disappeared, press the
Recording Start/Stop Button to stop
recording.
8
Release the [FADE] Button.
78