Einstellen von datum und uhrzeit, Setting the date and time, 3,6 osio 4 – Panasonic NVRX33EG User Manual
Page 38
Attention! The text in this document has been recognized automatically. To view the original document, you can use the "Original mode".
r
TRACKING I
3,6 OSiO 4
J SWIFT
SFT
12:30
15.10.1998
HOLIDAY
15.10.1998
' 1
} Hi
©
©
/
15.10.1998
>_________________ _
HOLIDAY
o
12:30 HOLIDAY
15.10.1998
DEUTSCH
Einstellen von Datum und
Uhrzeit
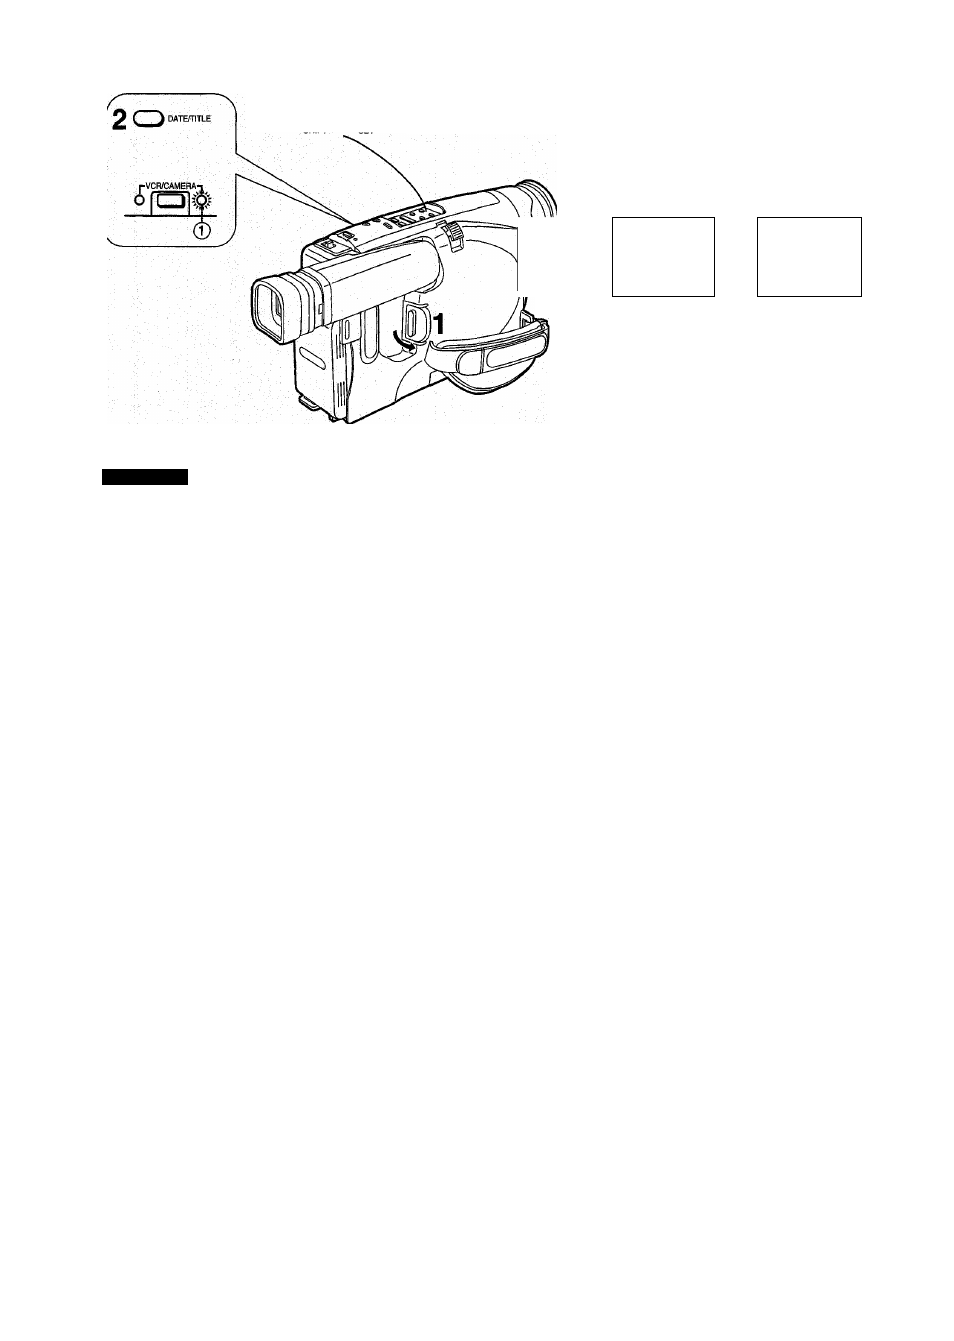
1
Den Schalter [POWER] nach außen
drehen, um den Camerarecorder
einzuschalten.
• Die Anzeigelampe [CAMERA] (T) leuchtet auf.
2
Die Taste [DATE/TITLE] drücken, so daß
die Datums-/Uhrzeit'/Titei-Anzeige im
Sucher erscheint.
•Zum Einstellen von Datum und Uhrzeit darf nicht
die Titelanzeige allein @ im Sucher sichtbar sein.
Wenn die Titelanzeige 0 allein sichtbar ist, eine
andere Datums-/Uhrzeit-/Titel-Anzeige wählen
(0-0). (-»40)
3
DieTaste [DATE/TIME/SHIFT] drücken,
bis der Anzeigeteil für „Jahr“ blinkt.
4
DieTaste [DATE/TIME/SET] wiederholt
drücken, bis das gegenwärtige Jahr
(z.B. 1998) angezeigt wird.
•Die Zahlen in der Datums-ZUhrzeit-Anzeige
ändern sich in folgender Reihenfolge:
Jahr: 1990-^1991-i................. -^2089-» 1990-^...
Monat: 1-»2-^ .................... ^12^1->...
Tag: 1-^2^ ........................ ....^31-^1-^...
Stunde:0^1-> ........... ............ -»23-»0—>...
Minute:00-^01^ .. .......... ....... ->59^00->...
5
Anschließend auch „Monat“, „Tag“,
„Stunde“, „Minute“ einsteilen, wie in
den Schritten 3 und 4 erklärt.
6
Nach beendetem Einsteilen von Datum
und ilhrzeit überprüfen, ob sie korrekt
sind, und dann die Taste [DATE/TIME/
SHIFT] drücken.
• Die Uhr läuft an.
Setting the Date and Time
1 Turn out the [POWER] Switch to turn the
Movie Camera on.
•The [CAMERA] Lamp © lights.
2
Press the [DATE/TITLE] Button to make
the Date/Time/Title indication appear in
the Finder.
•To set the date and time, one of the indications
other than the Title Indication alone 0 shown
above must be displayed. If the Title Indication
alone © is displayed, select another Date/TimeZ
Title indication (Q - O). (-» 40)
3
Press the [DATE/riME/SHIFT] Button
until the “Year” portion flashes.
4
Press the [DATE/TIME/SET] Button
repeatedly until the current year (for
example: 1998) is displayed.
•The figures in the DateZTime Indication change in
the following order:
Year: 1990-»1991-> ............
m
.2089-»1990-»...
Month: 1 ^2-> .......... ............ -s. 12^ 1
Day:
1^.>2
—>
......................^31—^1—>...
Hour: 0->1-»................. ......... ->23->0->...
Minute: 00-»01-^ ..... ............. -»59-»00-»...
5
Also set the^'Month”, “Day”, “Hour”,
“Minute” in the same way as explained
in steps 3 and 4.
6
After you have set the date and time and
confirmed that they are correct, press
the [DATE/TIME/SHIFT] Button.
•The operation of the clock starts.
38