Using the vitc function, Vitc, Notes – Panasonic NV-S99A User Manual
Page 53: Types of user code, T| recording of vitc signals, When selecting “dr-on” for “vitc, Note, When selecting “dr-off” for “vitc
Attention! The text in this document has been recognized automatically. To view the original document, you can use the "Original mode".
Using the VITC Function
■ VITC
As an address (individual number) is recorded for
each frame, it is possible to find the accurate
position of any desired scene or picture on a tape
by checking the address during playback. This
address is called ‘Time Code”.
Since the VITC signals (Vertical Interval Time
Code) are recorded together with the picture
signals (however, in a part that is not visible on the
TV screen), they will not be cancelled even when
the video cassette is taken out from the Movie
Camera or the Movie Camera is switched off. This
makes it possibie to check the precise position of
any desired picture at any time.
Notes:
1 The number indicated In the Viewfinder (Linear
Counter or VITC Counter) is output through the
[NEW EDIT] Socket.
2. Do not switch between the "Linear Counter”
and the “VITC” counter during editing with an
Editing Controller.
3. Be sure to play back the last part of the
recording to initialize the VITC signal and
ensure that the information is recorded onto the
tape after:
(A) Removing and reinserting the Video
Cassette you have been recording on.
(B) Performing REW or FF.
(C) When starting to record midway through a
Video Cassette.
4. As the VITC Counter Indication displayed
during FF or REW is only a rough
approximation of the actual VITC value, it
cannot be used for checking the precise VITC
value (When performing FF or REW without
having performed any playback, the VITC
Counter Indication remains at zero.)
5. When editing with the Editing Controller
VW-ECIO (optional), set the User Code to the
“off mode as explained in paragraph ‘3.6.2
Editing with “Foreign" Time Code’ of its
Operation Manual.
6. To provide a blank leader portion (unrecorded
tape) at the beginning of each video cassette,
film for at least 20 seconds with the Lens Cap
attached to the Lens.
7. Each time you start recording, small jumps may
appear in the time code. Therefore, get into the
habit of always starting the recording approx.
5 seconds before the action you wish to record
actually starts.
R Notes only for Performing VITC Editing
with an Editing Controiler
•During VITC editing with certain editing
controllers, an error message may appear and
prevent further editing. In this case, move the
editing point forwards or backwards approx.
1 second and try to start editing again.
54
■ Types of User Code
By selecting “DR-ON” or “DR-OFF" for “VITC” in
the MENU Mode, it is possible to select the two
types of user code system. For calling up the
MENU screen and selecting “DR-ON” or “DR-OFF
for “VITC”, see the page 36.
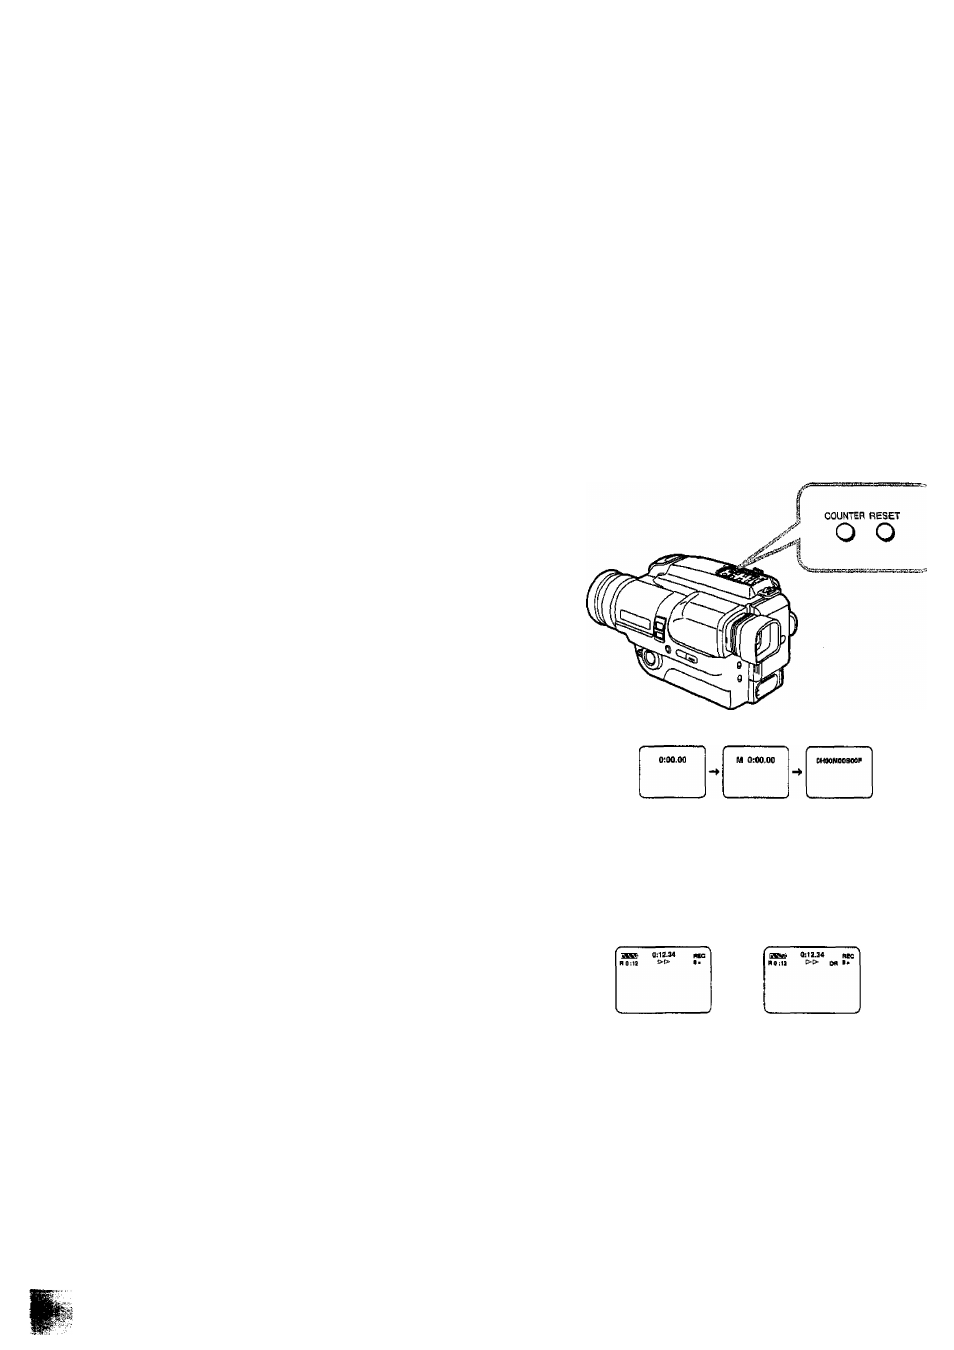
[T|
Recording of VITC Signals
During recording, VITC signals are also
recorded automatically.
•When recording is started from an unrecorded
part of a video tape, the VITC number begins
from OHOOMOOSOOF (Hours, Minutes, Seconds,
Frames).
(1 Frame 1/25 s)
•When recording is started from the end of the
previously recorded part of a video tape, the
VITC number continues from the previously
recorded VITC number.
©
t
To check the VITC number, press the
[COUNTER] Button to make the VITC Counter
Indication appear in the Viewfinder.
■ When Selecting “DR-ON” for “VITC”
•The “DR” mark is displayed in the Viewfinder.
•The camera information and the date/time will
also be recorded.
Note:
When using a VITC editing controller of another
brand than Panasonic to edit a recording made
with “DR-ON” selected for “VITC", accurate editing
may not be possible. To ensure accurate editing
with other brand VITC Editing Controllers, select
"DR-OFF” for “VITC” before recording.
■ When Selecting “DR-OFF” for “VITC”
The camera information and the date/time will not
be recorded, therefore, it cannot be displayed
during playback.