DVR systems IPC User Manual
Page 73
Network Camera User’s Manual
72
Note:
The record parameter configurations vary depending on the camera model.
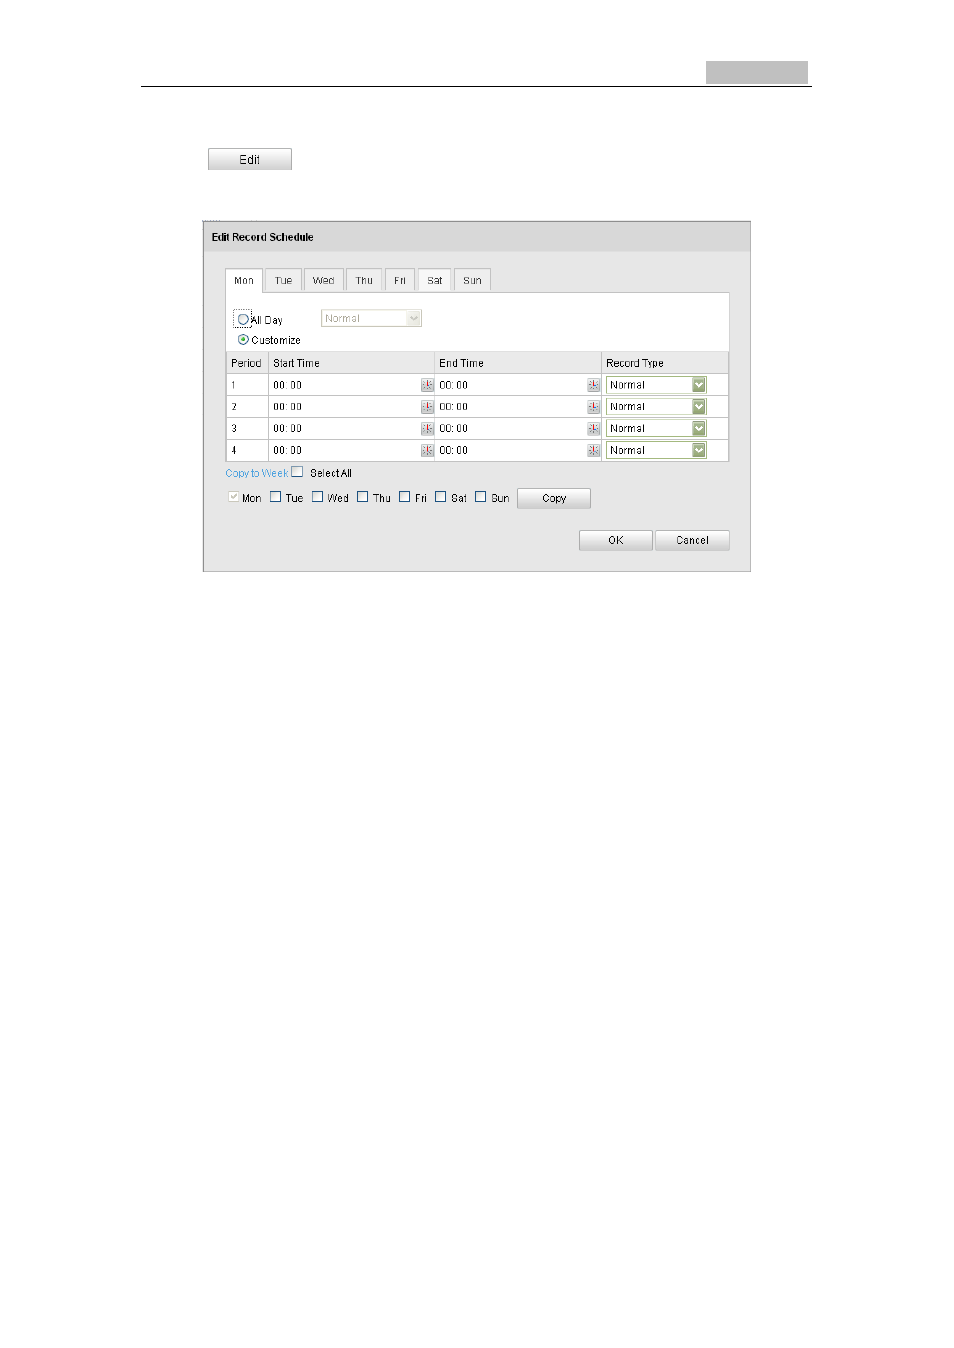
4. Click
to edit the record schedule.
Figure 7-7
Record Schedule
5. Choose the day to set the record schedule.
(1) Set all-day record or segment record:
●If you want to configure the all-day recording, please check the All Day
checkbox.
●If you want to record in different time sections, check the Customize
checkbox. Set the Start Time and End T ime.
Note:
The time of each segment can’t be overlapped. Up to 4 segments can
be configured.
(2) Select a Record Type. The record type can be Normal, Motion Detection,
Alarm, Motion | Alarm, Motion & Alarm, PIR Alarm, Wireless Alarm,
Emergency Alarm, or Motion | Alarm Input | PIR | Wireless | Emergency.
●Normal
If you select Normal, the video will be recorded automatically according to
the time of the schedule.
●Record Triggered by Motion Detection
If you select Motion Detection, the video will be recorded when the
motion is detected.
Besides configuring the recording schedule, you have to set the motion
detection area and check the checkbox of Trigger Channel in the Linkage
Method of Motion Detection Settings interface. For detailed information,
please refer to the Step 1 Set the Motion Detection Area in the Section
5.6.1.
●Record Triggered by Alarm
If you select Alarm, the video will be recorded when the alarm is triggered
via the external alarm input channels.
Besides configuring the recording schedule, you have to set the Alarm Type
and check the checkbox of Trigger Channel in the Linkage Method of Alarm
Input Settings interface. For detailed information, please refer to