2 configuring recording schedule – DVR systems IPC User Manual
Page 72
Network Camera User’s Manual
71
7.2 Configuring Recording Schedule
Purpose:
There are two kinds of recording for the cameras: manual recording and scheduled
recording. For the manual recording, refer to Section 5.3 Recording and Capturing
Pictures Manually. In this section, you can follow the instructions to configure the
scheduled recording. By default, the record files of scheduled recording are stored in
the SD card (if supported) or in the network disk.
Steps:
1. Enter the Record Schedule Settings interface:
Configuration > Advanced Configuration> Storage > Record Schedule
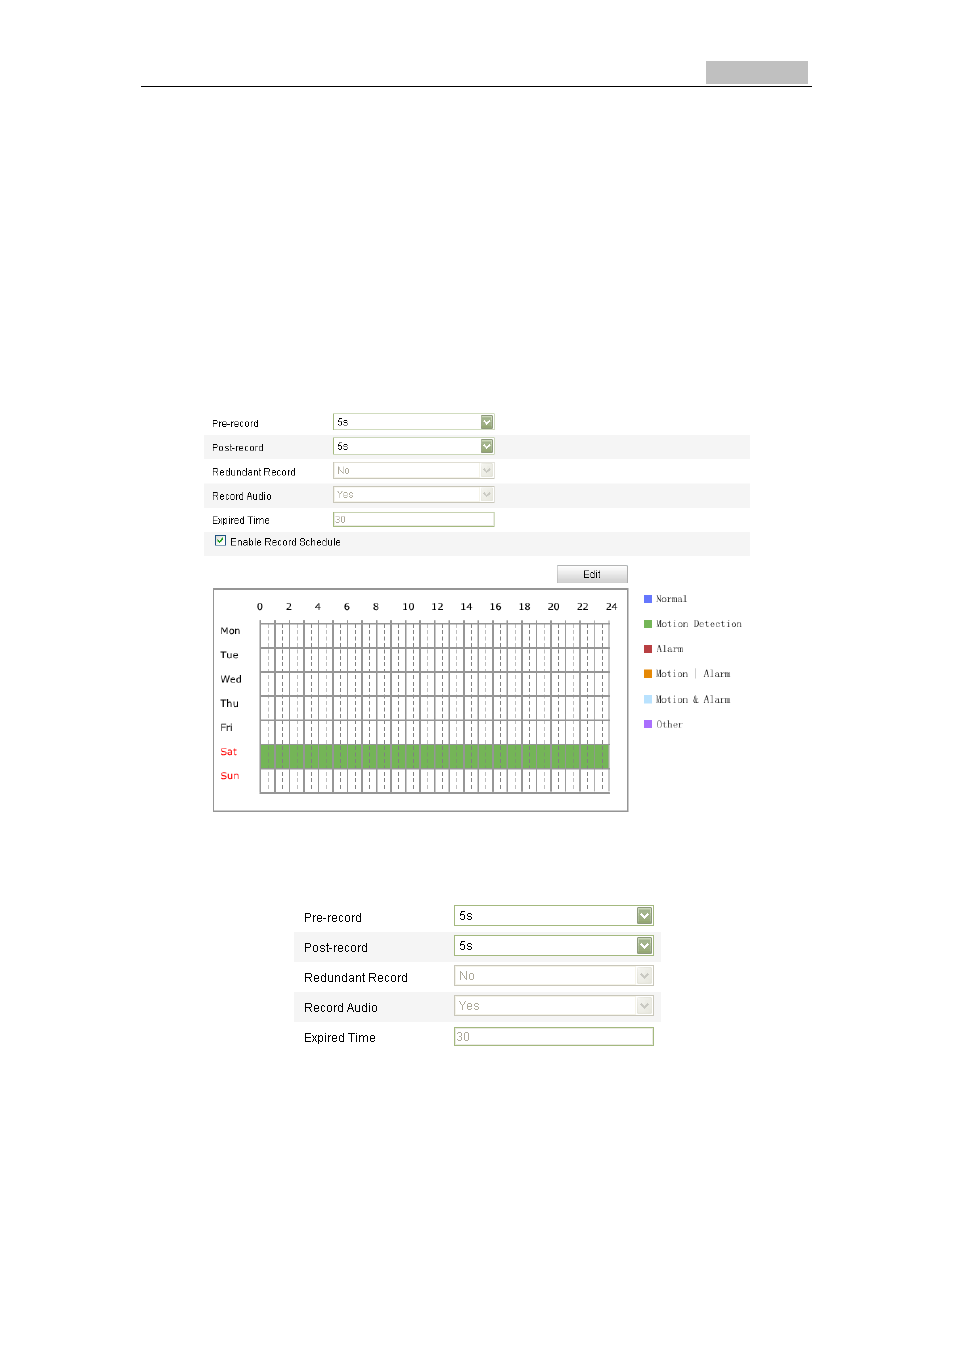
Figure 7-5
Recording Schedule Interface
2. Check the checkbox of Enable Record Schedule to enable scheduled recording.
3. Set the record parameters of the camera.
Figure 7-6
Record Parameters
●Pre-record: The time you set to start recording before the scheduled time or
the event. For example, if an alarm triggers recording at 10:00, and the pre-
record time is set as 5 seconds, the camera starts to record at 9:59:55.
The Pre-record time can be configured as No Pre-record, 5 s, 10 s, 15 s, 20 s,
25 s, 30 s or not limited.
●Post-record: The time you set to stop recording after the scheduled time or
the event. For example, if an alarm triggered recording ends at 11:00, and the
post-record time is set as 5 seconds, the camera records until 11:00:05.
The Post-record time can be configured as 5 s, 10 s, 30 s, 1 min, 2 min, 5 min
or 10 min.