Replace all the screws – Elecraft K144XV Manual User Manual
Page 17
17
Turn the K3 off, then on again while watching the status LED on the K144XV module. It should flash once
or twice when power is applied. That indicates normal operation. If it does anything else, refer to Status Light on
page 19.
Turn to Frequency Calibration on page 19 and follow those instructions enter the calibration data on the
K144XV module top cover label into the K3’s configuration menu.
After confirming your K144XV is operating normally, we strongly recommend you
check the Elecraft web site (
www.elecraft.com
), download and install newer K144XV
firmware if available. You can check the version of your K144XV firmware and install
updates as described in Using External Transverters with the K144XV
The K144XV may be used with higher-frequency converters and the KXV3 interface will provide band data to
control the external transverter. The
CONFIG:XV1 ADR
menu selects the band data to be sent. The default for
the K144XV is
Int. Trn0.
Int. Trn0
through
Int. Trn9
provides band information for external transverters. See
Band Data in the K3 Owner’s manual for details about the data signals.
Firmware Updates on page 20.
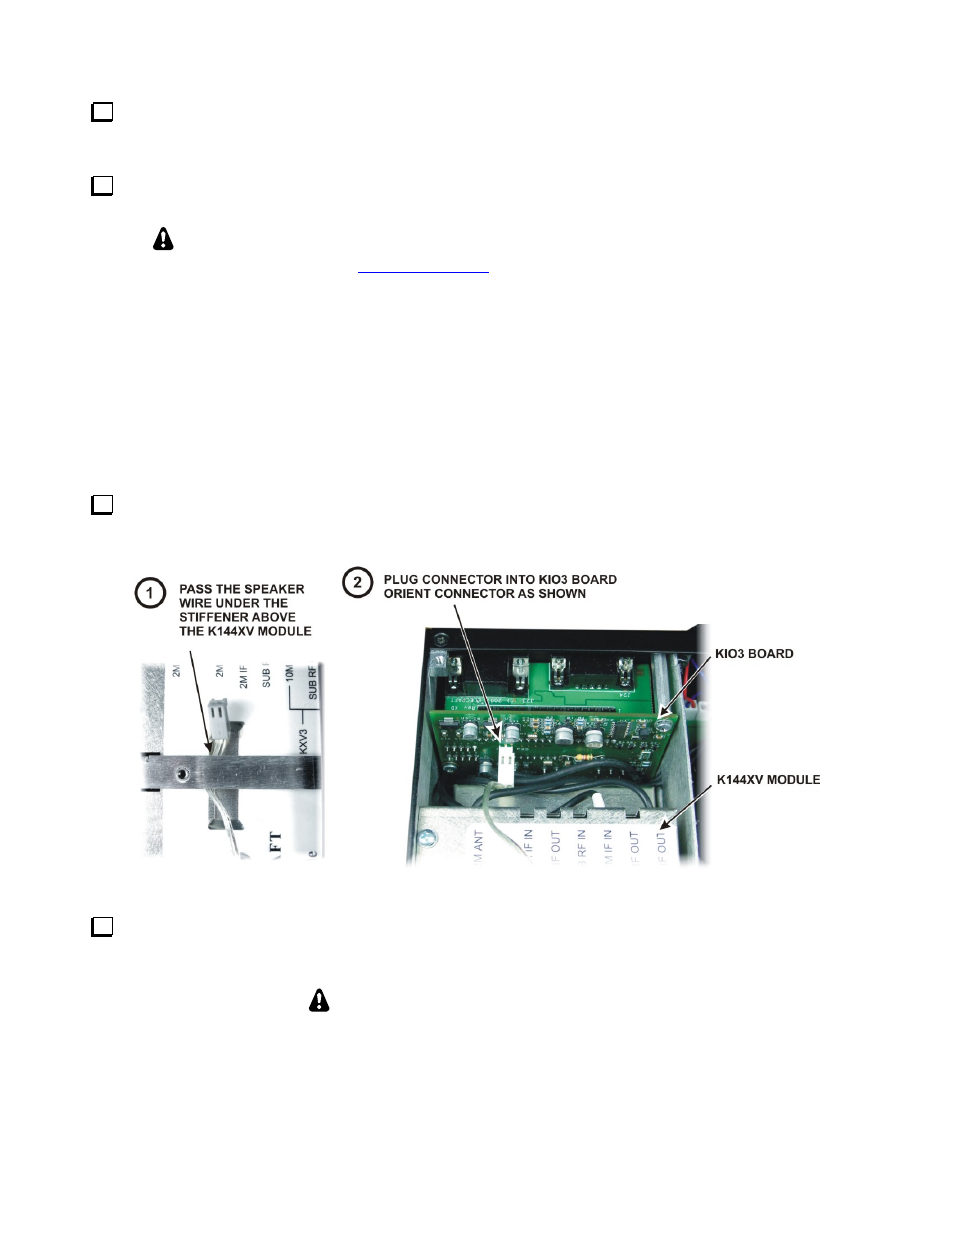
Replacing the Top Cover
Hold the top cover above the K3, route the speaker wire under the stiffener bar. Route it under the stiffener
bar at the depression in the top of the K144XV module as shown in Figure 11 and plug it into P25 on the KIO3
board at the left rear of the K3.
Figure 11. Connecting the Speaker Cable.
Position the top cover on the K3. Note that the tab on the back center goes under the rear lip of the K3 rear
panel. Secure the top cover with the nine 4-40 3/16” (4.8 mm) black flat head screws you removed earlier (see
Figure 1 on page 9 for the screw locations).
REPLACE ALL THE SCREWS!
The K3's chassis has excellent rigidity despite its light weight. The screws that hold the top
cover in place are an important part of the structural design. Please be sure to replace all the
screws and verify they are tight whenever you replace the cover or other panels