Elecraft KX3 Assembly Manual User Manual
Page 16
14
Verify that you placed a lock washer between the 4-40 standoff and the pc board as shown in Figure 13.
Inspect the front of the display for smudges or dust. Remove smudges by wiping it gently with a soft cloth.
Blow off any dust.
Locate the plastic bezel and inspect it for dust or smudges. If necessary, you can wash it with mild dish
soap. Dry it with a soft cloth to avoid scratches.
Place the front panel over the CP board as shown in Figure 14. You will need to reach under the CP board
and lift it up into position with the four encoders through the corresponding holes in the front panel. While
positioning the CP board:
Be sure all of the switch covers are aligned in the holes so you can feel each switch operate when
pressed. All of the switches should stand slightly above the panel.
Verify that all four LEDs are aligned with the holes in the front panel.
No hardware is used on the four encoder shafts.
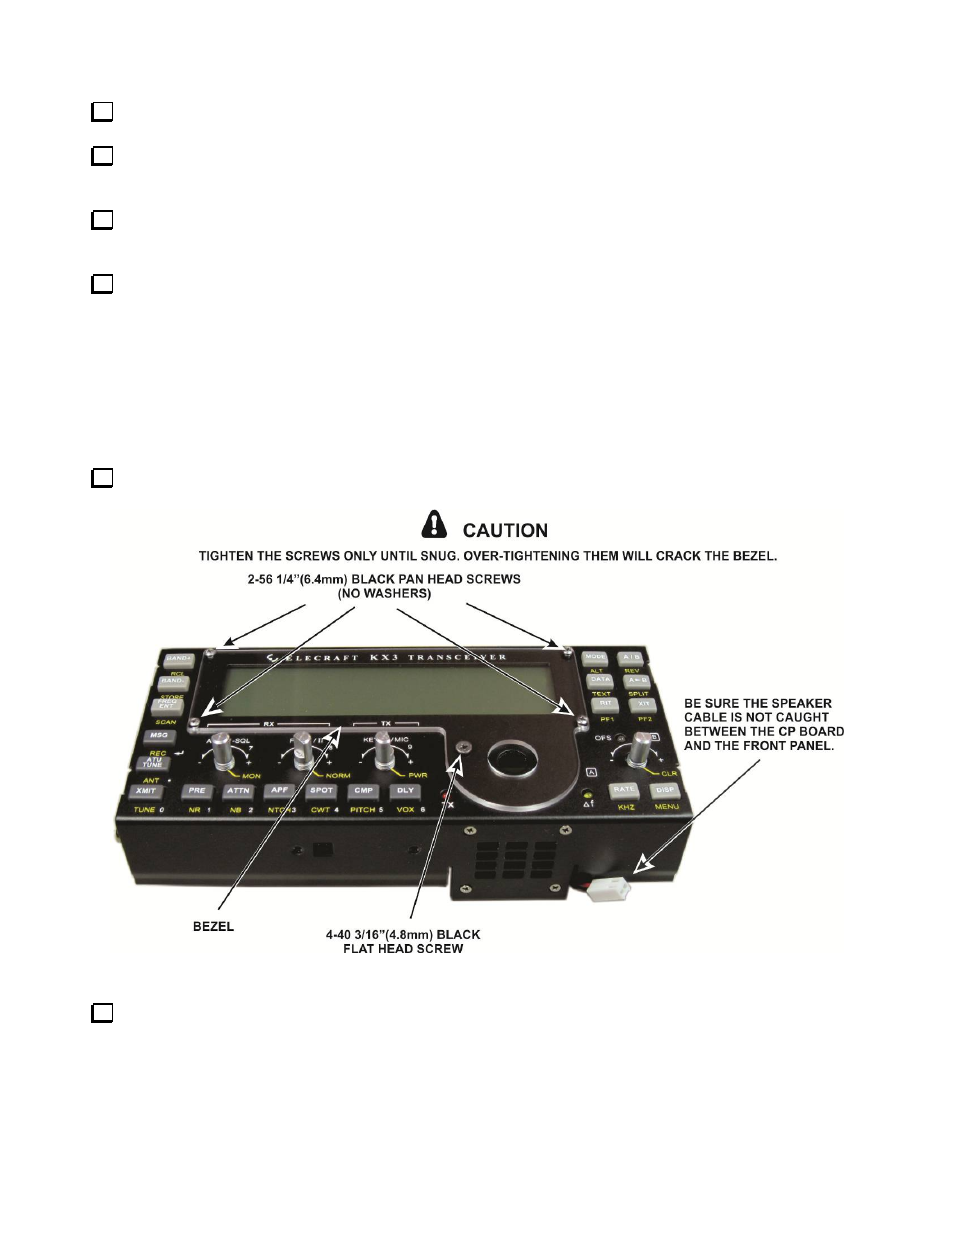
Place the bezel on the front panel and secure it, and the CP board inside, as shown in Figure 14.
Figure 14. Placing the CP Board in the Front Panel.
Test all of the front panel pushbutton switches to ensure they move easily in the panel openings without
binding. If any do bind, loosen the bezel screws as needed to adjust the rubber so it will move freely, and then
retighten everything.