Hood upgrade, Assembling the hood, Assembling the hood -27 – Dynojet 150: Eddy Current Brake User Manual
Page 33: Figure 1-36: dyno hood side panel
E D D Y C U R R E N T B R A K E I N S T A L L A T I O N
Hood Upgrade
Version 8
Eddy Current Brake Installation Guide
1-27
. . . . . . . . . . . . . . . . . . . . . . . . . . . . . . . . . . .
HOOD UPGRADE
Use the following instructions to assemble and install the hood upgrade or to attach
the eddy current brake cover to your existing hood.
A
SSEMBLING
THE
H
OOD
1
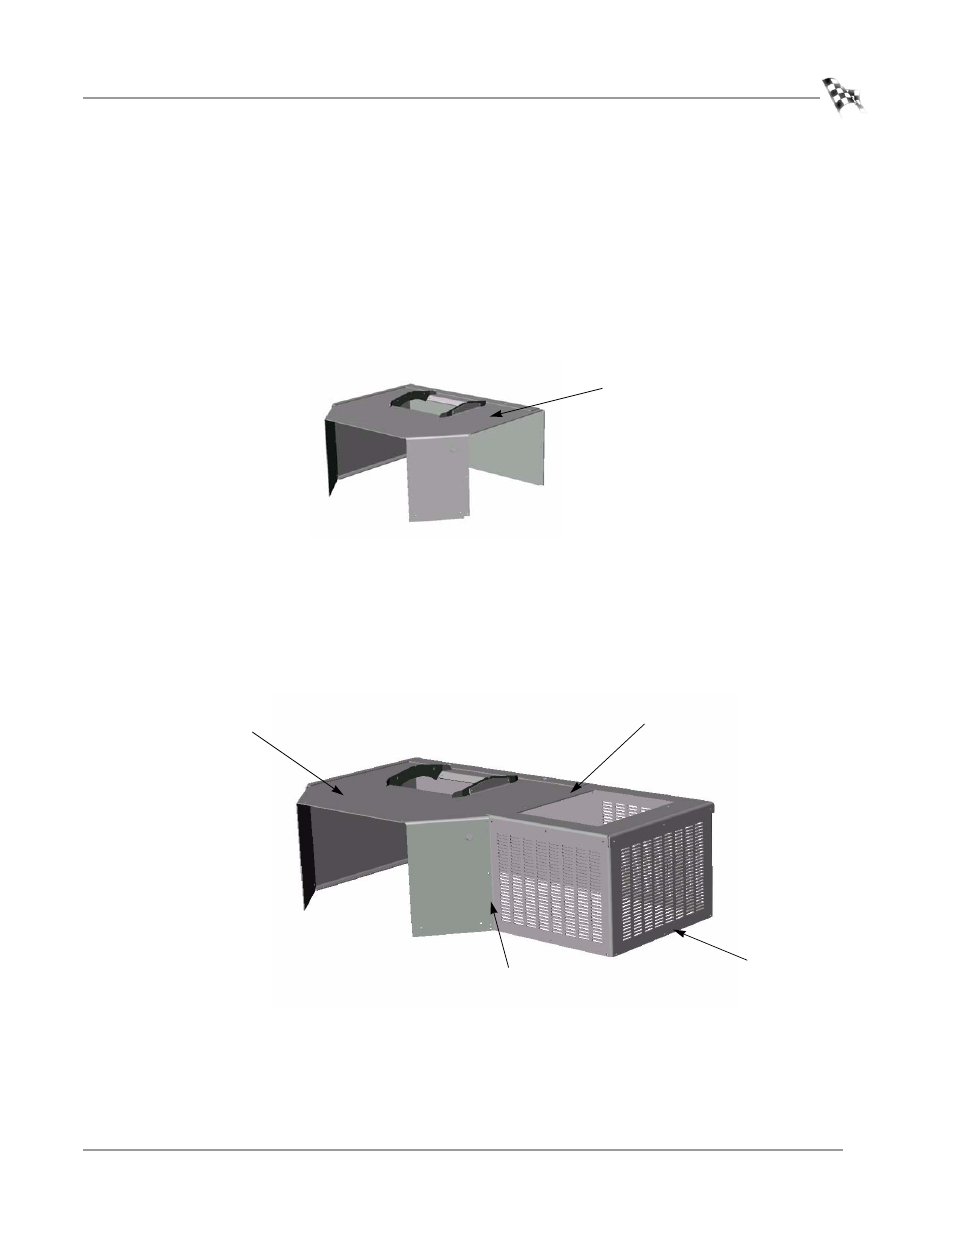
Verify that the dyno hood side panel is on the correct side for your eddy current
brake. You may have to remove the side panel and move it to the opposite side for
your particular installation.
Figure 1-36: Dyno Hood Side Panel
2
Place the eddy current brake cover in position next to the dyno hood.
Note: Place the front and rear flanges of the eddy current brake cover on the
inside of the dyno hood. Place the top flange of the eddy current brake cover on
top of the dyno hood.
3
Secure the eddy current brake cover to the dyno hood using the six 1/4-inch
button head screws and locking nuts.
Figure 1-37: Secure Eddy Current Brake Cover to Dyno Hood
dyno hood set up for left side
installation
eddy current brake cover flange on
top of the dyno hood
eddy current brake cover flange on the
inside of the dyno hood
eddy current
brake cover
dyno hood