Image adjustments continued on next page, Adjusting projected image – Copernicus IS702 User Manual
Page 38
IS600-IS700 Series - Version B - December 16, 2013 - Copernicus Educational Products Inc.
X
X
X
X
Image Adjustments
continued on next page...
Before you start
Plug a computer/laptop into the projector.
Verify that the computer’s resolution matches the projector’s resolution:
When the projector turns on, the desired resolution is posted on the screen.
Make sure the image is in the right ratio, 4:3 for SB640 and SB660, 16:10 for
Copernicus Magnetic Dry Erase Board
i. some projectors are built with a native resolution of 16:10 for widescreen
ii. change resolution in projector menu setting by going into computer's Control
Panel, under “Display” to change settings to match projector resolution
27
Projected
Image
Projector
1
2
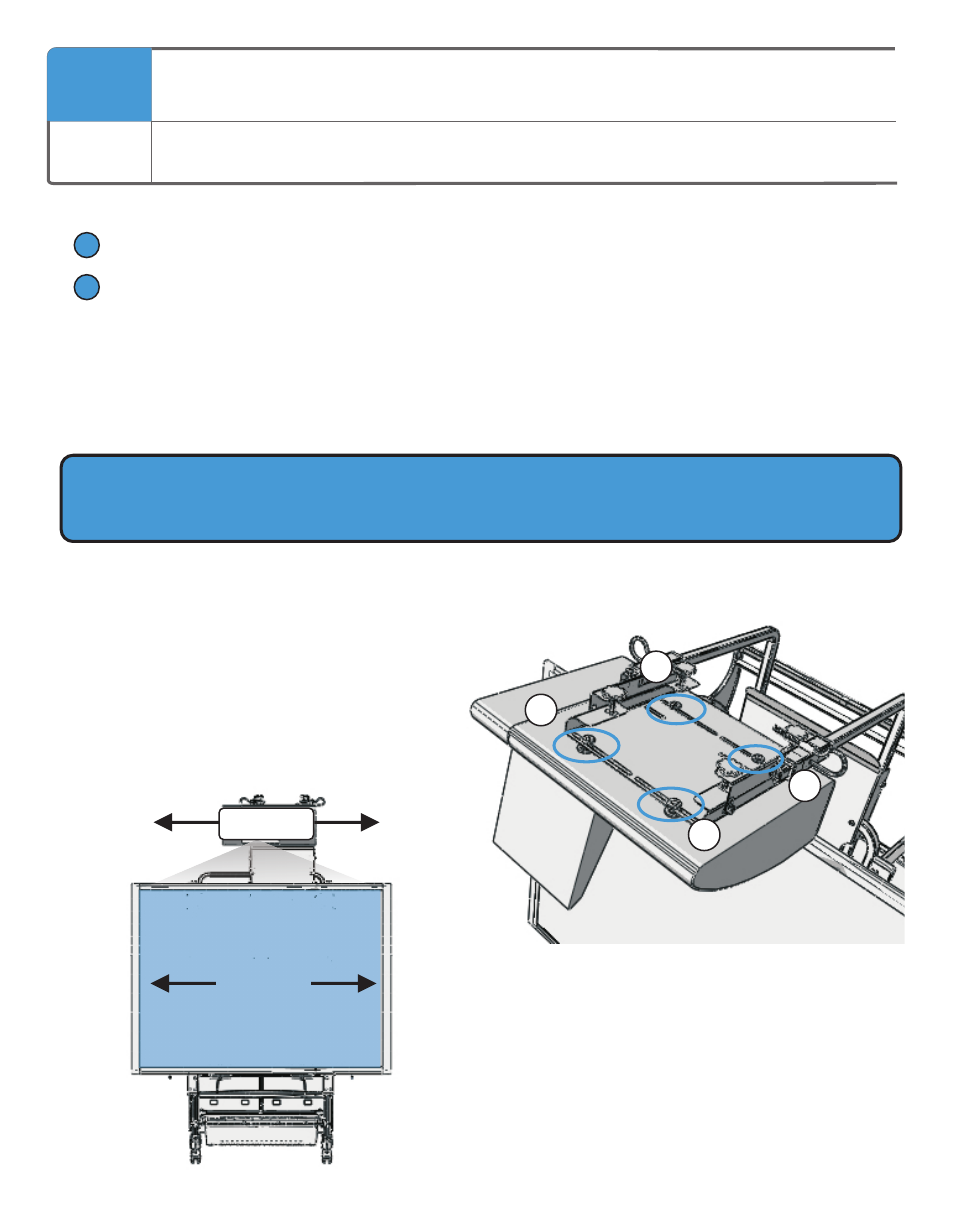
Horizontal Shift - Centering the Image
To shift the projected image from left to right:
Slightly LOOSEN Hardware Items ‘X’ (shown)
in FOUR locations
Slide projector from left to right until the
image is centered
Re-tighten all FOUR bolts
HITACHI ONLY:
Execute all following steps to align the lower left corner of your image with the board and then use
the Perfect Fit feature on the projector to align the other three corners.
Adjusting Projected Image
38