Copernicus IR400 User Manual
Page 21
Epson_CART - Version 2012_A - May 8 2012 - Copernicus Educational Products Inc.
You will need:
(not to scale)
11
Partially threaded M8
x 95mm bolt 1x
F
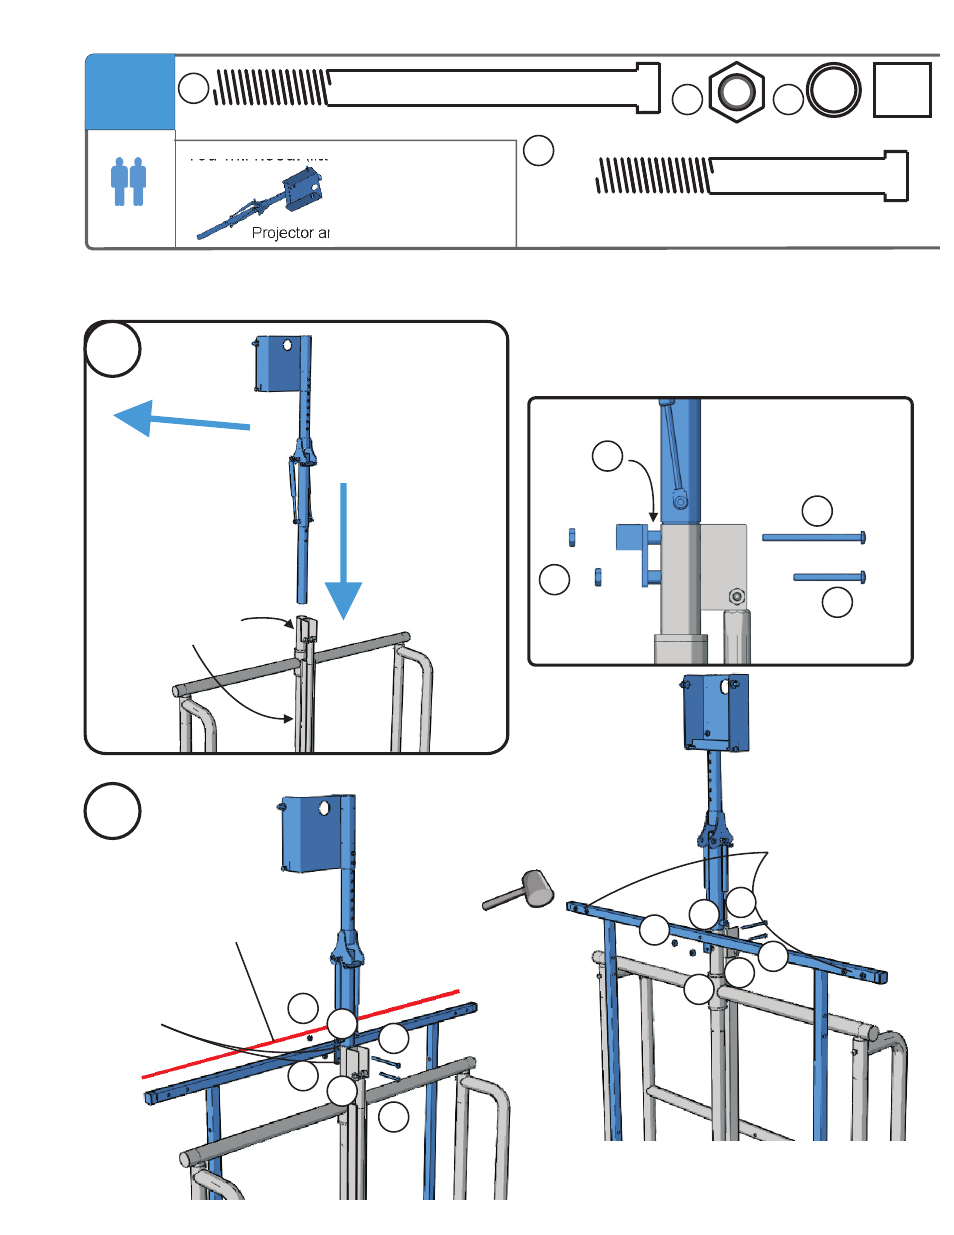
Install Board Mounting Frame - Top & Projector Arm Support
Projector arm support x 1
Note orientation
of arm - ensure
it is toward the
front.
Slide projector
arm support
into center
slide pole.
2
3
Rear
Front
Spacer
item T
Ensure welded nuts
are facing
toward the front.
!
Insert bolts through the
projector support arm, shock bracket
and board mounting frame - top.
Tap in with a rubber mallet if necessary.
2-Person Task
front
side
Partially
threaded
M8 x 65mm bolt 1x
E
M8 lock
nut 2x
R
Large
spacer 2x
T
F
E
T
R
T
R
F
E
T
R
Ensure frame is level
before tightening!
!
You must remove
the temporary bolt
and detent pin to
install the arm support.
T
R
Side View
E
T
R
F
E
21