Inserting slides, Inserting portrait orientation slides, Inserting landscape orientation slides – Nikon LS-10 Installation Guide for Macintosh User Manual
Page 48: Inserting portrait orientation slides l, Inserting landscape orientation slides l
Attention! The text in this document has been recognized automatically. To view the original document, you can use the "Original mode".
Chapter 4
Basic Operation
Inserting Slides
Now that you understand how to prepare your film, determine whether it is a
portrait or landscape image, and identify its emulsion side, you are ready to insert the
slide for scanning. The slide is inserted into Coolscan in much the same way as a floppy
diskette is inserted into a disk drive. First, determine the proper orientation for inser
tion by using the guidelines below. Then, insert the slide into the slot in the front of
the scanner, gently pushing the slide in as far as it will go,
without forcing it.
The slide
will be difficult to grasp once properly inserted.
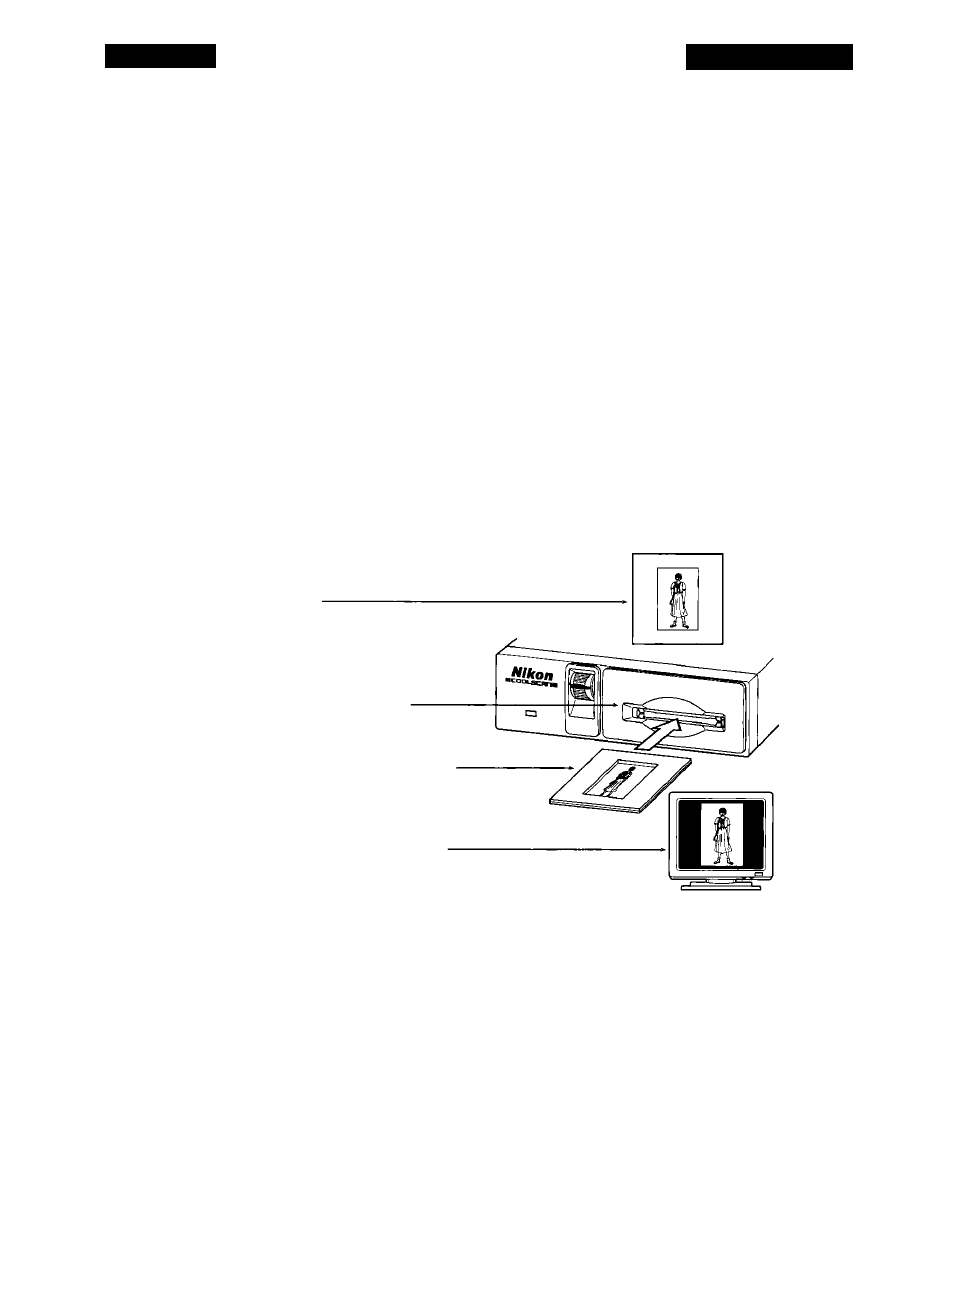
Inserting Portrait Orientation Slides
If the film is in a portrait otientation, determine the emulsion side of the film and
ensure that this side of the film faces towards the top of the scanner. Insert the slide into
the scanner with the top of the image entering into the scanner first. This is shown in
Figure 4.9.
(a) Image on film
is in a portrait
orientation
Coolscan front
panel film slot
(b) Film inserted narrow side
first when the image on the
film is in a portrait orientation
(c) Resulting image on
monitor is oriented
correctly
Figure 4.9
Inserting film into Coolscan that is in a portrait orientation.
If the bottom of the image inserted first, the resulting scan will be upside-down.
This can be corrected in the scanning software before the final scan by performing a ver
tical flip. This operation is fast and causes absolutely no loss of image quality.
Inserting Landscape Orientation Slides
If the film is in a landscape orientation, determine the emulsion side of the film
and ensure that this side of the film faces the top of the scanner. Insert the slide, making
Nikon
Coolscan Installation Guide for Macintosh
Page 41