Setting the scsi id-ls-10e, Setting the scsi id-ls-10, Setting the scsi id - ls-loe – Nikon LS-10 Installation Guide for Macintosh User Manual
Page 24: Setting the scsi id - ls-10, Scsi id number indicator to, The scsi id number. conversely, push the, Button to, Scsi id number
Attention! The text in this document has been recognized automatically. To view the original document, you can use the "Original mode".
Chapter 3
The SCSI Interface
Setting the SCSI ID-LS-10E
If necessary, rhe SCSI ID number of the LS-IOE can be set via a switch on the
back of the scanner, as shown in Figure 3.1. Simply push the button
above x\\t
SCSI ID
number indicator to
decrement
the SCSI ID number. Conversely, push the
lower
button
to
increment tint
SCSI ID number.
Top Button
(push to decrement) ■
SCSI ID Switch------------------
SCSI ID # Indicator-------------
Bottom Button-------
(push to increment)
SCSI ID
Figure3.1
SCSI ID switch on the rear of Coolscan - LS-IOE.
Please proceed to the section “Terminating the SCSI Chain.”
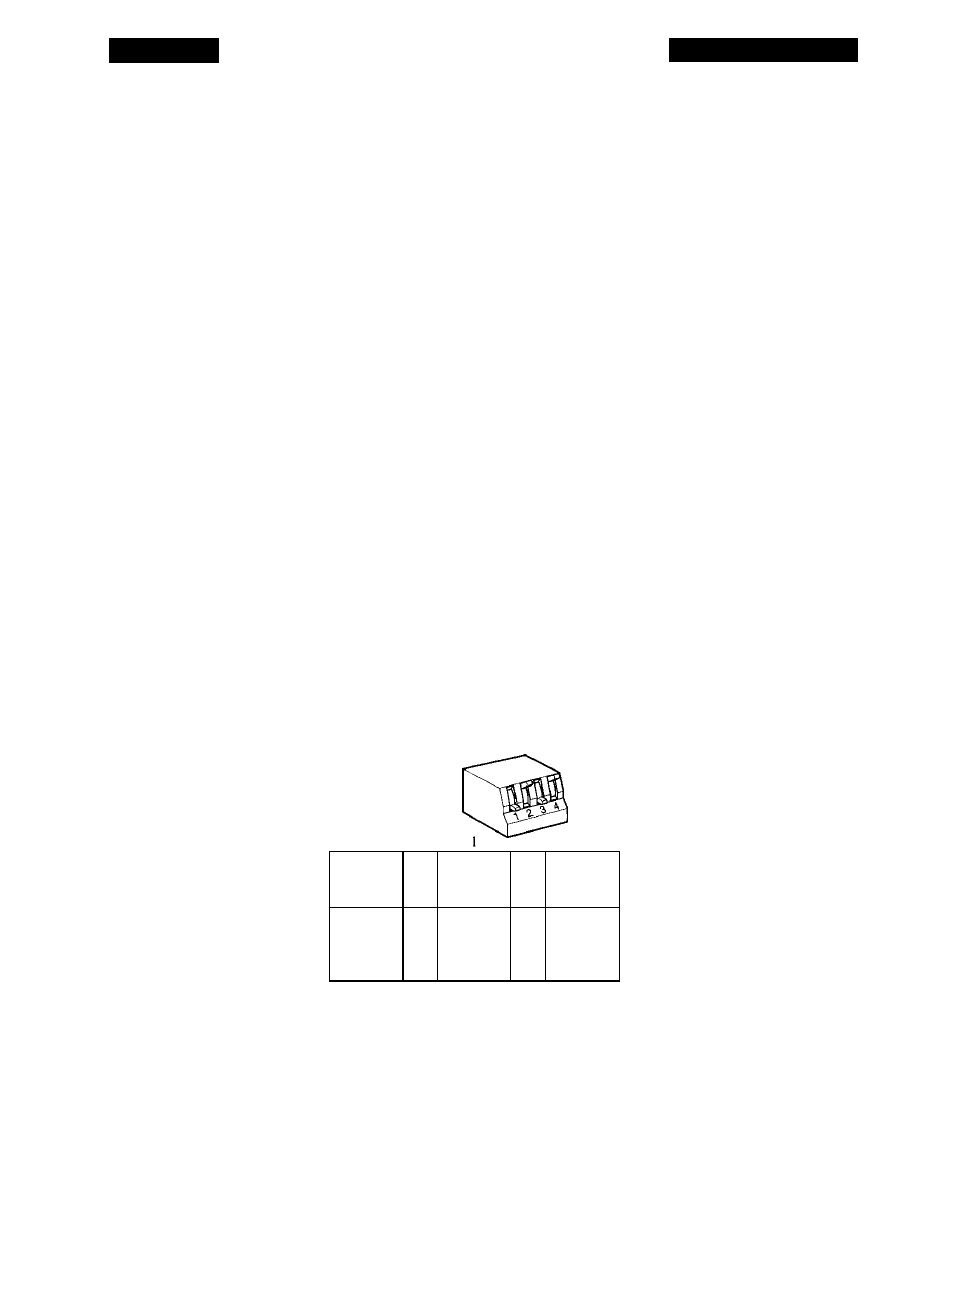
Setting the SCSI ID-LS-10
If necessary, the SCSI ID number of the LS-10 can be set via the block of config
uration DIP switches on the back of the scanner, as shown in Figure 3.2. For most
installations, these configuration DIP switches will not require changing.
Configuration DIP
Switch --------------
Typically reserved
for computer ------
OFF
Factory default
oN
for Coolscan ---------
1
i'
5
j
OFF
ON
Figure 3.2
Configuration DIP switch block on the rear of Coolscan - LS-10.
To change the positions of the configuration DIP switches to the desired SCSI ID
number, use Table 3.2 for proper switch positions. Use a small pointed instrument to
toggle the switches, such as a very small screwdriver. It is not recommended to use a
Nikon
Coolscan Installation Guide for Macintosh
Page 17