Installing the cooling shroud – Dell DX6000 User Manual
Page 104
104
Installing System Components
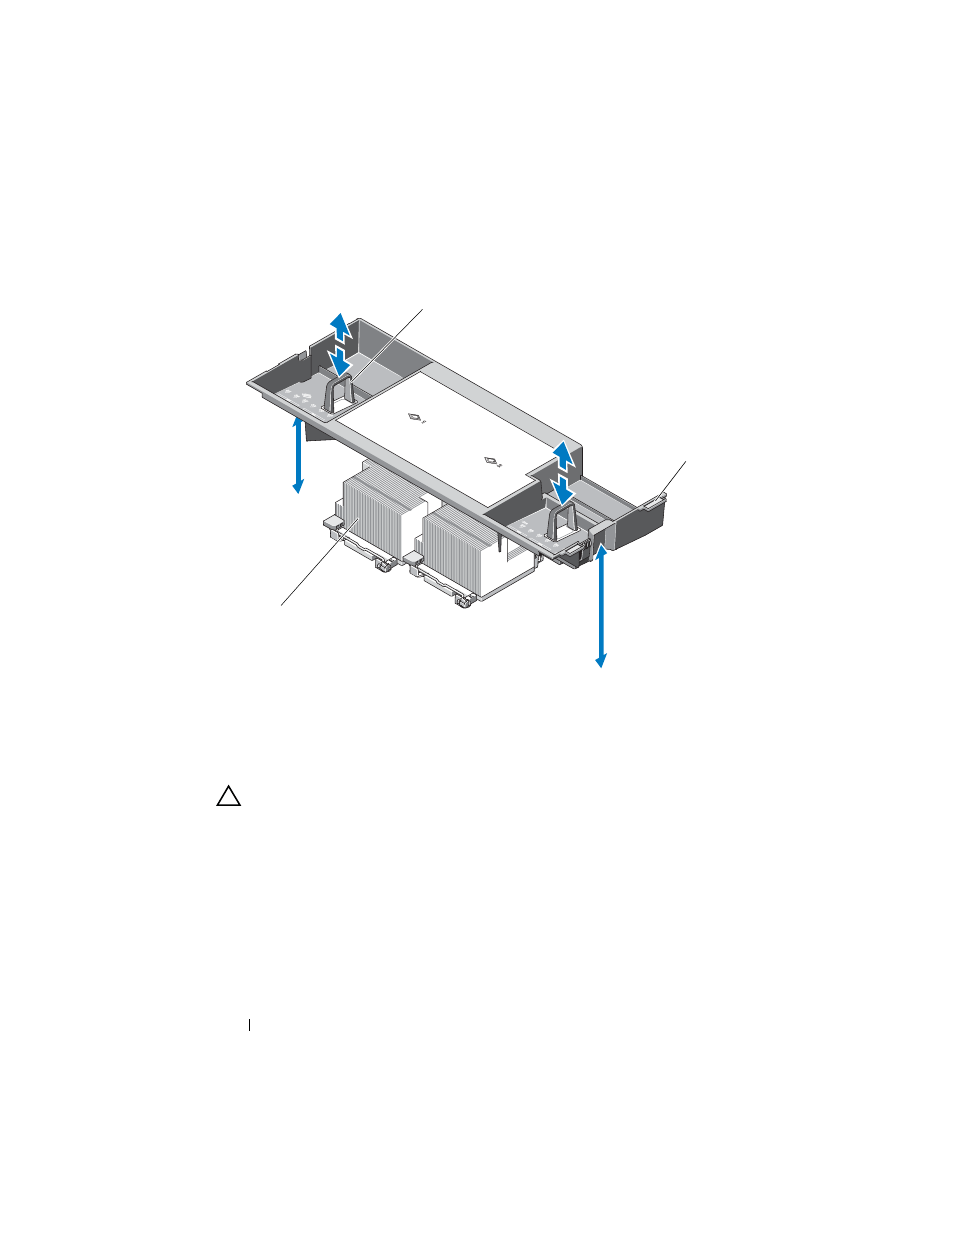
Figure 3-12. Removing and Installing the Cooling Shroud
Installing the Cooling Shroud
CAUTION:
Many repairs may only be done by a certified service technician.
You should only perform troubleshooting and simple repairs as authorized in
your product documentation, or as directed by the online or telephone service
and support team. Damage due to servicing that is not authorized by Dell is not
covered by your warranty. Read and follow the safety instructions that came
with the product.
1 Align the tabs on the right side of the cooling shroud with the cutouts in
the right chassis wall.
2 Lower the right end of the shroud into the chassis cutouts and rotate the
left end down inside the left chassis wall.
1
lift handles
2
alignment tabs
3
processor
1
2
3
- AXIM X3 (158 pages)
- AXIM X3 (366 pages)
- AXIM X3 (178 pages)
- AXIM X3 (2 pages)
- PowerVault MD3220 (174 pages)
- PowerVault MD3220 (32 pages)
- PowerVault MD3220 (76 pages)
- PowerVault MD3220 (11 pages)
- PowerVault MD3220 (76 pages)
- PowerVault MD3220 (272 pages)
- PowerVault MD3220 (32 pages)
- PowerVault MD3220 (2 pages)
- PowerVault MD3220 (74 pages)
- PowerVault MD3220 (28 pages)
- PowerVault MD3220 (32 pages)
- PowerVault MD3220 (32 pages)
- PowerVault MD3220 (237 pages)
- PowerVault MD3220 (32 pages)
- PowerVault MD3220 (32 pages)
- PowerVault MD3220 (388 pages)
- PowerVault MD3220 (32 pages)
- PowerVault MD3220 (6 pages)
- PowerVault 114x (49 pages)
- PowerVault 114x (7 pages)
- POWERVAULT MD3600F (2 pages)
- POWERVAULT MD3600F (222 pages)
- PowerVault MD3200i (22 pages)
- PowerVault MD3200i (32 pages)
- POWERVAULT MD3600F (2 pages)
- POWERVAULT MD3600F (222 pages)
- PowerVault MD3200i (34 pages)
- POWERVAULT MD3600F (17 pages)
- PowerVault MD3200i (32 pages)
- POWERVAULT MD3600F (90 pages)
- POWERVAULT MD3620F (16 pages)
- POWERVAULT MD3600F (38 pages)
- POWERVAULT MD3600F (318 pages)
- PowerVault MD3200i (32 pages)
- PowerVault MD3200i (75 pages)
- PowerVault MD3200i (32 pages)
- PowerVault MD3200i (32 pages)
- POWERVAULT MD3600F (90 pages)
- PowerVault MD3200i (21 pages)
- PowerVault MD3200i (32 pages)
- PowerVault MD3200i (32 pages)