Upgrading the microprocessor, Microprocessor – Dell OptiPlex GX1 User Manual
Page 73
Installing System Board Options: Dell OptiPlex GX1 and GX1p Midsize Managed PC Systems
file:///C|/infodev/2013/eDoc/OpGX1/SIG/options.htm[2/21/2013 12:07:24 PM]
5. Replace the expansion-card cage as described in "
Replacing the Expansion-Card Cage
6.
, and reconnect your computer and peripherals to their electrical outlets
and turn them on.
NOTE: If Enabled, the
option will cause the following message to be displayed
at the next system start-up:
ALERT! Cover was previously removed.
7. Enter the
and check the Video Memory total under
8. If the video memory total is incorrect, turn off and disconnect your computer and peripherals from their
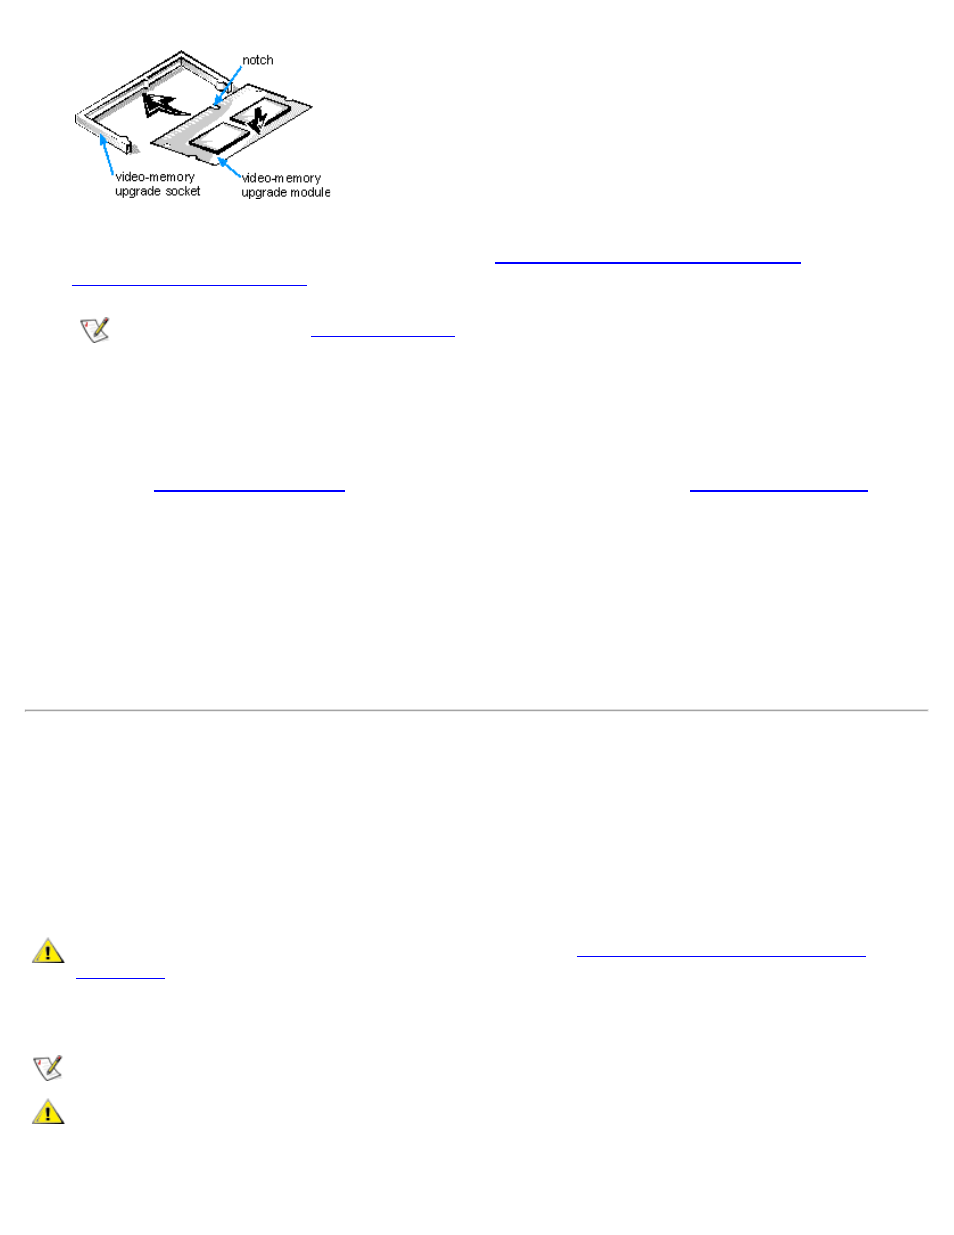
electrical outlets. Remove the computer cover, and check the video memory upgrade to make sure that
it is seated properly in its socket. Then repeat steps 6 and 7.
9. Run the Video Test Group in the Dell Diagnostics to test the new video memory.
See your Diagnostics and Troubleshooting Guide for information on running the Dell Diagnostics and
troubleshooting any problems that may occur.
Upgrading the Microprocessor
To take advantage of future options in speed and functionality, you can replace the microprocessor on your
system board with any Dell-supported microprocessor upgrade. Call your Dell sales representative for
information on available microprocessor upgrades.
The microprocessor upgrade kit includes a new single-edge contact (SEC) cartridge with heat sink assembly
and an airflow shroud.
CAUTION: Before you remove the computer cover, see "
Safety First — For You and Your
."
The following procedure describes how to replace the microprocessor.
NOTE: Dell recommends that only a technically knowledgeable person perform this procedure.
CAUTION: Ground yourself by touching an unpainted metal surface on the back of the
computer.