Installing a hard drive/ssd – Dell PowerEdge VRTX User Manual
Page 34
3. Slide the hard drive/SSD out until it is free of the drive bay.
If you are permanently removing the hard drive/SSD, install a blank insert.
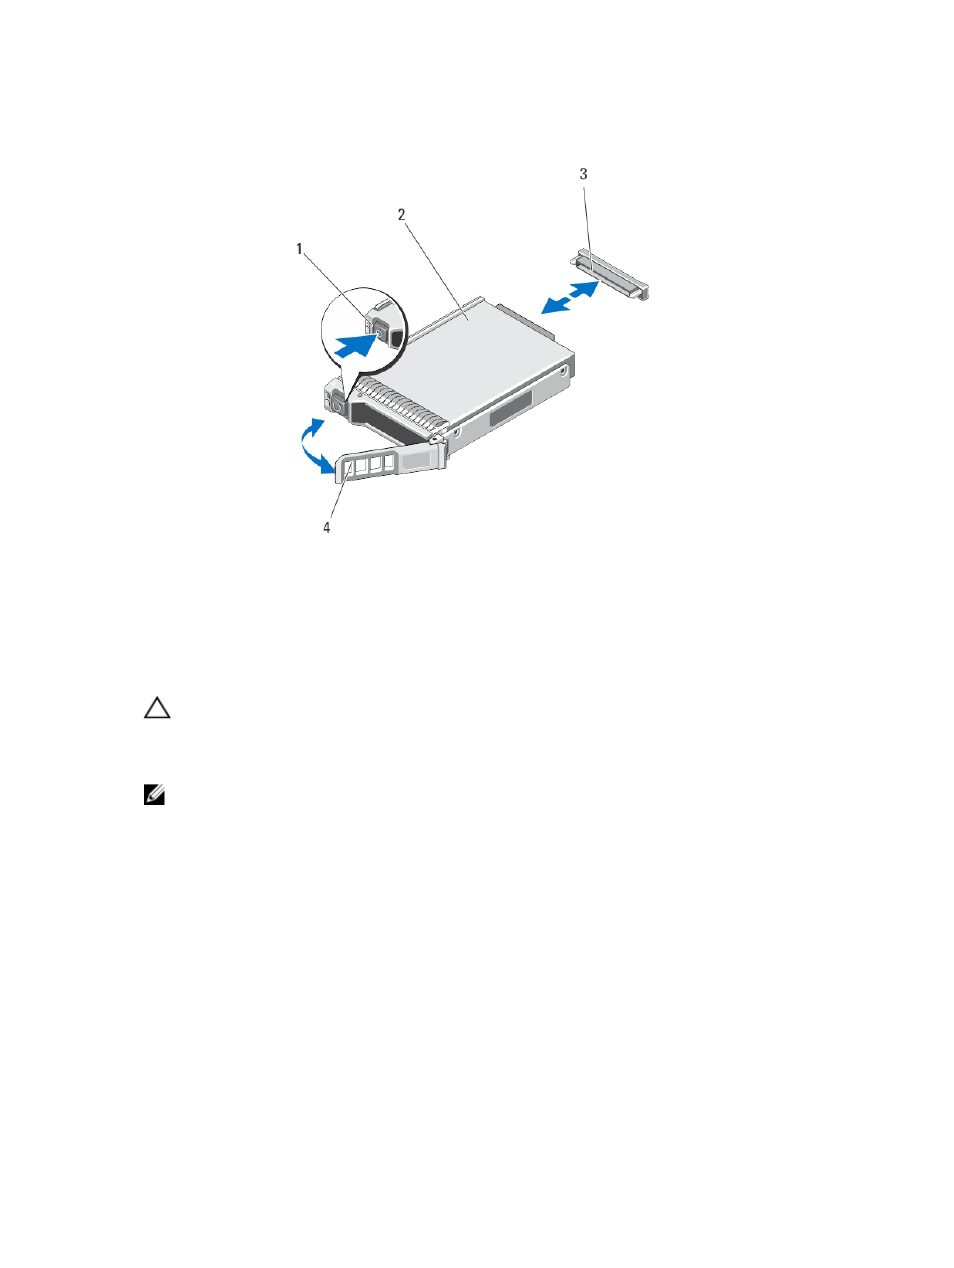
Figure 8. Removing and Installing a Hard Drive/SSD
1.
release button
2. hard drive/SSD
3. drive connector (on the hard-drive/SSD
backplane)
4. hard-drive/SSD carrier handle
Installing A Hard Drive/SSD
CAUTION: When a replacement hot-swappable hard drive/SSD is installed and the server module
is powered on, the hard drive automatically begins to rebuild. Make absolutely sure that the
replacement hard drive/SSD is blank or contains data that you wish to have over-written. Any
data on the replacement hard drive/SSD is immediately lost after the hard drive/SSD is installed.
NOTE: Not all operating systems support hot-swappable drive installation. See the documentation
supplied with your operating system.
1.
Open the hard-drive/SSD carrier handle.
2. Insert the hard-drive/SSD carrier into the drive bay. Align the channel on the hard-drive/SSD carrier
with the appropriate drive slot on the server module.
3. Push the hard-drive/SSD carrier into the slot until the carrier connects with the hard-drive/SSD
backplane.
4. Rotate the hard-drive/SSD handle to the closed position while pushing the hard-drive/SSD into the
slot until it locks into place.
The status LED indicator lights green if the drive is installed correctly. The hard-drive/SSD carrier LED
indicator flashes green as the drive rebuilds.
34