Floppy drive, Removing a floppy drive – Dell OptiPlex 170L User Manual
Page 89
3.
Gently slide the drive into place until you hear a click or feel the drive securely installed.
4.
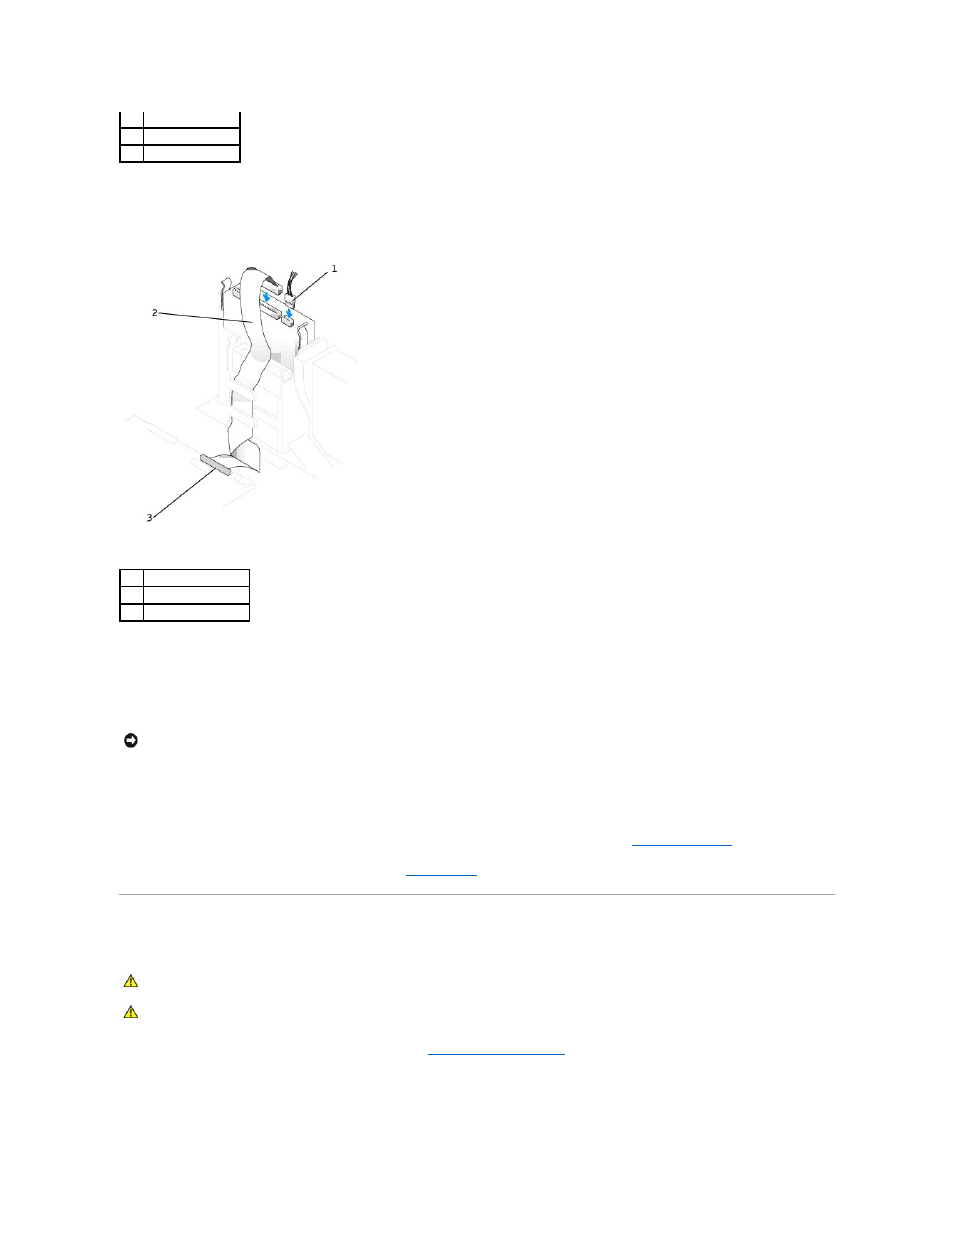
Connect the power and CD/DVD drive cables to the drive.
5.
Connect the other end of the CD/DVD drive cable to the IDE connector on the system board.
6.
If you are installing a drive that has its own controller card, install the controller card in a card slot.
7.
Check all cable connections, and fold cables out of the way to provide airflow for the fan and cooling vents.
8.
Close the computer cover.
9.
Attach the computer stand (optional).
10.
Connect your computer and devices to their electrical outlets, and turn them on.
See the documentation that came with the drive for instructions on installing any software required for drive operation.
11.
Update your configuration information by setting the appropriate Drive option (0 or 1) under Drives. See "
System Setup Options
" for more information.
12.
Verify that your computer works correctly by running the
Dell Diagnostics
.
Floppy Drive
If you are installing a new floppy drive rather than replacing a drive,
remove the front-panel inserts
.
Removing a Floppy Drive
1
drive
2
bracket rails (2)
3
screws (4)
1
power cable
2
CD/DVD drive cable
3
IDE connector
NOTICE:
To connect a network cable, first plug the cable into the network wall jack and then plug it into the computer.
CAUTION:
Before you begin any of the procedures in this section, follow the safety instructions in the Product Information Guide.
CAUTION:
To guard against electrical shock, always unplug your computer from the electrical outlet before opening the cover.