Dell OptiPlex 170L User Manual
Page 120
7.
Unpack the new processor.
8.
If the release lever on the socket is not fully extended, move it to that position.
9.
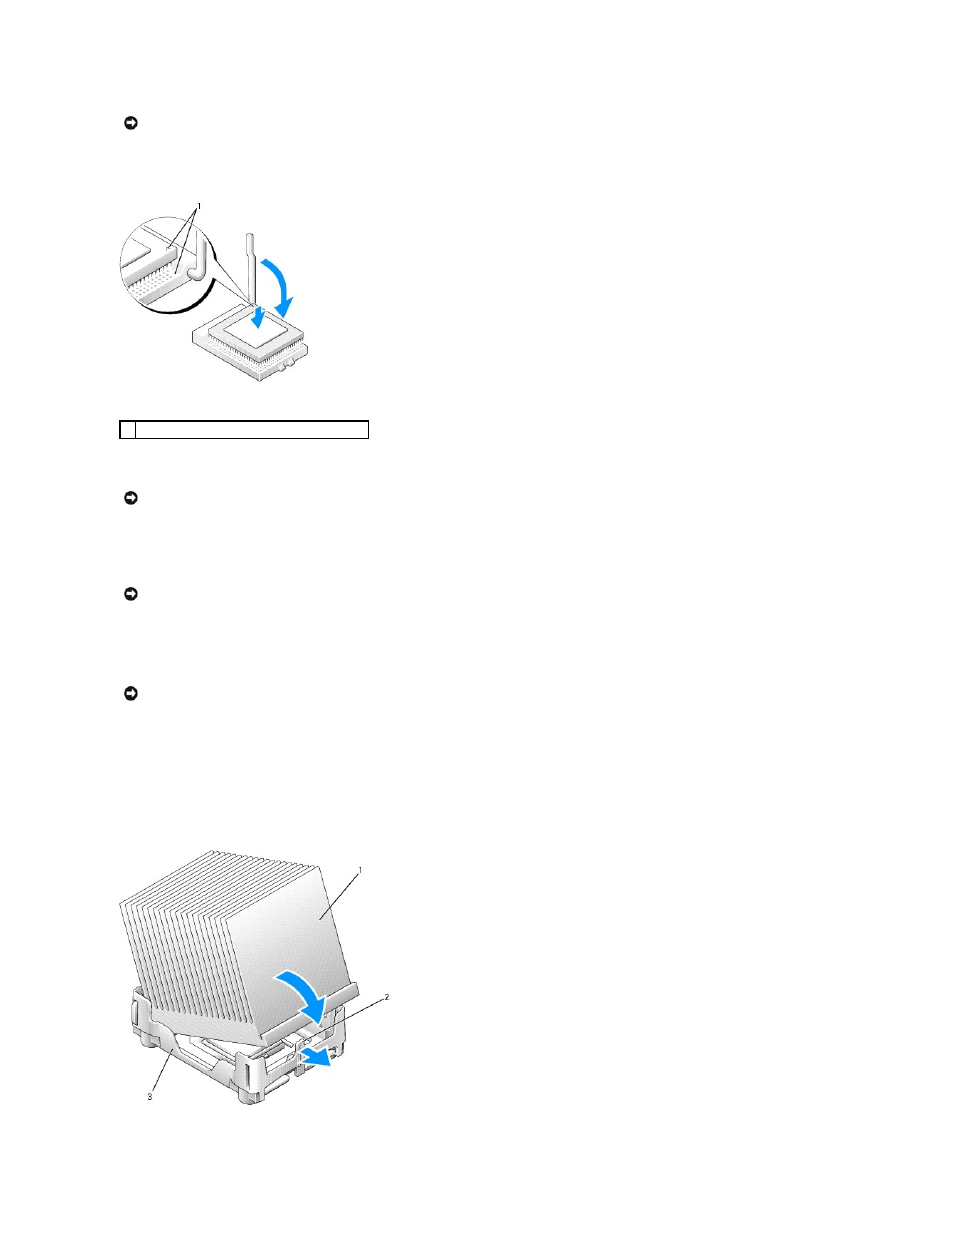
Align the pin-1 corners of the processor and socket.
10.
Set the processor lightly in the socket and ensure that all pins are headed into the correct holes. Do not use force, which could bend the pins if the
processor is misaligned. When the processor is positioned correctly, press it with minimal pressure to seat it.
11.
When the processor is fully seated in the socket, pivot the release lever back toward the socket until it snaps into place to secure the processor.
If you installed a processor replacement kit from Dell, return the original heat sink and processor to Dell in the same package in which your replacement
kit was sent.
12.
Install the heat sink:
a.
Place one end of the heat sink under the tab on one side of the retention base.
b.
Lower the heat sink until the heat sink fits securely under the tab on the retention base.
NOTICE:
Be careful not to bend any of the pins when you unpack the processor. Bending the pins can permanently damage the processor. If any of the
pins on the processor appear to be bent, contact Dell for instructions on obtaining technical assistance.
1 pin-1 corners of the processor and socket aligned
NOTICE:
You must position the processor correctly in the socket to avoid permanent damage to the processor and the computer when you turn on the
computer.
NOTICE:
When you place the processor in the socket, ensure that all of the pins fit into the corresponding holes on the socket.
NOTICE:
If you are not installing a processor upgrade kit from Dell, reuse the original heat sink when you replace the processor.