Dell OptiPlex 170L User Manual
Page 111
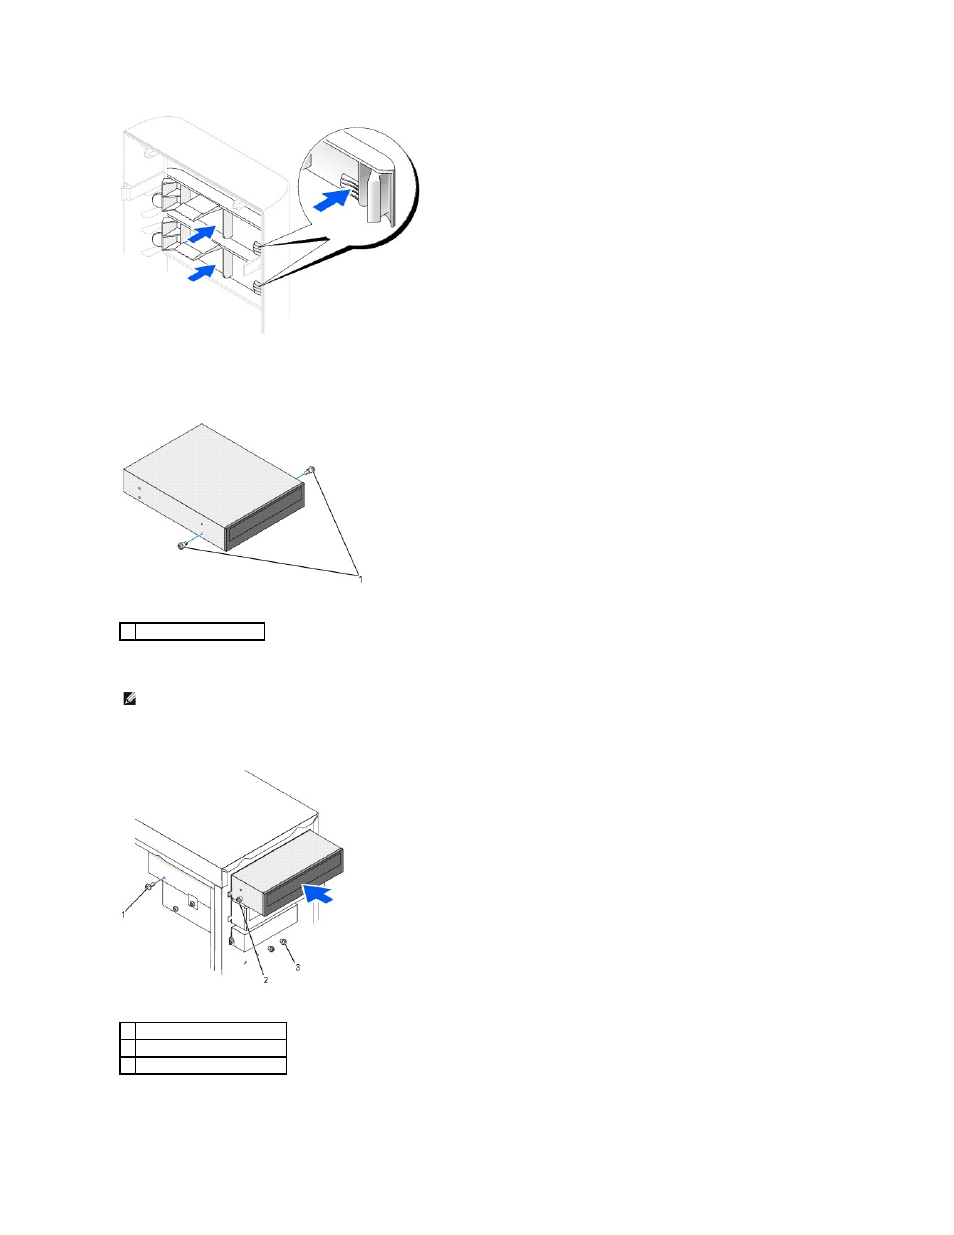
4.
Ensure that the jumper setting on the new drive is set for "cable select" (see the documentation that came with the drive for information).
5.
Remove the two extra alignment screws from the front of the computer and insert them into the drive.
6.
Gently slide the drive into place.
7.
Once the drive is in place, gently apply pressure to ensure that the drive is fully seated.
8.
Use the securing screw that came with the drive to attach the drive to the computer.
1 drive alignment screws (2)
NOTE:
Some computers come with only two extra alignment screws; others come with four. You only need two alignment screws for this procedure.
1 securing screw
2 drive alignment screws (2)
3 extra alignment screws (2 or 4)
See also other documents in the category Dell Computers:
- Inspiron 530 (2 pages)
- OptiPlex 755 (528 pages)
- OptiPlex 755 (82 pages)
- OptiPlex 755 (45 pages)
- OptiPlex 755 (248 pages)
- OptiPlex 755 (622 pages)
- OptiPlex 760 (76 pages)
- OptiPlex 760 (203 pages)
- OptiPlex 745 (360 pages)
- OptiPlex 745 (428 pages)
- OptiPlex 745 (212 pages)
- OptiPlex 780 (89 pages)
- OptiPlex 780 (10 pages)
- OptiPlex 780 (74 pages)
- OptiPlex 780 (80 pages)
- OptiPlex 780 (73 pages)
- OptiPlex 780 (40 pages)
- OptiPlex 780 (14 pages)
- OptiPlex GX620 (338 pages)
- OptiPlex GX620 (221 pages)
- OptiPlex GX620 (294 pages)
- Inspiron 530 (226 pages)
- OptiPlex 960 (Late 2008) (16 pages)
- OptiPlex GX260 (100 pages)
- OptiPlex GX260 (235 pages)
- OptiPlex FX160 (Late 2008) (20 pages)
- OptiPlex FX160 (Late 2008) (132 pages)
- OptiPlex FX160 (20 pages)
- OptiPlex 210L (258 pages)
- OptiPlex 210L (150 pages)
- OptiPlex 210L (130 pages)
- OptiPlex 210L (128 pages)
- OptiPlex 210L (300 pages)
- OptiPlex 320 (44 pages)
- OptiPlex 320 (140 pages)
- OptiPlex 320 (132 pages)
- OptiPlex 320 (312 pages)
- OptiPlex 320 (266 pages)
- OptiPlex 320 (356 pages)
- OptiPlex GX240 (121 pages)
- OptiPlex GX240 (86 pages)
- OptiPlex GX240 (283 pages)
- OptiPlex GX240 (298 pages)
- OptiPlex GX240 (182 pages)
- OptiPlex GX240 (144 pages)