Dell Inspiron 2000 User Manual
Page 34
The palmrest assembly consists of the palmrest, status lights, and touch pad assembly.
NOTICE: To avoid damaging the system board, you must remove the main battery before you service the computer.
1. Remove the
.
2. Remove the
3. Remove the
.
4. Turn the computer upside down on a flat work surface.
5. Remove the six M2.6 x 1.6-mm screws located in the battery bay (see Figure 13).
NOTICE: Make sure that the work surface is clean to prevent scratching the computer cover.
6. Turn the computer right-side up.
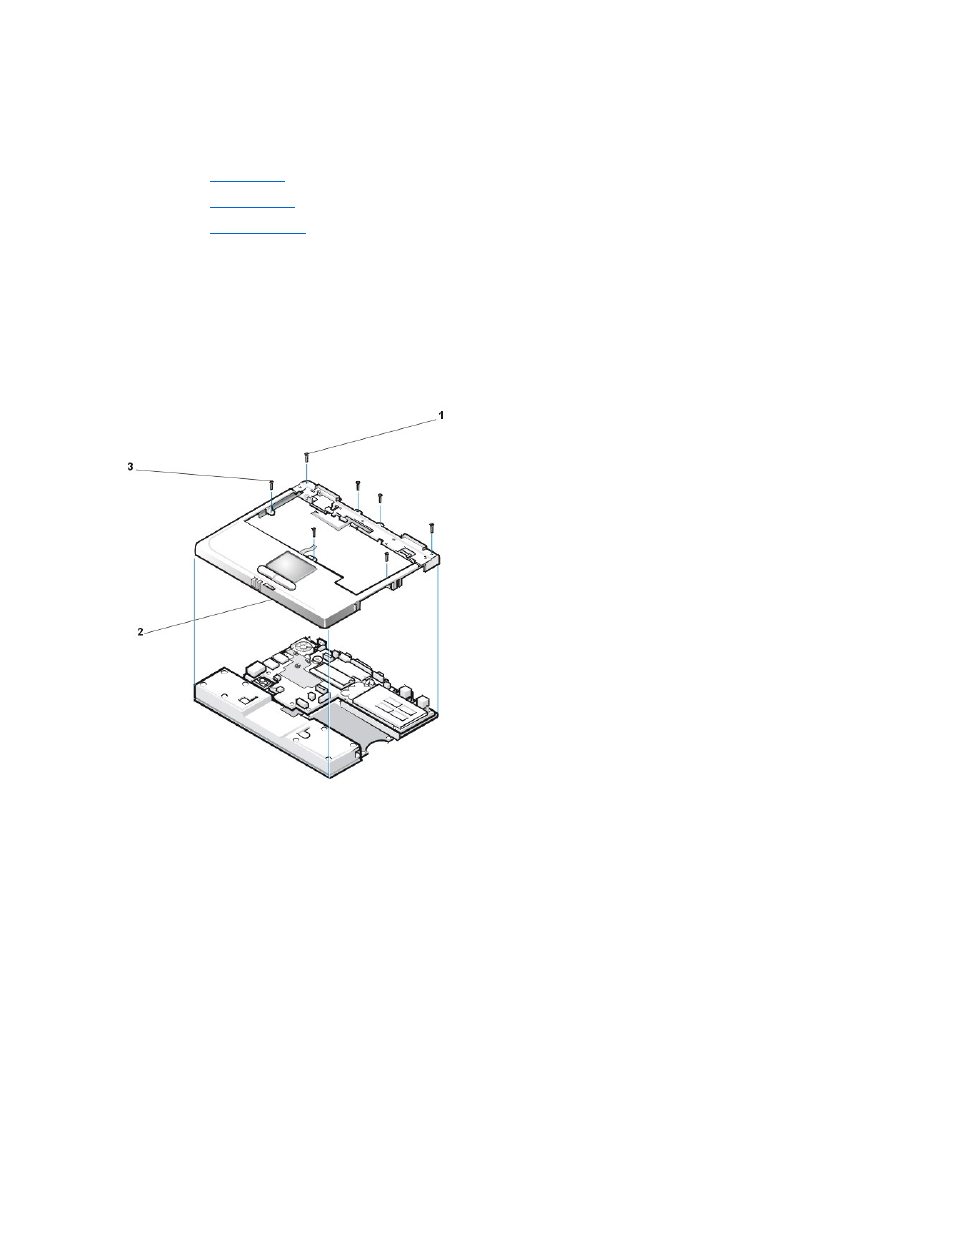
7. Remove the four black M2 x 4-mm screws across the top of the computer (see Figure 14).
Figure 14. Removing the Palmrest Assembly Top Screws
8. Remove the three silver M2 x 6-mm screws in the keyboard-assembly area that secure the middle of the palmrest assembly to the bottom
case (see Figure 14).
9. Disconnect the status lights flex cable from the ZIF connector on the system board.
10. Disconnect the touch pad flex cable from the ZIF connector on the system board.
11. Carefully remove the palmrest assembly from the bottom assembly.
To replace the palmrest assembly, perform the following steps:
1. Place the palmrest assembly on the bottom assembly.
2. Reinstall the three silver M2 x 6-mm screws in the keyboard-assembly area that secure the middle of the palmrest assembly to the bottom-
case assembly (see Figure 14).
3. Reinstall the four black M2 x 4-mm screws that secure the top of the palmrest assembly to the bottom-case assembly (see Figure 14).
4. Connect the touch pad flex cable to the ZIF connector on the system board.
5. Connect the status lights flex cable to the ZIF connector on the system board.
6. Turn the computer upside down.
7. Reinstall the six M2.6 x 1.6-mm screws in the battery bay that secure the bottom of the palmrest assembly to the bottom-case assembly (see
1 M2 x 4-mm screws (4 black)
2 Palmrest assembly
3 M2 x 6-mm screws (3 silver)